Product notification
This product has been discontinued, and its end-of-service date has passed. While it is no longer supported, the information on this page remains available for your reference.
|
To keep your UltiMaker 3 or UltiMaker 3 Extended in optimal condition, we recommend the following maintenance schedule, based on 1,500 printing hours per year.
Tip: If the usage frequency is higher, more frequent maintenance is recommended to ensure optimal printing results.
| Frequency | Topic | Instructions | Effects if not performed |
Every month
(or when necessary) |
Clean the printer
|
Keep the printer clean for optimal printing results. This includes the build plate, nozzles, Bowden tubes, and the inside of the printer.
|
Discoloration in print, extrusion problems, adhesion issues, build plate homing errors
|
|
Lubricate the axles
|
Apply a small drop of oil to the gantry axles (X and Y). This includes the axles in the frame as well as the two print head shafts. Move the print head manually to equally distribute the oil.
|
Inaccurate movements, dimensional inaccuracy, increased wear on belts and bearings
|
Every 3 months
(or 300-400 printing hours) |
Check the tension of the short belts
|
The short belts attached to the X and Y motors should be tight to correctly transfer the movement to the print head. If the belt tension is too low, reposition the motor.
|
Inaccurate movements, dimensional inaccuracy, layer shifts
|
|
Clean the front print head fan
|
Thin strands of filament could end up in the fan. Check this regularly by opening the front fan bracket. Remove any strands of filament with tweezers.
|
Fan blockages, extrusion problems, filament jams in print core
|
|
Check the nozzle cover
|
The nozzle cover shields the print cores from cold airflow from the fans. Check both sides of the cover for tears or damage from heat. If it is damaged, replace the nozzle cover.
|
Filament backflow into print head, print core temperature errors, extrusion problems
|
|
Lubricate the lead screw (Z motor)
|
Clean the lead screw using a cloth or paper towel, then re-apply a small amount of grease. Move the build plate up and down to equally distribute the grease.
|
Build plate drops, inaccurate Z movement, thick lines in print
|
Every 6 months
(or 700-800 printing hours)
|
Check for play on the axles
| The X and Y axles in the frame should only rotate, not move back and forth. Firmly attempt to move the axles individually. If there is play, adjust the pulleys. |
Inaccurate movements, dimensional inaccuracy, layer shifts
|
|
Clean the feeders
| Small filament particles can gather on the feeder’s knurled wheel. Unload the materials and open the feeders to clean the inside with a small brush. |
Filament particles in print, feeding problems, filament slips
|
|
Lubricate the Z axles
|
Check the Z axles on either side of the build plate. If they feel dry, apply a small drop of oil and move the build plate to distribute the lubricant.
|
Inaccurate Z movement, thick lines in print
|
Every year
(or 1500 printing hours) |
Lubricate the feeder gear
|
Remove the feeder from the back panel to access the feeder gear. Clean it first, then apply a small amount of grease to the gear. Reinstall the feeder to continue printing.
|
Feeding problems, increased wear on feeder parts
|
|
Check the Bowden tubes
|
Materials can slightly scratch the inside of the Bowden tubes and the ends of the tubes can get damaged by the tube coupling collets. Check them once a year and replace them when they are damaged.
|
Filament particles in print, extrusion problems, feeding problems
|
Tip: For more detailed information about how to perform all these maintenance actions, click the links in the table above.
Print core cleaning
Besides the maintenance actions to the main parts of the printer as shown above, it is essential for good print quality to regularly clean the print cores. Material can sometimes get stuck inside the nozzle and degrade. This can cause extrusion problems, or even completely block the print core. Some materials are more prone to degradation and blocking the nozzle, such as PVA and composite materials.
UltiMaker print cores are classified as consumables, but can have a long lifespan if proper and preventive maintenance is applied. UltiMaker 3 series printers contain a guided process for cleaning the print core. This is also referred to as the ‘hot and cold pull’ process. During the cleaning steps, you will remove the Bowden tube, manually insert filament into the print core, and pull out any dirt and carbonized material from the top.
The recommended frequency for cleaning the print cores depends on the type of core and the materials used. For the recommended print core maintenance schedule, visit Print core cleaning maintenance schedule and for detailed instructions for the cleaning process, visit Clean the print core: How to perform a hot and cold pull
Maintenance schedule in UltiMaker Digital Factory
The printer overview in the UltiMaker Digital Factory also contains the maintenance schedule. This allows you to mark tasks as done once maintenance has been performed, and you will be notified when actions are due.
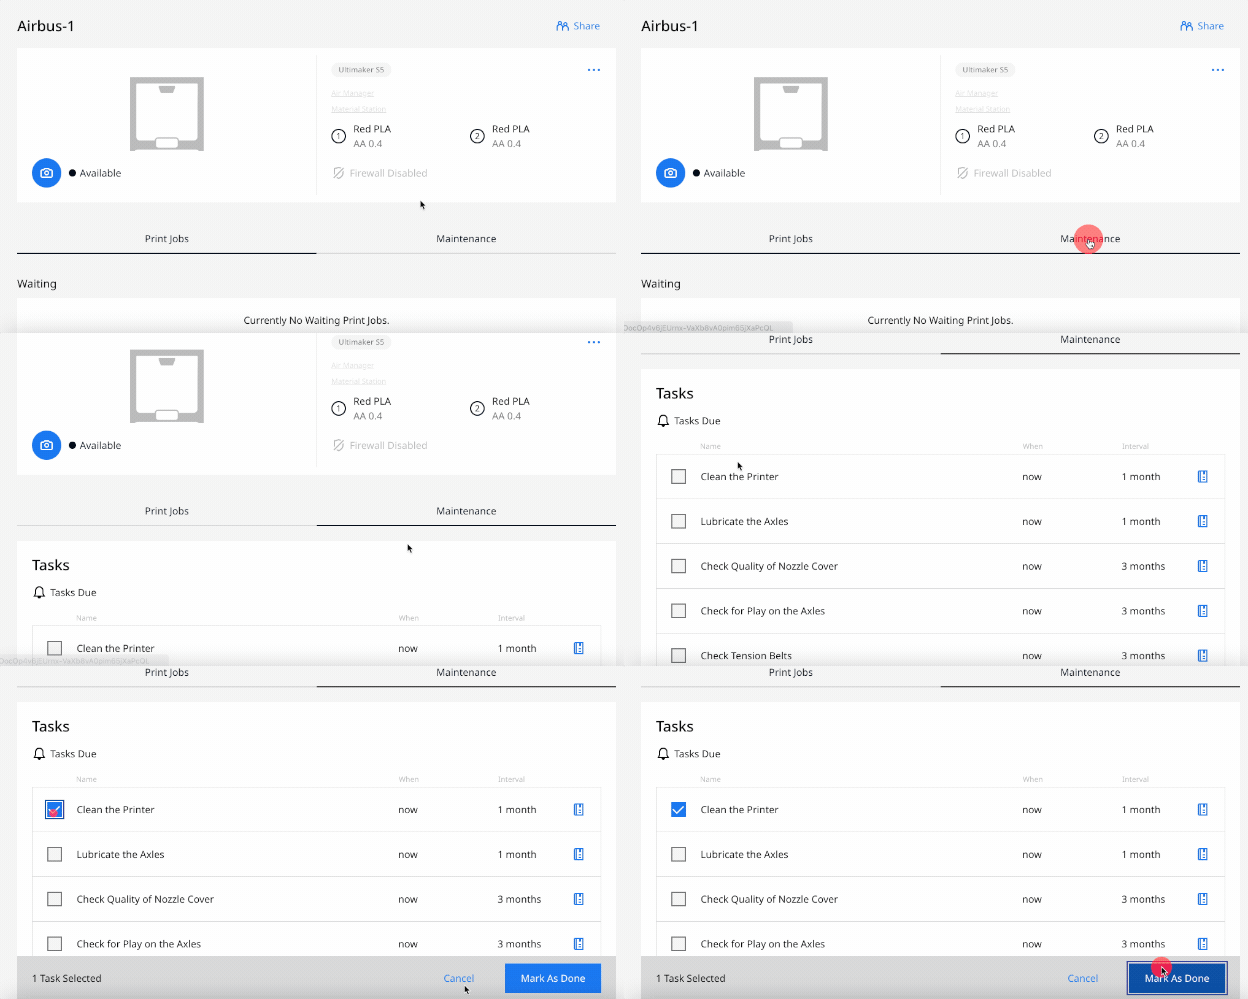
Sign in to Digital Factory and connect your printer to get access to this feature and improve your maintenance workflow.
Important notes
Maintenance actions shall only be performed by an adult. Carefully follow the provided instructions.
Where possible, ensure the printer is turned off before performing maintenance. Otherwise, disable the printer in the Digital Factory to prevent new print jobs from starting remotely.
When maintenance processes require heating up the print core(s), take precautions and use personal protective equipment such as (thermal) gloves. Risks and recommendations are mentioned in the instructions.
Tip: The UltiMaker 3 Maintenance Kit contains the most commonly used replacement parts and maintenance consumables for the UltiMaker 3 or UltiMaker 3 Extended.
(Note: Because the UltiMaker 3 has been discontinued and is no longer supported, the Maintenance Kits may not be available anymore)


