This error can appear on printers with a Material Station when an extrusion problem is detected. The Material Station is integrated on Factor Series and an optional add-on for the UltiMaker S5, S6, S7, and S8.
Error description
The flow sensor of the printer signals that filament is not flowing as predicted. The Material Station has not determined end-of-filament, but something else is wrong with the material flow. The display will show which of the extruders has encountered a problem and which material is loaded.
The ER65 message is often an early indication of under-extrusion. This can be due to an obstruction in the filament path or incorrect print settings.
When the ER65 message appears, the print will be paused. You can choose to ignore the error and continue printing, or abort the print. Note that during the paused and printing states, the troubleshooting options are limited. For persistent ER65 messages, it is recommended to stop the print progress and check the extrusion path before reprinting.
Troubleshooting
There are a few things to try both during and after the print. The troubleshooting steps differ for S Series and Factor Series.
Tip: It is always recommended to keep the firmware up-to-date. New releases may include error-handling optimizations, such as for ER65.
Select your product below for detailed troubleshooting information:
UltiMaker S series
During the print
As mentioned above, the troubleshooting options while the print is paused are fairly limited. It is not possible to clean or change the print cores mid-print, as this would affect the print cores' alignment. Before selecting to continue or abort the print, though, please perform the following checks:
|
Check the feeder lever
|
Make sure that the lever of the indicated feeder is fully down. If the feeder lever is left (partially) up, it will not give sufficient pressure on the filament while feeding.
|  |
|
Check the feeder tension
|
For UltiMaker materials, the feeder tension should be at the middle mark. If the tension is too high, the feeder may flatten the filament, but if the tension is too low, the material can slip inside the feeder.
Use a 2 mm hex key or screwdriver to turn the bolt at the top of the feeder housing to adjust the feeder tension.
Tip: Learn more about the recommended feeder tension and how to adjust it on this page.
|
|
|
Check the nozzle cover
|
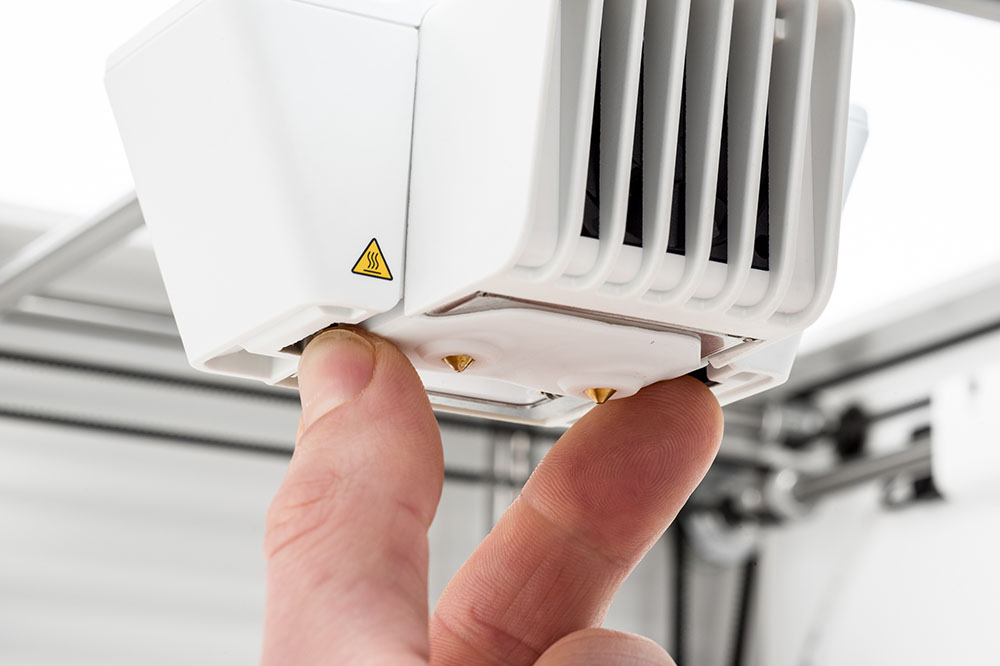
Printing without a nozzle cover, or with a worn / damaged one, can negatively affect the extrusion. One of the functions of the nozzle cover is to shield the print cores from the cold airflow of the fans during printing. Printing with a missing or damaged cover can cause temperature fluctuations in the print cores, possibly leading to under-extrusion and the ER65 error message.
If the nozzle cover is missing or damaged, install a new one. Find instructions in this article. This can be done during the paused state, although it is better to check this before starting a print.
Tip: Regularly check the nozzle cover according to the maintenance schedule to prevent problems during printing.
|
|
|
Adjust print settings
|
During a print, it is possible to slightly tweak the print settings. Printing too fast and/or at too low temperatures can cause extrusion problems. Try adjusting the settings via the display of the printer before continuing the print job.
Note: This is just a quick fix; remember to update the print settings in UltiMaker Cura for the next print job with this material.
|
After trying the steps listed above, you can select the triangle icon ('play' button) on the display to continue printing. If the ER65 error continues to appear, and under-extrusion is visible in the print, it is best to abort the print and try the following troubleshooting steps.
After the print
When the ER65 message appears multiple times throughout the print, there probably is an obstruction in the extrusion path. Resolving this requires aborting the print job and performing some hardware checks.
|
Clogged print core
|
A blockage in the print core, even a partial one, can cause extrusion problems. Especially PVA (in the BB core) and composite materials (in the CC core) are prone to cause clogs.
Clean the print core(s) using the hot and cold pull method or swap the print core before retrying the print.
Tip: To prevent problems, clean the print cores preventively at regular intervals. Learn more about the recommended preventive maintenance schedule for print cores on this page.
|  |
|
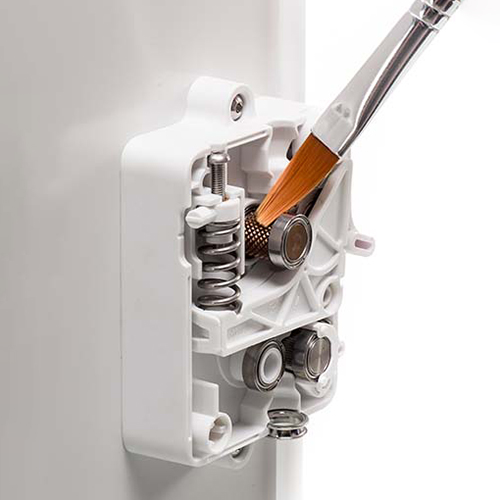
Dirty feeder
|
After many hours of printing, or when the material has been ground down, there is a chance that there are small filament particles in the feeders. Cleaning the inside of the feeders is recommended once every three months (or 300–500 operating hours).
Carefully remove the front of the feeder and brush away any filament particles or obstructions according to the cleaning instructions.
|
|
|
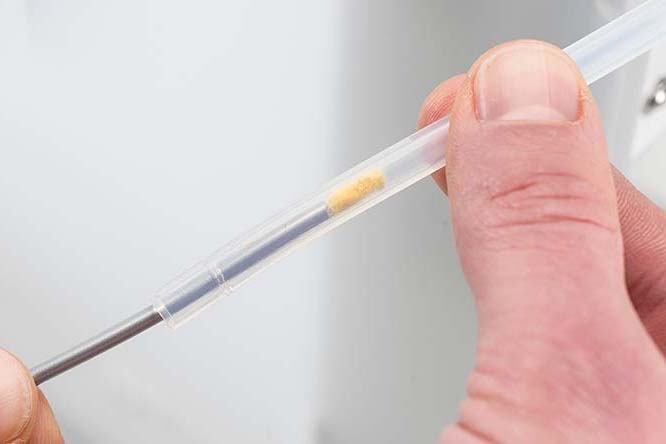
Obstructed Bowden tube
|
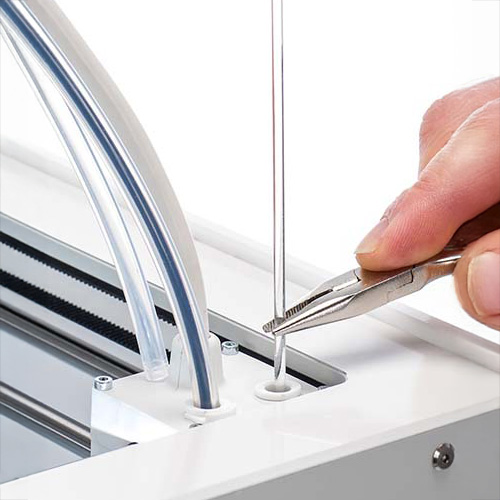
Filament strands or particles inside the Bowden tube can prevent the material from passing through smoothly. This extra friction can cause reduced extrusion. Clean the Bowden tube according to the instructions.
Cleaning the Bowden tubes is recommended every month (or 100–200 operating hours).
Additionally, check for scratches and signs of damage on the inside of the tubes. If any damage is observed, it is recommended to replace the Bowden tube(s).
|
|
|
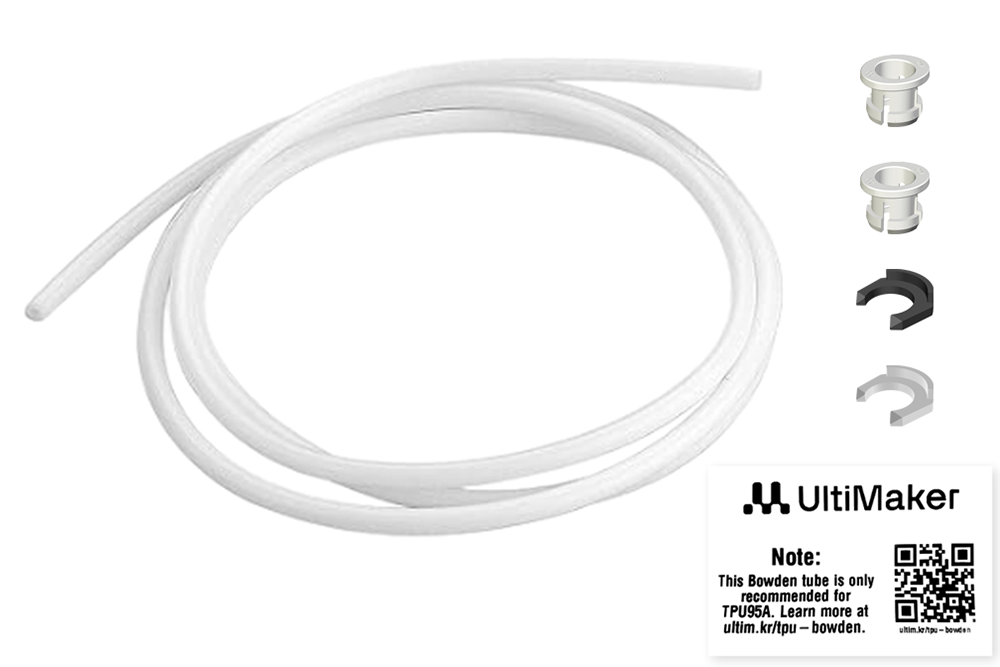
TPU 95A
|
The ER65 errors are more common when printing with TPU 95A on S series printers. A special PTFE Bowden tube is made available, for use specifically with TPU 95A. replace the Bowden tube for this PTFE version for reduced friction on the filament.
Learn more here.
|
|
Tip: The filament path of the Material Station could also be obstructed with filament. For step-by-step instructions (including photos) on how to remove the broken PVA from the system, read the troubleshooting guide on this page
After performing these corrective actions, you can try the print job again.
Note: In some rare cases, the ER65 message can be caused by a misalignment of the flow sensor magnet in the feeder. For more information, check the expert troubleshooting content below:
Check the rotating magnets of the feeder
The flow sensor has a rotating magnet. The rotations of this magnet are read by the connected PCB and the material flow is calculated in this way. A correct alignment of the magnets is important for a correct reading by the PCB.
In the following pictures, you can see the magnet up close. The aligned magnet on the left picture is in the correct position. In the right picture, the magnet is not fully level. This is causing it to interfere with the PCB, and therefore with the flow sensor readings:
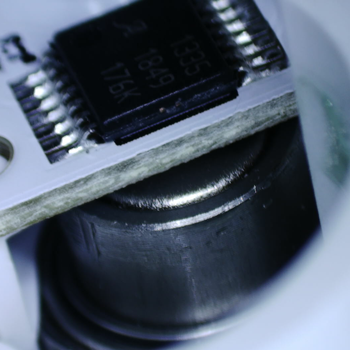
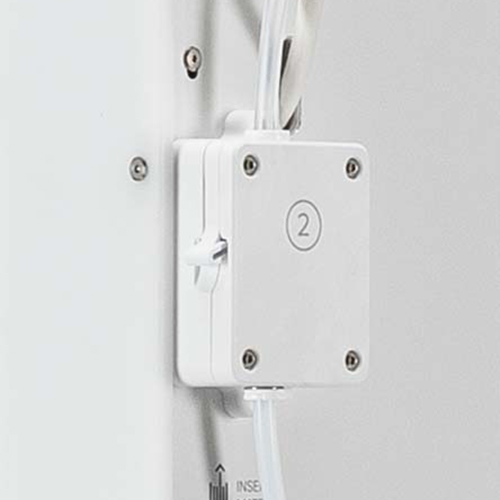
Feeder 2. Magnet is correctly aligned | 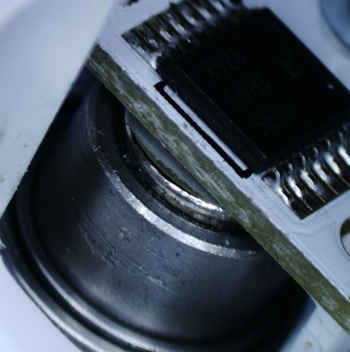
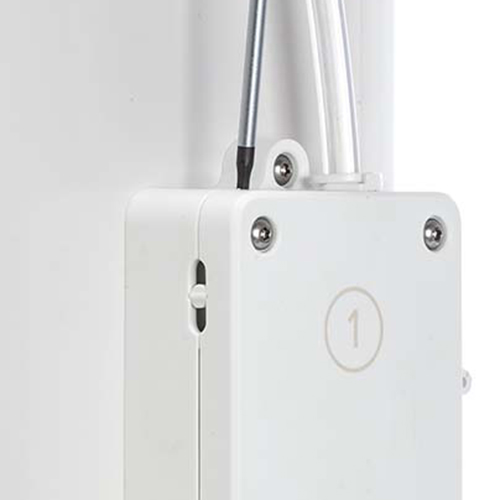
Feeder 1. Magnet sticks out and is pressed against the PCB. |
If your flow sensor is affected by this, please contact support and provide supporting images. A support representative will help you restore full functionality.
Disable the flow sensors
It is possible to disable the flow sensors. This can be a useful temporary patch, especially if the print shows no signs of under-extrusion. Open the Options menu (gear icon) and toggle the switch for Flow sensor to turn them off.

Note that in the standalone S series printers (without a Material Station), this will also disable the end of filament detection, whereas in the Pro Bundle, the end of filament will still be detected by the Material Station. It is still recommended to determine the root cause of the ER65 error, because under-extrusion will no longer be detected with the flow sensors disabled.
Factor 4
During the print
As mentioned above, the troubleshooting options while the print is paused are fairly limited. It is not possible to clean or change the print cores mid-print, as this would affect the print cores' alignment. Before selecting to continue or abort the print, though, please perform the following checks:
|
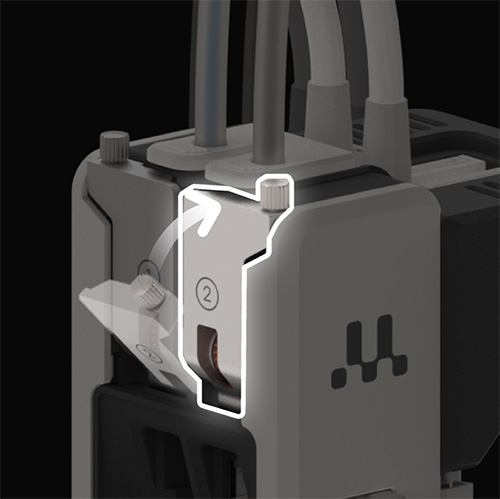
Check the feeder latches
|
Ensure that the metal feeder latches are fully and correctly closed. If they are open, not secured, or misaligned, there will not be sufficient pressure on the filament.
Turn the small thumb screw at the top of the latch to open it, then press it closed again. Ensure that it is properly aligned and secure the by turning the thumb screw.
|  |
|---|
|
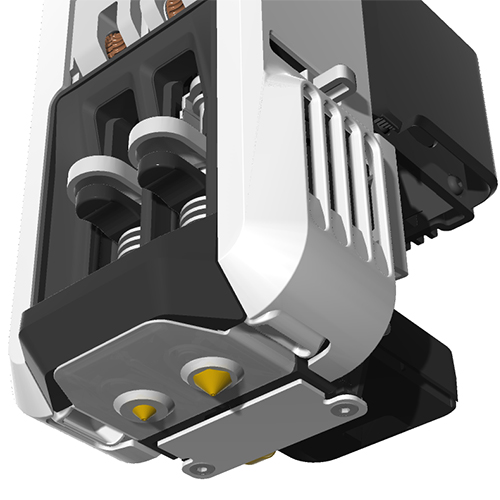
Check the nozzle cover
|
Printing without a nozzle cover, or with a worn / damaged one, can negatively affect the extrusion. One of the functions of the nozzle cover is to shield the print cores from the cold airflow of the fans during printing. Printing with a missing or damaged cover can cause temperature fluctuations in the print cores, possibly leading to under-extrusion and the ER65 error message.
If the nozzle cover is missing or damaged, install a new one. Find instructions in this article. This can be done during the paused state, although it is better to check this before starting a print.
Tip: Regularly check the nozzle cover according to the maintenance schedule to prevent problems during printing.
|  |
|---|
|
Adjust print settings
|
During a print, it is possible to slightly tweak the print settings. Printing too fast and/or at too low temperatures can cause extrusion problems. Try adjusting the settings via the display of the printer before continuing the print job.
Note: This is just a quick fix; remember to update the print settings in UltiMaker Cura for the next print job with this material.
|
|---|
After trying the steps listed above, you can select the triangle icon ('play' button) on the display to continue printing. If the ER65 error continues to appear, and under-extrusion is visible in the print, it is best to abort the print and try the following troubleshooting steps.
After the print
When the ER65 message appears multiple times throughout the print, there probably is an obstruction in the extrusion path. Resolving this requires aborting the print job and performing some hardware checks.
| Clogged print core |
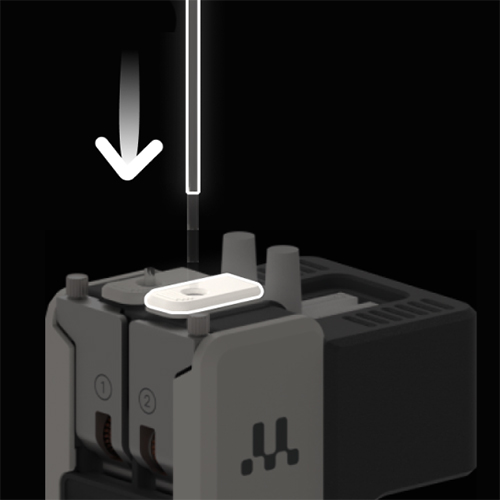
A blockage in the print core, even a partial one, can cause extrusion problems. Especially PVA (in the BB core) and composite materials (in the CC core) are prone to cause clogs.
Clean the print core(s) using the hot and cold pull method or swap the print core before retrying the print.
Tip: To prevent problems, clean the print cores preventively at regular intervals. Learn more about the recommended preventive maintenance schedule for print cores on this page.
|  |
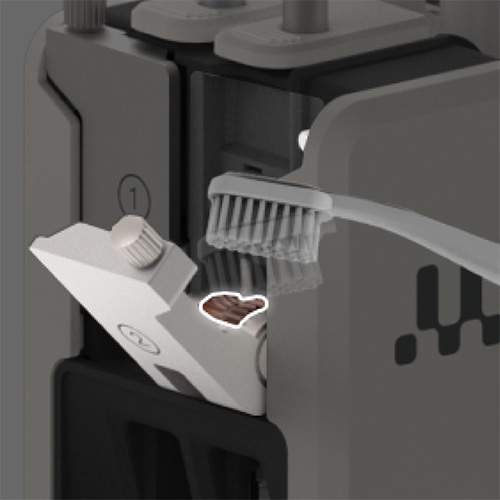
| Dirty feeder |
After many hours of printing, or when the material has been ground down, there is a chance that there are small filament particles in the feeders. Cleaning the inside of the feeders is recommended once every three months (or 300–500 operating hours).
Carefully remove the front of the feeder and brush away any filament particles or obstructions according to the cleaning instructions.
|
|
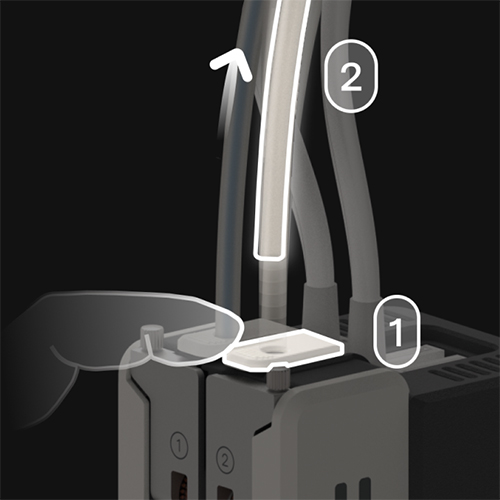
| Obstructed Bowden tube |
Filament strands or particles inside the Bowden tube can prevent the material from passing through smoothly. This extra friction can cause reduced extrusion.
Clean the Bowden tube according to the instructions.
Note: Cleaning the Bowden tubes on Factor 4 requires access to the back compartment, where the electronics and power supply are located. Always check local regulations and see the notes on the cleaning article.
Additionally, check for scratches and signs of damage on the inside of the tubes. If any damage is observed, it is recommended to replace them. Find instructions here.
|
|
|
Reslice your file
|
If extrusion problems occur with a certain configuration or print file, check your profile settings in Cura. Adjust extrusion-related settings such as temperature, speed, and layer height and reslice the model.
Tip: It is recommended to revert to one of the default profiles in UltiMaker Cura, as these have been extensively tested to ensure the highest reliability.
|
Best practices
To try to prevent this error from occurring in the future, see the following tips and best practices:
- Material quality: Only use good quality materials on your UltiMaker 3D printers. Materials from UltiMaker's own portfolio or from the Marketplace are recommended. Also ensure that material spools are stored correctly when not in use. For materials that are sensitive to moisture uptake, dry them in case of extrusion issues, or pre-dry them to prevent problems.
- Feeder: Always make sure the feeder is correctly closed before loading material. On the S series, ensure that the feeder lever at the back is down. On Factor 4, ensure that the latches at the top of the print head are fully upright and secured.
- Maintenance: Perform timely maintenance on your printer to prevent problems. This includes cleaning the feeders and Bowden tubes for more reliable material handling and loading. Consult the preventive maintenance schedules for S Series and Factor Series printers.
- Print settings: Avoid printing too fast at too low temperatures. If you have changed Cura settings to increase the extrusion rate, ensure that the temperature and other related settings are adjusted accordingly. In case of doubt, revert back to one of the default Cura profiles.
- Firmware: It is always recommended to keep the firmware up-to-date. New releases may include error-handling optimizations, such as for ER65.
Need further support?
If the problem still persists after trying all the troubleshooting steps listed above, please contact support. For the most efficient help, please share the following information:
- How often the error shows up
- The printer's log files
- Which materials are used
- Print settings (or preferably an UltiMaker Cura project file)
- The outcome of the attempted troubleshooting steps.


