This article applies to UltiMaker 3D printers with a Bowden setup and a separate feeder. This includes the UltiMaker S series, UltiMaker 3, UltiMaker 2+ Connect, UltiMaker 2+, and UltiMaker 2.
Note: This article does not apply to the Factor 4, UltiMaker Original, Method, Sketch, or Replicator series.
Introduction
The feeder at the back of the printer forwards the filament to the print head. Although the feeders of the various UltiMaker printer models have visual and technical differences, the basics are the same. The feeder contains a knurled wheel, which is controlled by the extruder motor. Its textured surface is pressed against the filament as the motor spins, so it has a firm grip on the material for reliable loading, unloading, and printing.
The pressure on the filament is controlled by an idler lever with a spring. More tension on the spring means more pressure on the filament. The pressure is set by adjusting a bolt in the top of the feeder. Some feeders contain a clip to easily relieve all tension from the filament, which allows you to manually move, load, or unload material.
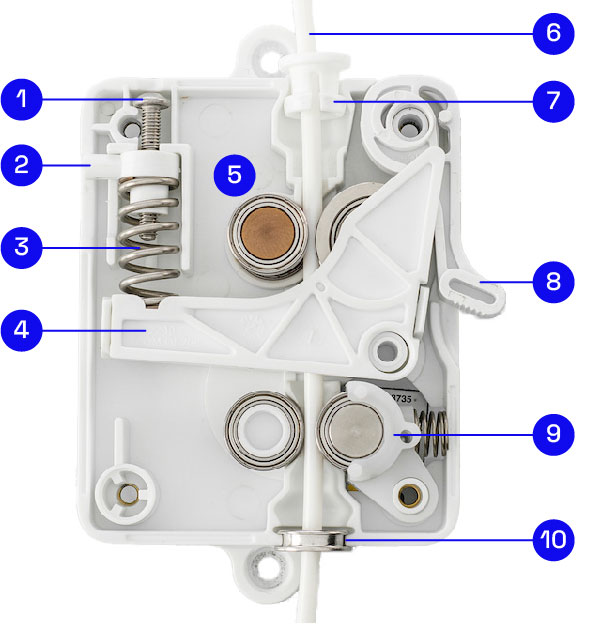
The image below shows the inside of the S series (S3, S5, S7) feeder, with an explanation of what the different components are.
 |
Feeder components
- Adjustment bolt. Turn this bolt to adjust the feeder tension.
- Tension indicator. The plastic clip at the side shows the current feeder tension.
- Spring. This spring presses on the lever to put tension on the filament.
- Lever. The lever pushes the idler wheel against the filament.
- Knurled wheel. This textured grip wheel is activated by the motor and moves the filament.
- Filament. This is the material as it travels through the feeder.
- Tube coupling collet. This holds the Bowden tube (not shown) in place, which guides the material into the print head.
- Cam clip. Flip this upward to relieve all tension from the filament.
- Flow sensor. This checks for end-of-filament and severe under-extrusion (only on S series).
- Feeder ring. This guides the filament into the feeder and prevents wear on the housing.
|
The correct feeder tension
Having the correct tension on the material is important for accurate and reliable printing. An incorrect feeder tension will lead to extrusion problems or even complete print failure.
- Too high: If the tension is too high, the knurled wheel can damage and flatten the filament. After a while, this can cause grinding, meaning that the knurled wheel digs into the material, and the material will get fully stuck in the feeder.
- Too low: If the tension is too low, the knurled will not have sufficient grip on the filament. The material can slip inside the feeder, meaning that not enough material will be forwarded. This will show in the print as missing or incomplete layers.
As the material passes through the feeder, the knurled wheel will make small indentations on the filament. This is normal and an indication of good feeder pressure. If you are experiencing extrusion problems, it is wise to check the feeder tension and the marks on the filament. If there are no visible marks at all, the tension is probably too low. If the material is (almost) completely flattened, or you see that the feeder has ground into the filament, the tension might be too high.
Tip: Under-extrusion and grinding could also be caused by a (partial) blockage in the hot end or other factors. Check the following pages for more information: Material is ground down by the feeder and How to fix under-extrusion.
The images below show the indentations on the material with different feeder tensions:
|
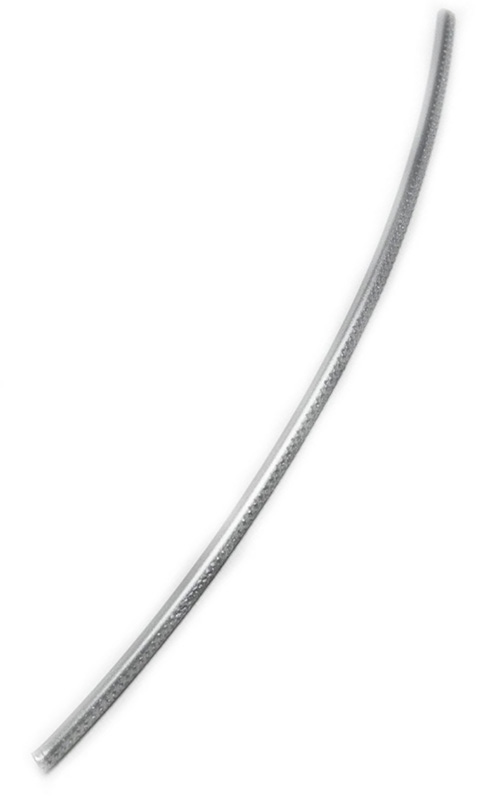
Correct feeder tension
The marks on the filament are superficial and uniform
|
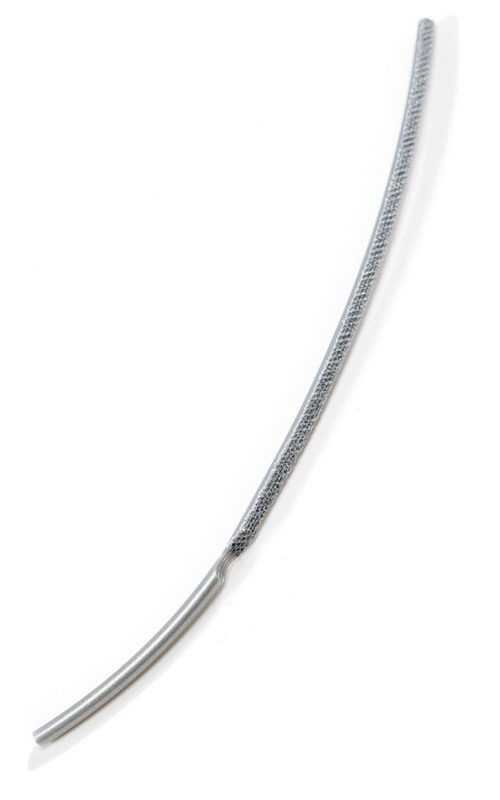
Tension too high
The filament is flattened and almost completely ground through
|
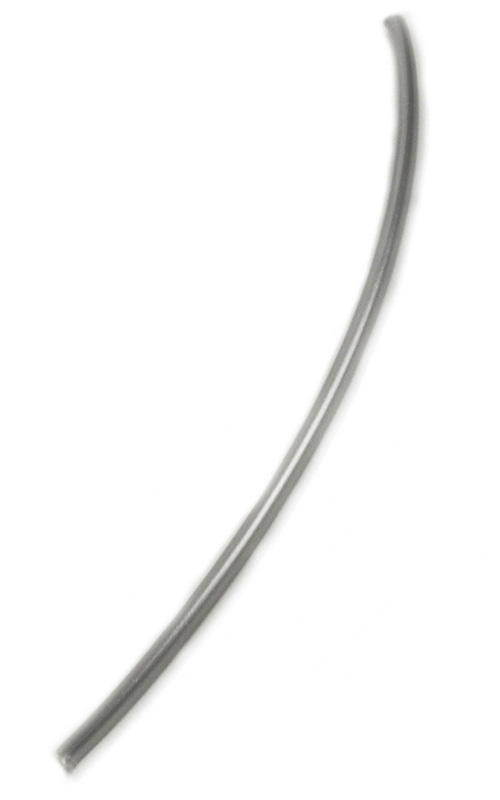
Tension too low
There are hardly any markings or inconsistent scuff marks on the material
|
Default feeder tension
All UltiMaker printers (except the DIY UltiMaker Original and Original+) are shipped with the feeder tension pre-set at the factory. This setting works well for all supported UltiMaker materials.
All UltiMaker 3D printers with the white geared feeder have the tension set to the middle. This means medium tension. For the UltiMaker 2, 2 Extended, and 2 Go, the tension indicator is at the top by default, meaning it is at its loosest setting.
|
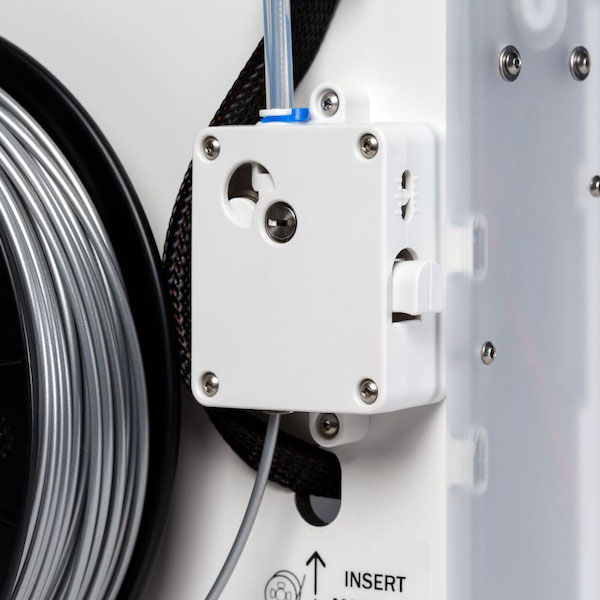
UltiMaker 2+ feeder
|
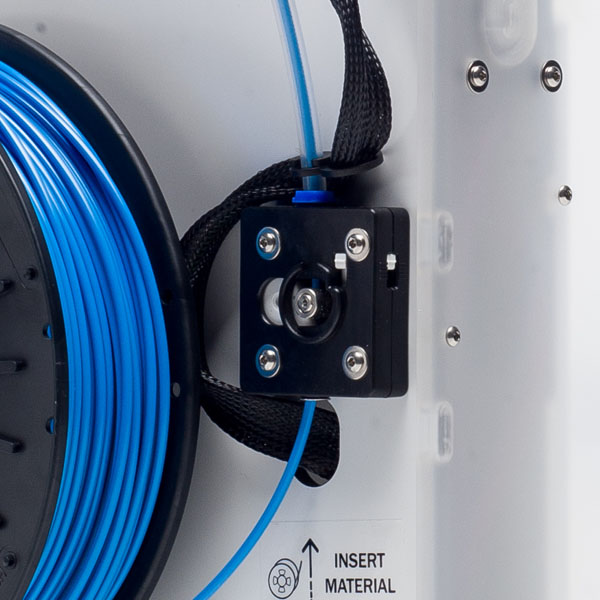
UltiMaker 2 feeder
|
How to adjust the feeder tension
In some cases, it might be necessary to change the feeder tension. Certain materials have different requirements for the feeder tension for optimal performance. Changing the feeder tension can also be necessary for certain repair or maintenance processes, although temporarily. See the examples below:
- Flexible materials. 3D printing materials that are very flexible may benefit from slightly higher feeder tension to prevent slippage. This is because the material can be compressed somewhat due to its properties.
- Metal filament. The BASF Ultrafuse material in the Metal Expansion Kit requires a slightly lower feeder tension to prevent grinding. Learn more here: How to adjust the feeder tension for Metal prints
- Opening the feeder. Whenever the feeder must be opened, for example for cleaning, repair, or troubleshooting, it is recommended to first fully loosen the feeder tension. If the front half of the feeder is removed with a higher tension setting, there is a high chance that the tension spring, bolt, and indicator jump out of the feeder and get lost. It is also quite difficult to correctly reassemble the feeder otherwise.
Adjusting the tension is simple. Insert a 2 mm hex key or screwdriver into the bolt at the top of the feeder housing. Turn the screwdriver clockwise to decrease the tension. The indicator will move up. Alternatively, turn the screwdriver counter-clockwise to increase the tension. The indicator will move down.
Note: On the UltiMaker S5 or S6 with the Air Manager (add-on), the default 2 mm hex screwdriver does not fit into the feeder housing with the Air Manager installed. You can use a smaller hex key instead, temporarily uninstall the Air Manager, or remove the feeder from the printer before adjusting the tension.
If you adjusted the feeder tension for a repair, don't forget to set it back to the correct setting after reassembling the feeder! Additionally, the head of the adjustment bolt must always be inside the feeder; otherwise, the tension will not be correct, and you will probably experience printing and feeding issues. If the head of the bolt is outside the feeder, please open it up again by removing the four bolts in the front part of the housing. Push the feeder tension indicator in the correct location before pressing the housing parts together again.


