The nozzle cover shields the print cores from cold airflow from the fans, which helps the print cores to maintain a stable temperature while printing. The cover also helps to prevent backflow of material into the print head when something goes wrong during printing.
The heat of the nozzles may cause wear on the nozzle cover over time. Check the nozzle cover according to these instructions and replace it when necessary.
Caution: Before you start, make sure that the print cores have completely cooled down. Turn off the printer or ensure it is disabled in the UltiMaker Digital Factory to prevent new print jobs from starting remotely.
Note: These instructions apply to the UltiMaker S3, UltiMaker S5, and UltiMaker S7. Although the UltiMaker S7 print head is slightly different, the nozzle cover replacement instructions are the same.
Requirements and info
| Part(s) | 1x 203641 - Nozzle cover S series |
| Tool(s) | Round or flat-tipped tweezers (recommended) |
| Time | 3 - 10 minutes |
| Difficulty level | 2 - Accessible |
Instructions
Tip: You can also watch a video of the UltiMaker S series nozzle cover replacement on YouTube.
Disassembly
 |  |
|
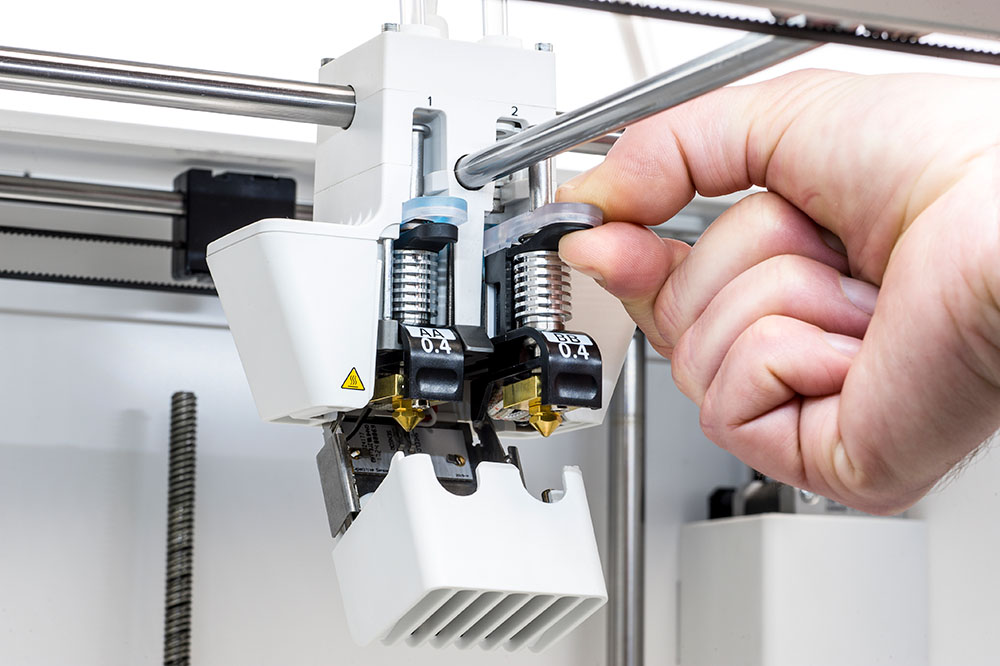
1. Unload print cores
It is recommended to first unload both print cores to provide more space. In the Configuration menu, select Unload for both print cores.
|
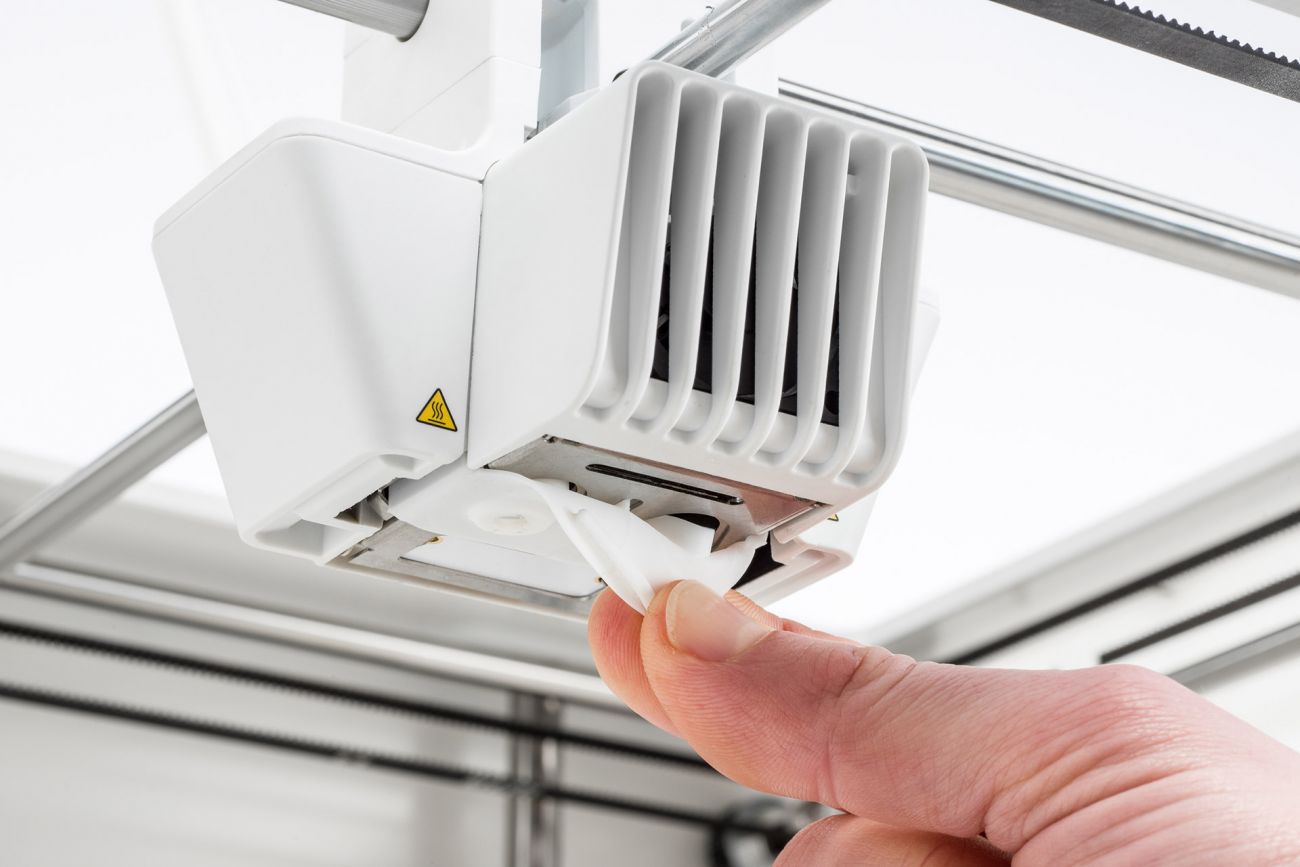
2. Remove old cover
Close the fan bracket again. From the underside of the print head, peel away the front corner of the nozzle cover, and pull it out of the fan bracket.
|
Reassembly
 |  |
|
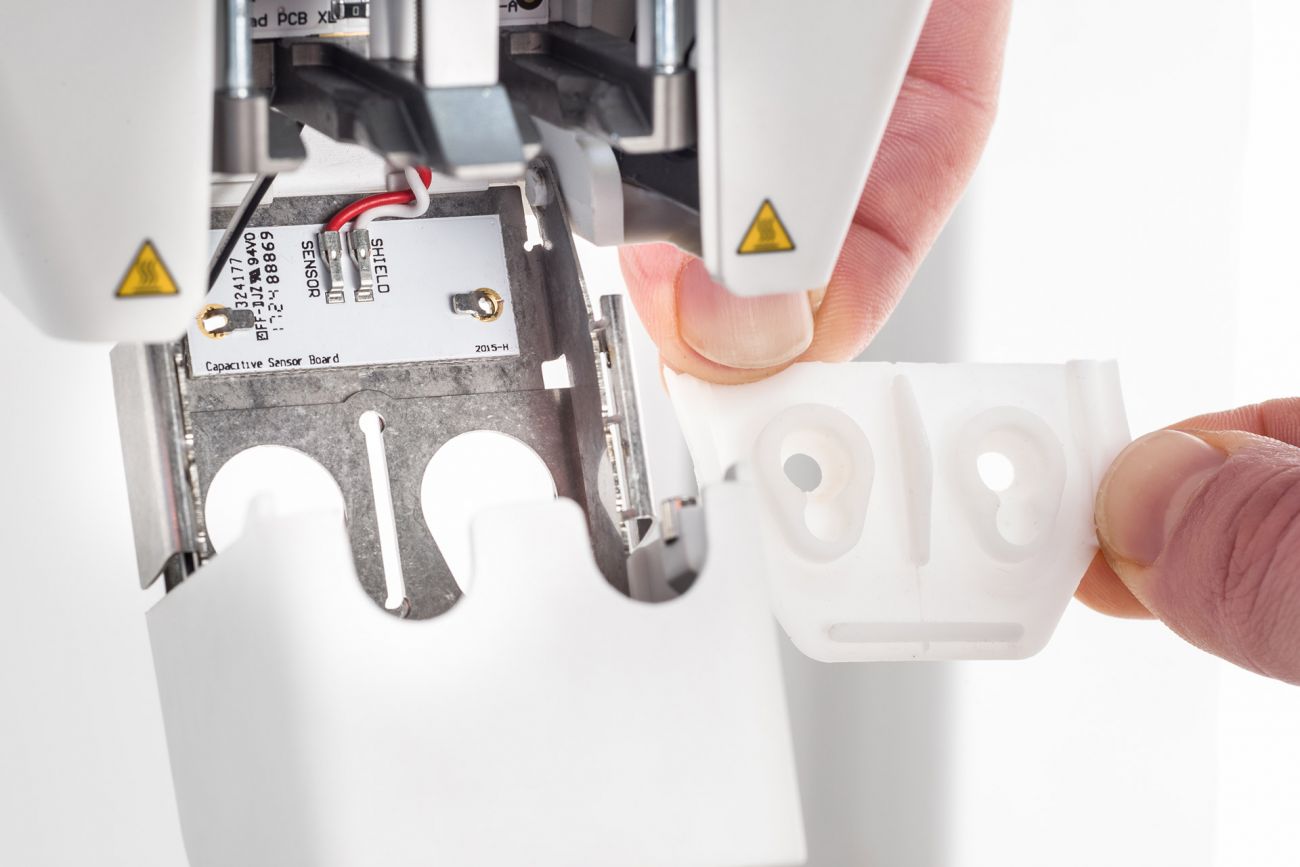
1. Orientation
Open the fan bracket and hold the new nozzle cover in the correct orientation behind the bracket. Ensure the shapes of the cover match the holes in the fan bracket.
|
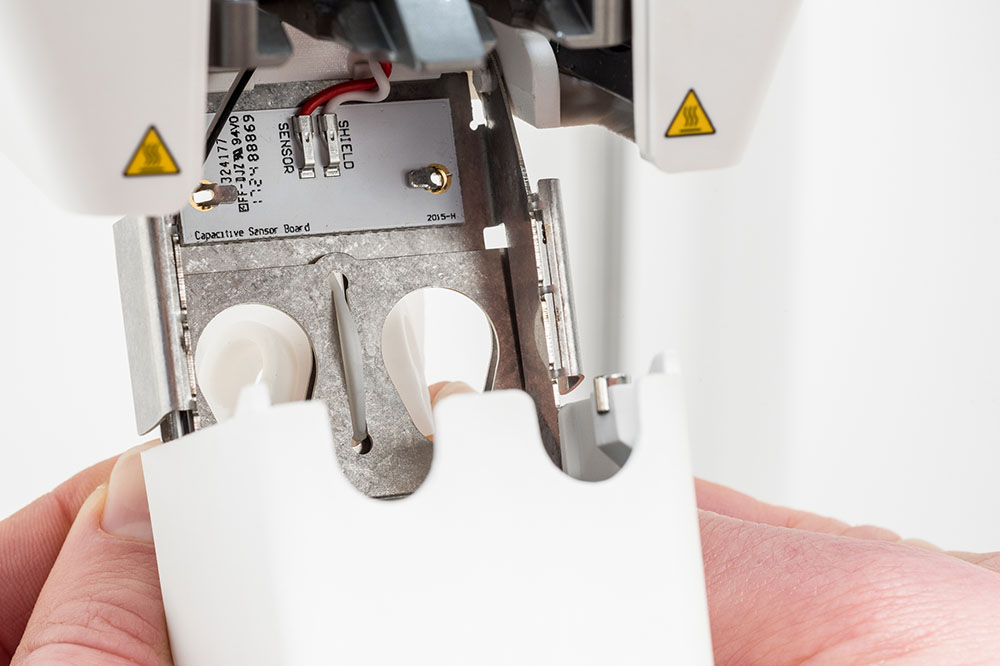
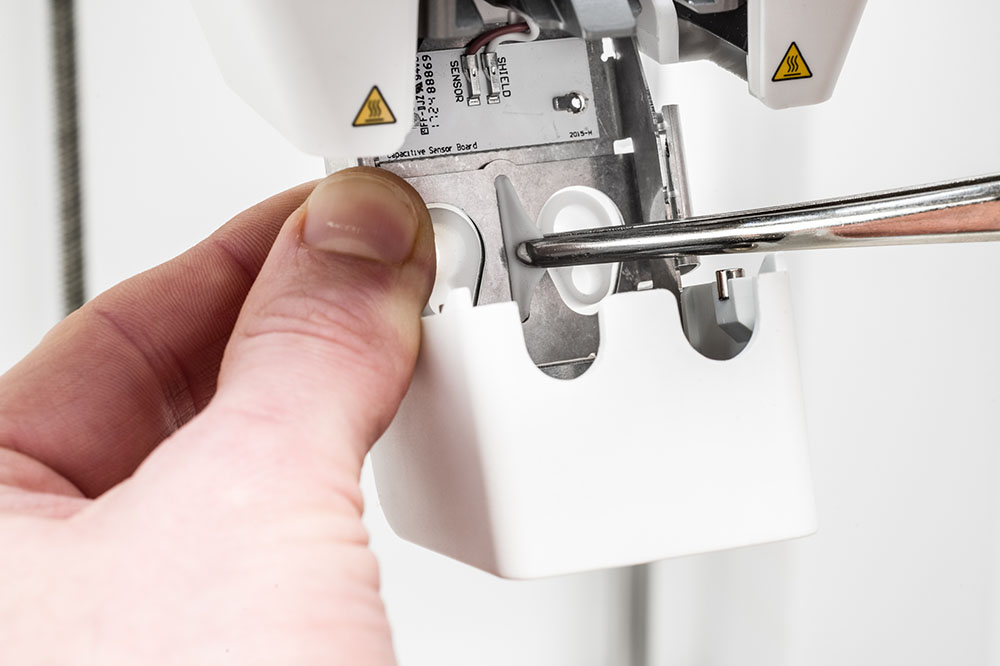
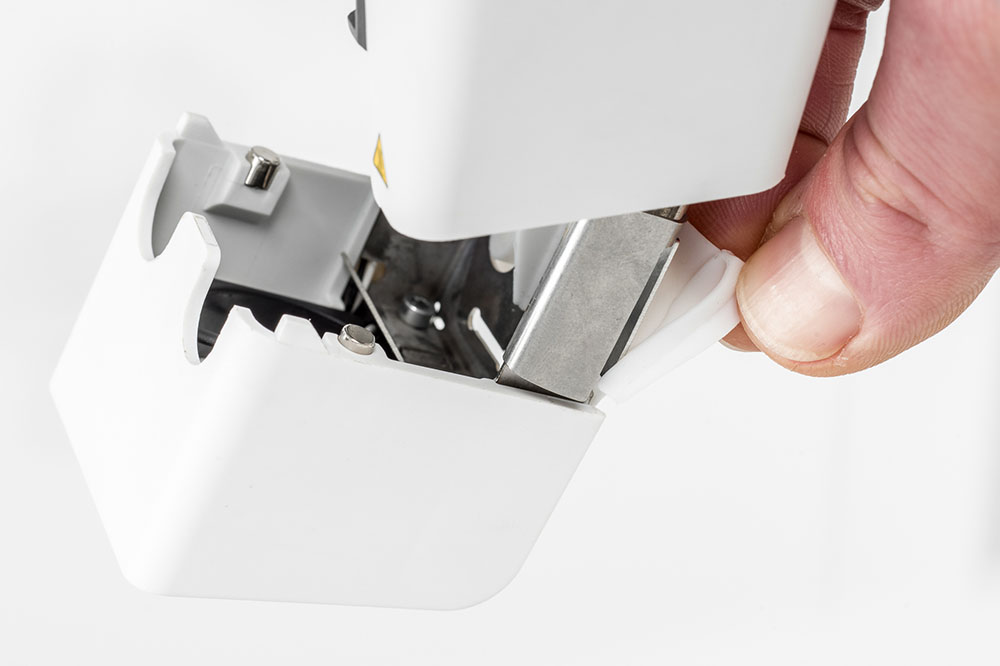
2. Insert middle tab
From behind the fan bracket, slightly bend the nozzle cover and insert the middle tab through the slot in the fan bracket and metal plate.
|
|
|
|
|
3. Seal middle tab
From the inside of the print head, apply pressure to the metal plate. At the same time, pull the tab through the bracket and plate until the seal locks the cover in place. You can use (round or flat-tipped) tweezers for this.
|
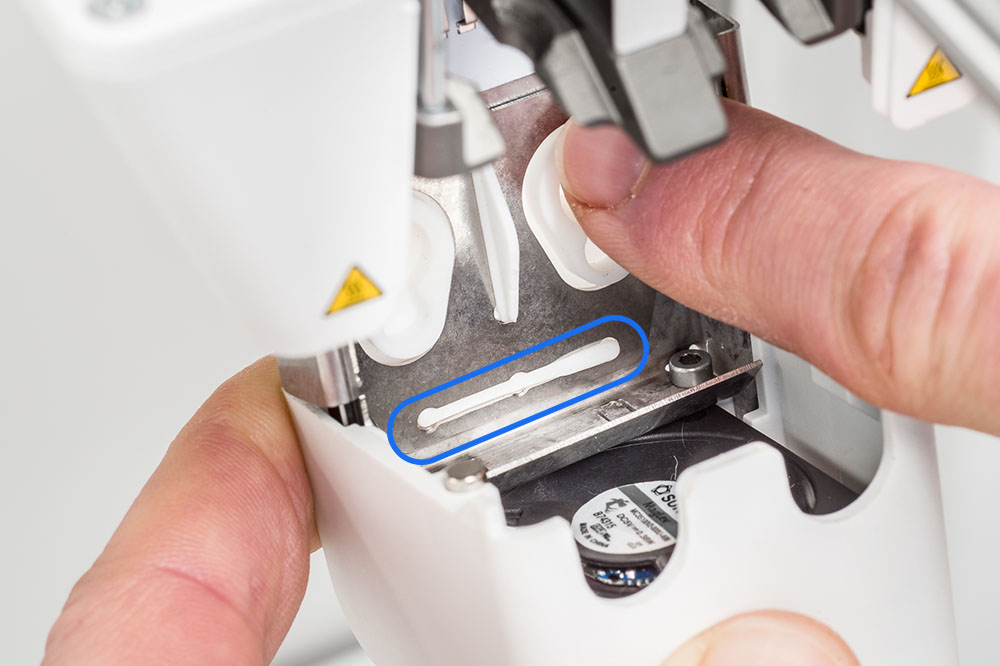
4. Fold pockets
Pull the right side of the nozzle cover and fold the pocket over the edge of the metal plate. Push the tab of the nozzle cover under the metal tab of the fan bracket. Repeat this for the left side.
|
|
|
|
|
5. Front tab
From behind the bracket, push the front tab through the slot at the front, while applying pressure to the metal plate from the inside of the fan bracket. Make sure the seal is pushed completely through the plate, to lock the cover in place.
|
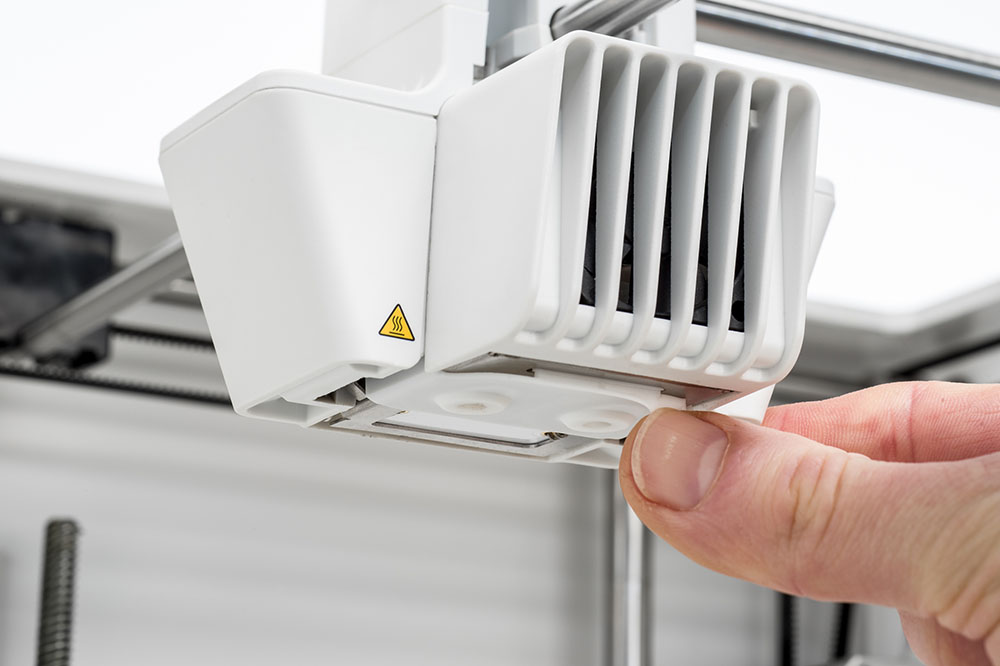
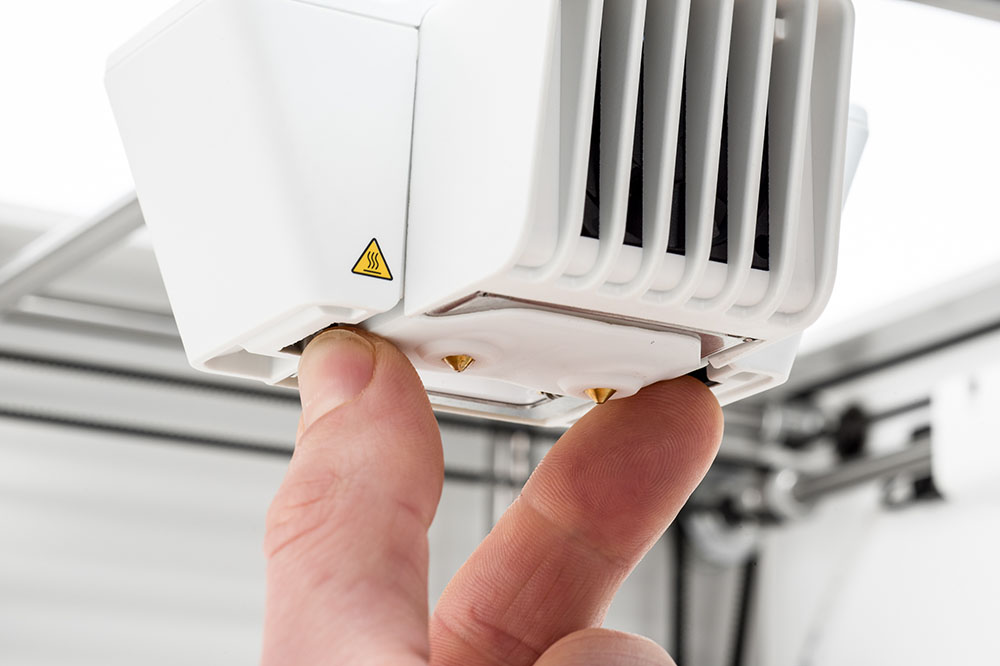
6. Check placement
Close the fan bracket and check if the new nozzle cover is correctly placed. Slide your finger across the bottom of the print head. If the nozzle cover easily detaches from the fan bracket, check the seals and redo steps 2-5.
|
|
|
|
|
7. Load print cores
Open the fan bracket and insert both print cores. In the Configuration menu, select Load for both print cores and install them.
|
8. Align the cover
With the front fan bracket closed, hold the nozzle cover on both sides and slightly move it left and right. The metal place and nozzle cover will now align themselves with the print cores.
|
Tip: As an extra check, it is recommended to manually lift and lower the second print core using the lift switch on the right side of the print head. If the fan bracket easily falls open when the print core is lowered, the placement of the nozzle cover is probably not correct. Go through the steps again.


