|
Note: This article contains information about UltiMaker 2.85 mm PC material. Similar quality cannot be guaranteed with third-party filaments. This material can be used on the UltiMaker 2+, 3, S Series, and Factor Series, but is not compatible with the Method, Sketch, or Replicator.
PC (polycarbonate) is a very strong and tough material that can be used for various engineering applications. Its material properties make it perfect for printing molds, tools, functional prototypes, and parts for short-run manufacturing. Here are guidelines for getting started with UltiMaker PC and tips to achieve the best 3D print results.
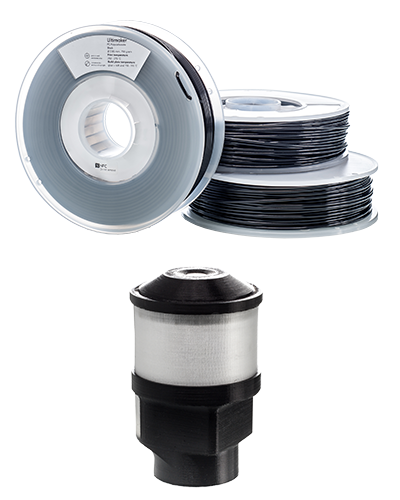
UltiMaker PC is available in the following colors:
|  |
In this article:
- Compatibility: Information about printer, print core, and dual material compatibility
- Printing recommendations: Overview of the advised temperatures, adhesion, and environment
- Maintenance and troubleshooting: Advice for printer maintenance and material storage
- Health and safety: Important information about printing safely with UltiMaker PC
|
Related articles for UltiMaker PC:
|
Compatibility
UltiMaker PC can be used on Factor Series, S Series, UltiMaker 3, and UltiMaker 2+ (Connect), but is not fully supported for all nozzle sizes. On UltiMaker 3D printers that use print cores, you print PC with the AA or AA+ variant.
| Printer | Compatible print cores and nozzles |
|---|
| UltiMaker Factor 4+ | AA+ 0.4, AA 0.4 (experimental) |
| UltiMaker Factor 4 | AA 0.4 |
| UltiMaker S6 and S8 | AA+ 0.4, AA 0.25 (experimental), AA 0.4 (experimental), AA 0.8 (experimental) |
| UltiMaker S3, S5, and S7 | AA 0.25 (experimental), AA 0.4, AA 0.8 (experimental) |
| UltiMaker 3 series | AA 0.25 (experimental), AA 0.4, AA 0.8 (experimental) |
| UltiMaker 2+ Connect | 0.25, 0.4, 0.6, 0.8 |
| UltiMaker 2+ series | 0.25, 0.4, 0.6, 0.8 |
| UltiMaker 2 series | 0.4 (no other nozzle sizes available) |
| UltiMaker Original+ | 0.4 (no other nozzle sizes available) |
Printer and print core compatibility notes
- UltiMaker PC has optimized settings for the Pro Bundle, Air Manager, and Material Station. This ensures a good end-of-filament and end-of-print experience in the Material Station and an optimal build environment with the Air Manager. Please make sure to use the latest version of UltiMaker Cura and keep the printer's firmware up to date.
- Printing UltiMaker PC with an AA 0.25 or AA 0.8 print core is listed as experimental. It has a material profile that can be selected in UltiMaker Cura. However, more complicated prints, with tiny features or a large build plate surface, may show increased warpage or oozing. In these cases, the AA 0.4 print core is advised.
- For the high-speed printers running the Cheetah motion planner (UltiMaker S6, S8, and Factor 4+), the AA+ 0.4 print core is preferred; profiles for the standard AA print cores are experimental.
- For the S6 and S8, Cura also offers compatibility with the CC+ 0.4 print core. These profiles are still available in Cura, but this print core has been discontinued due to reliability concerns. The replacement CC+ 0.6 print core is not compatible with PC; use the AA or AA+ variant instead.
- UltiMaker PC is not supported on the Ultimaker 2 Go and Ultimaker Original because they lack a heated build plate. Printing PC on a cold build plate will definitely fail due to warping.
- Although profiles are available in Cura for the UltiMaker 2, 2 Extended, and Original+, UltiMaker PC has not been fully validated in combination with these older-generation printers. You may use this material experimentally.
Dual material combinations
UltiMaker PC is only officially supported for single-material prints. However, on dual-extrusion UltiMaker printers (Factor 4, S, and UltiMaker 3 Series), some experimental dual material combinations are possible.
|
Support materials:
- Breakaway (experimental)
- Self-support (PC)
|
Dual combinations:
- PC (dual color, experimental)
- TPU 95 (experimental)
|
Note: The combination of PC and Breakaway is only possible for small prints. Larger prints may show warping of the build material. Dual combinations with TPU 95A may result in stringing and blobs on the surface of the print. Results are dependent on the model type that is used.
Note: Factor Series printers only support single-extrusion PC prints, or experimental dual-color PC printing. Using Breakaway support or TPU 95A with PC is not possible on Factor Series due to the different required build volume temperatures.
Printing recommendations
UltiMaker PC is an advanced material. Engineering materials offer advanced properties but may require more printing experience to achieve consistent results, even when using default settings.
Tip: Always use the latest version of UltiMaker Cura and make sure that your 3D printer is updated with the latest firmware version to include the correct material profile for UltiMaker PC.
Cura profiles
UltiMaker PC supports intent print profiles. The Engineering profile is optimized for dimensional accuracy, and the Balanced profile offers a good compromise of all settings. No Visual intent profiles are available for PC, as this is intended as an engineering material.
Note: Different intent profiles may be available depending on the selected printer and print core. Intent profiles are only available for the 0.4 print core.
Temperatures
UltiMaker PC prints at relatively high temperatures, between 260 and 280 °C. The build plate temperature is set to approximately 110 °C, but this slightly differs per printer model.
Tip: The temperatures are automatically set correctly based on the printer, nozzle size, and profile you select in UltiMaker Cura.
Adhesion
UltiMaker PC is not an easy-to-print material because it tends to warp and delaminate if the printing environment and settings are not perfect. Ensuring proper adhesion is critical to print success.
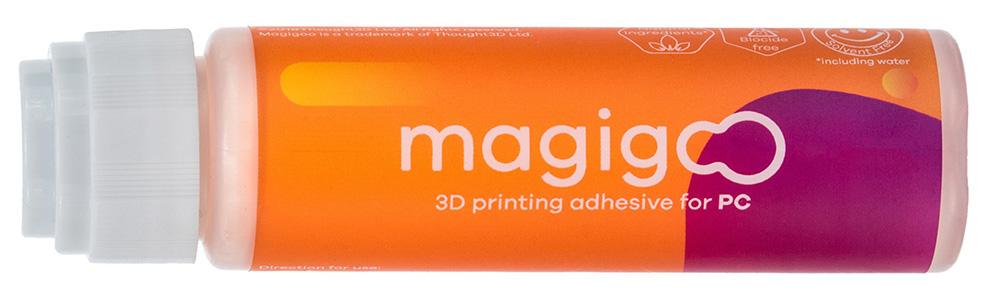
For the glass build plate, an additional adhesive must be used. For most printers using the glass build plate (S series, UltiMaker 3, and 2+ Connect), glue is recommended. For the Ultimaker 2+, an adhesion sheet is recommended to achieve the best build plate adhesion when printing with UltiMaker PC. To minimize warping when printing more complex prints with UltiMaker PC, the best choice of glue is Magigoo PC. This glue offers better results than the UHU glue stick for PC prints.
Magigoo PC is also advised for the flexible build plate on the Factor and S Series printers.
Caution: The addition of glue is recommended to improve adhesion and thereby prevent the chance of print failure and printer damage. Additionally, the use of glue can prevent over-adhesion, which could otherwise damage or break the glass plate.
The UltiMaker Cura profiles for PC either print with a brim or raft. The UltiMaker Factor Series, S Series, and UltiMaker 2+ Connect profiles use a brim, the UltiMaker 3 profiles use either a brim or a raft depending on the selected print core, and the UltiMaker 2+ profiles always use a raft.
Tip: For more tips on how to improve the build plate adhesion, see our build plate adhesion guide.
After the 3D print is finished, it can be removed from the build plate. When using a brim, let the build plate cool down completely before removing the part. If you printed your model with a raft, it is easier to remove the raft while the build plate is still warm. If the raft does not automatically detach from a cold build plate after cooldown, you can raise the build plate temperature again via the menu or run warm water over the glass build plate.
Caution: PC requires a high build plate temperature (over 100 °C). Never attempt to remove the build plate from the printer until it has cooled to a safe temperature. On Factor and S Series printers, a warning bar is shown on the display until the build plate temperature drops below 60 °C. Always allow the build plate to cool down gradually. For larger PC prints on the glass build plate, a sudden temperature drop can create excessive stress in the glass and may cause it to crack or shatter.
Print environment
Printing in a stable environment is important when using PC; it needs high temperatures, which can easily be influenced by the environment. A closed printer ensures a controlled environment for better print results, including improved print properties and performance.
It works well on Factor Series due to the fully enclosed and insulated build chamber, and on the UltiMaker S series printers because of the glass door(s). Always keep the door(s) closed during printing. For the UltiMaker S5 and S6, consider installing the optional Air Manager to also enclose the top of the printer.
On the UltiMaker 3 and UltiMaker 2+, it is highly recommended to use the front enclosure included in the Advanced 3D Printing Kit for this material. For the UltiMaker 2+ Connect, a front enclosure is included with the Air Manager. The front enclosure will help avoid cracks in your 3D prints and will provide a controlled print environment for more consistent and reliable results.
Maintenance and troubleshooting
For the best results with UltiMaker PC (as with any material), apply general maintenance to your UltiMaker printer(s). Find the recommended preventive maintenance schedule for your printer type here:
Because PC uses high nozzle temperatures, this increases the wear on the nozzle cover (Factor, S, and UltiMaker 3 Series). Regularly check the nozzle cover for signs of wear and replace it if needed. Printing with a damaged or missing nozzle cover can cause temperature inconsistencies or errors, or lead to print failures, which may also damage your printer (such as a flooded print head).
The AA and AA+ print cores don't generally need preventive cleaning with the hot and cold pull procedure. However, it can help to clean the print core when switching to or from a material that requires a very different printing temperature to prevent clogging.
When the filament is subjected to moisture, the filament should be dried at 80 °C for 10–20 hours, depending on the moisture level. Always ensure to properly store the spools when not in use. Place the spool in a resealable bag, in a cool and dry place, and out of direct sunlight.
For a reliable loading process, especially when using the Material Station, ensure the filament has a clean, pointy tip. Use cutting pliers or wire cutters to remove any bent or damaged sections from the end of the spool, then cut the filament at an angle. A double cut will create a sharp tip that feeds smoothly.
Health and safety
UltiMaker PC is safe to print when using the recommended temperature settings listed above. To ensure a comfortable and healthy working environment, we recommend 3D printing in a well-ventilated area.
Tip: For more information, download the safety data sheet for UltiMaker PC here.
Caution: PC requires high temperatures for both the nozzle and the build plate. Never reach inside the printer while it is in operation, and never touch heated components.
Factor and S Series printers include clear visual indicators to show when it is safe to touch:
- Build plate: When the build plate temperature is above 60 °C, an orange warning bar appears at the top of the display. The bar disappears once the build plate cools to a safe temperature. Keep in mind that 60 °C can still feel warm to the touch, so handle the build plate with care.
- Print cores: The print core status is indicated by the LEDs behind the cores. When a print job is not in progress but a print core is still hot (heating up or cooling down), the LED glows or pulses orange. When it turns blue, the print core has cooled and is safe to handle.


