UltiMaker print cores make it quick and easy for you to change nozzle configurations on your 3D printer – giving you the flexibility to seamlessly print applications that are optimized for the job. Whether you're seeking fine details, a quick draft, or a nozzle specially developed for your chosen material type, our print cores have you covered.
This article gives general information about UltiMaker print cores, such as what a print core is, which printers and materials are compatible, and how to use print cores.
What is a print core?
A print core is a compact hot end, which can be exchanged without any tools. The print cores contain the nozzle, heater block, heater and sensor, and a small EEPROM chip. The filament is heated up inside the print core and extrudes from the nozzle. There are several types of print cores, which may look a little different, but all contain the same kinds of components:
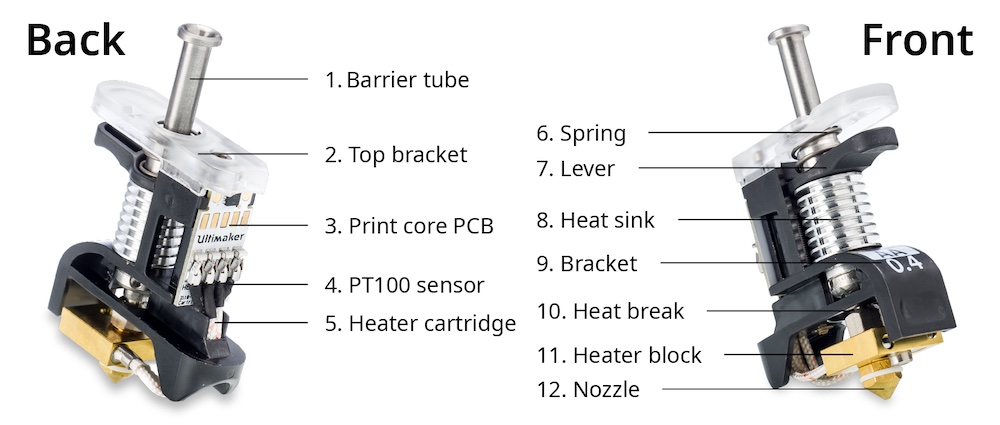
- Barrier tube. This part guides the filament from the end of the Bowden tube into the hot end.
- Top bracket. You hold this part when inserting or removing the core. It is transparent to show the LED to indicate the core's status.
- PCB. This board connects to the PCB inside the print head. The EEPROM chip contains information about the print core type, nozzle size, and printing hours.
- PT100. (right) This sensor registers the nozzle temperature.
- Heater cartridge. (left) Heats up the nozzle.
|
- Spring. This spring compresses to allow nozzle lifting and exchanging the print core.
- Lever. Squeeze this lever upward to compress the spring when removing or inserting the print core.
- Heat sink. The ridges help cool the print core, to prevent the heat from traveling too far upward.
- Bracket. The 'body' of the core. The type and nozzle size are printed on the front.
- Heat break. This thin aluminum part prevents the heat from the nozzle from traveling upward.
- Heater block. This part is heated up during printing to the material-specific temperature.
- Nozzle. Material extrudes from the nozzle. Different types and sizes are available.
|
Which printers use print cores?
Print cores are used in the UltiMaker 3 series, S series, and Factor series. All printers include (at least) two print cores in the box, so you can start printing right away. Other print core types or cores with other nozzle sizes can be purchased separately to fit your needs.
Not all print core types are compatible with all printers. This is due to the specific materials used in the print cores. The section below and the linked articles contain more information about compatibility.
Print core types and compatibility
There are several different types of print cores available, with different nozzle sizes. Choose the print core that suits your preferred material, and select the right nozzle size for your required print speed or level of detail.
| Type | Nozzle size(s) | Compatible printers | Compatible materials |
|---|
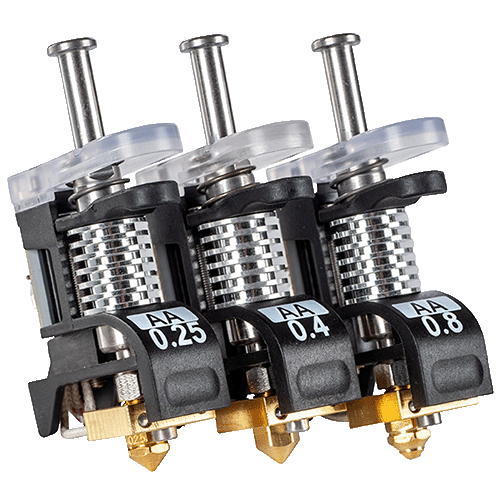 |
Print core AA
Download product data sheet
|
|
- UltiMaker 3
- UltiMaker S3
- UltiMaker S5
- UltiMaker S6
- UltiMaker S7
- UltiMaker S8
- Factor 4
- Factor 4 Plus
|
The AA print core is compatible with all (non-abrasive) UltiMaker build materials, such as PLA, PETG, and ABS, as well as Breakaway support material.
|
|---|
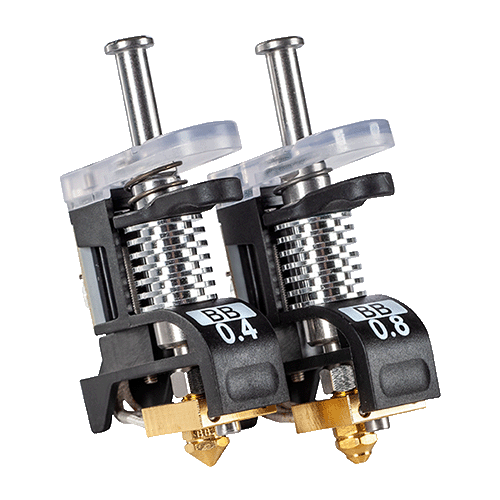 |
Print core BB
Download product data sheet
|
|
- UltiMaker 3
- UltiMaker S3
- UltiMaker S5
- UltiMaker S6
- UltiMaker S7
- UltiMaker S8
- Factor 4
- Factor 4 Plus
| The BB print core is intended for support materials. It was originally developed for PVA (water-soluble support material), but can also be used for Breakaway support material. |
|---|
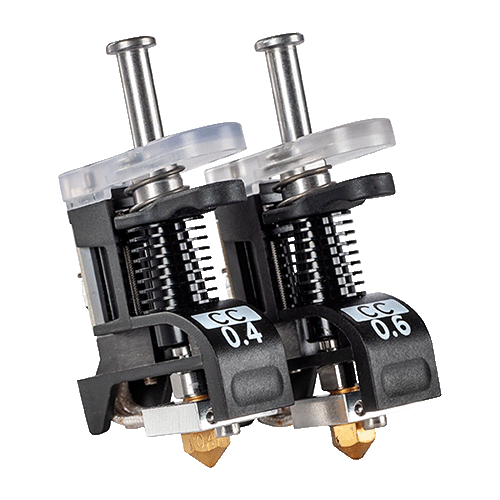 |
Print core CC
Download product data sheet
|
|
- UltiMaker S3
- UltiMaker S5
- UltiMaker S6
- UltiMaker S7
- UltiMaker S8
- Factor 4
- Factor 4 Plus
| The CC print core is designed for use with composite materials, such as UltiMaker PET CF and Nylon CF Slide. Find other compatible third-party materials in the Marketplace. |
|---|
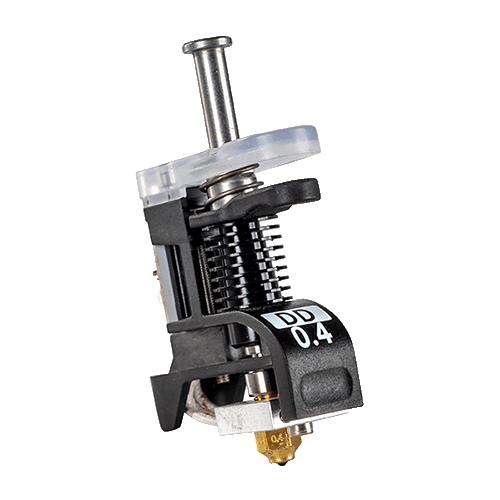 |
Print core DD
Download product data sheet
|
|
- UltiMaker S3
- UltiMaker S5
- UltiMaker S6
- UltiMaker S7
- UltiMaker S8
- Factor 4
- Factor 4 Plus
| The DD print core is specifically intended for Ultrafuse® Support Layer material, used in the Metal Expansion Kit.
Note: The DD core is not available in all regions.
|
|---|
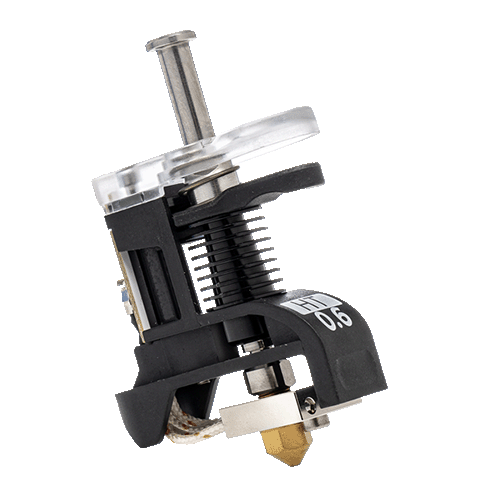 |
Print core HT
Download product data sheet
|
|
| The HT print core is optimized for high-temperature materials, such as UltiMaker PPS-CF. |
|---|
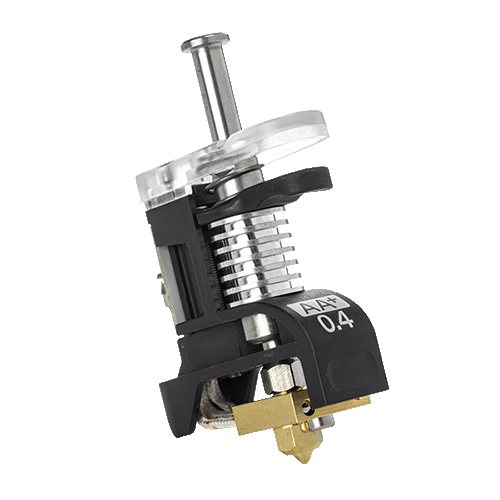 |
Print core AA+
Download product data sheet
|
|
- UltiMaker S6
- UltiMaker S8
- Factor 4 Plus
| Designed for high-speed, high-flow printing, the AA+ print core increases productivity and ensures reliable, high-accuracy prints across a wide range of materials. |
|---|
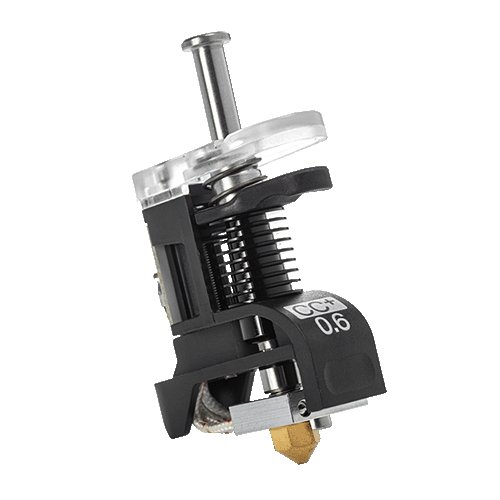 |
Print core CC+
Download product data sheet
|
|
- UltiMaker S6
- UltiMaker S8
- Factor 4 Plus
| Featuring a wear-resistant, hardened steel nozzle, the CC+ print core is engineered for printing abrasive composite materials at high speeds. |
|---|
For a comprehensive overview of printer, print core, and material compatibility, please visit the pages below:
Material and print core compatibility Print core and printer compatibility
How to use print cores
Installing or exchanging print cores is quick and does not require any tools. Before starting a print, ensure that two compatible print cores are installed. Each print core contains a small chip at the back, so the printer will automatically recognize the type of print core and the nozzle size. This helps to prevent configuration mismatches and errors.
Tip: Two print cores must always be installed, even for single extrusion prints. This is important during active leveling, for airflow reasons, and for closing the control loop.
Installing a new print core
UltiMaker 3:
When unboxing your new printer, an AA print core is already inserted into slot 1 of the print head. You will only need to insert the second print core into slot 2. The welcome setup will guide you through the steps. Open the front fan bracket of the print head. Squeeze the black lever of the print core upward and slide the print core into slot 2. Ensure it securely clicks into place and close the front fan bracket again. For more detailed information, visit the installation instructions: UltiMaker 3 - Install print cores
Tip: The welcome setup recommends installing the BB core. You can also choose to install the other AA print core, or a different type of print core instead.
S series
The included print cores vary per printer type:
- The UltiMaker S3, S5, and S7 are shipped with two AA 0.4 print cores and one BB 0.4 print core. One AA print core is already inserted into slot 1 of the print head. You will only need to insert the second print core into slot 2. The welcome setup will guide you through the steps. Open the front fan bracket of the print head. Squeeze the black lever of the print core upward and slide the print core into slot 2. Ensure it securely clicks into place and close the front fan bracket again. For more detailed information, visit the installation instructions: S series - Install print cores
- The UltiMaker S6 and S8 include two AA+ 0.4 print cores, and both are already installed in the print head. No installation is required after unboxing. For the first print, it is recommended to use the cores that came with the printer. Otherwise, see the instructions to change print cores below.
Factor series:
The included print cores vary per printer type:
- Factor 4: The print head already contains a set of two AA 0.4 print cores in the print head. Other print cores can be purchased separately.
- Factor 4 Plus: The printer ships with two AA+ 0.4 print cores installed in the print head. A CC+ 0.6 print core is included in the box.
If you want to use different print cores than the ones pre-installed in the print head for your first print, see the instructions to change print cores below.
Changing print cores
If you want to change one of the installed print cores for a different type or nozzle size, the printer will guide you through the steps. Select the change print core procedure on your printer:
- In the UltiMaker 3 menu, go to Material/PrintCore → PrintCore [x] → Change.
- For S and Factor series, open the Configuration menu, select the correct print core, and select Change.
The printer will start preparing for the print core change by heating up and retracting the material.
Tip: If you try starting a print that is prepared for different print cores than the one currently installed, the printer will notify you to change the configuration. When using the Digital Factory, you can submit print jobs to the queue with any configuration, but you will receive a configuration change prompt before the print starts if there is a mismatch.
Open the front bracket of the print head. Squeeze the black lever of the print core upward and slide the print core out of the print head. Take the new print core, squeeze the lever, and slide it into the print head slot. Close the bracket to complete the procedure. For more detailed information, visit the change print core instructions for your printer type:
Note: It is recommended to always use the process in the menu to change or unload print cores. Manually removing a print core while it is active (heating up or cooling down) will lead to errors. When handling print cores, never touch the PCB at the back.
More information
If you want to learn more about UltiMaker print cores, the following articles are recommended:
- Maintenance schedule. The inside of the nozzle can get (partially) blocked with material over time. Clean the print core preventively according to the maintenance schedule, or when you notice extrusion problems.
- Hot and cold pull. The way to clean the inside of the print cores is called the 'hot and cold pull' method. Use UltiMaker cleaning filament for the best results. On some printers, you can use other materials such as PLA instead as well, but this may be less effective depending on the print core type or which materials have been used.
- Status indication. The status of the print core is indicated by LEDs. This article explains what the different colors mean, such as heating up, idle, or active.
- Print core troubleshooting. Having issues with one of your print cores? Visit this page for more information about common problems and how to resolve them.
- Disassembly warning. As explained above, print cores come in different types with different nozzle sizes. The print cores are carefully assembled at UltiMaker's manufacturing facilities and are not intended to be disassembled. Changing just the nozzle is not supported; simply exchange the print core.
- Print core lifespan. Print cores can last for a long time, if they are used correctly and properly maintained. The lifespan depends on a number of factors, such as materials used and handling of the cores.
If you have a question about the UltiMaker print cores and you cannot find the answer in our knowledgebase, please contact support. Our customer service agents are happy to provide more information.


