UltiMaker Cura is at the heart of your connected 3D printing workflow. Follow these easy steps to learn how Cura integrates seamlessly with the UltiMaker platform.
This article will take you through the full UltiMaker Cura workflow with connected printers. Start by signing in, learn how to prepare your models, then print and monitor via the cloud.
Related articles
Sign in to UltiMaker Cura
To make the most out of your connected printers, sign in to Cura with your UltiMaker account. Although you can connect to your S series or Ultimaker 3 printers via local network without signing in, to benefit from cloud features and the Digital Factory, you need an account. This article focuses on the cloud-based workflow.
Note: Please make sure to use the latest version of Cura. If you are in an organization, ask your administrator to install UltiMaker Cura Enterprise. If you are a personal user, you can download the latest version of UltiMaker Cura from our website.
Use the Sign in button on the top right corner of the Cura interface to sign in to your UltiMaker account.
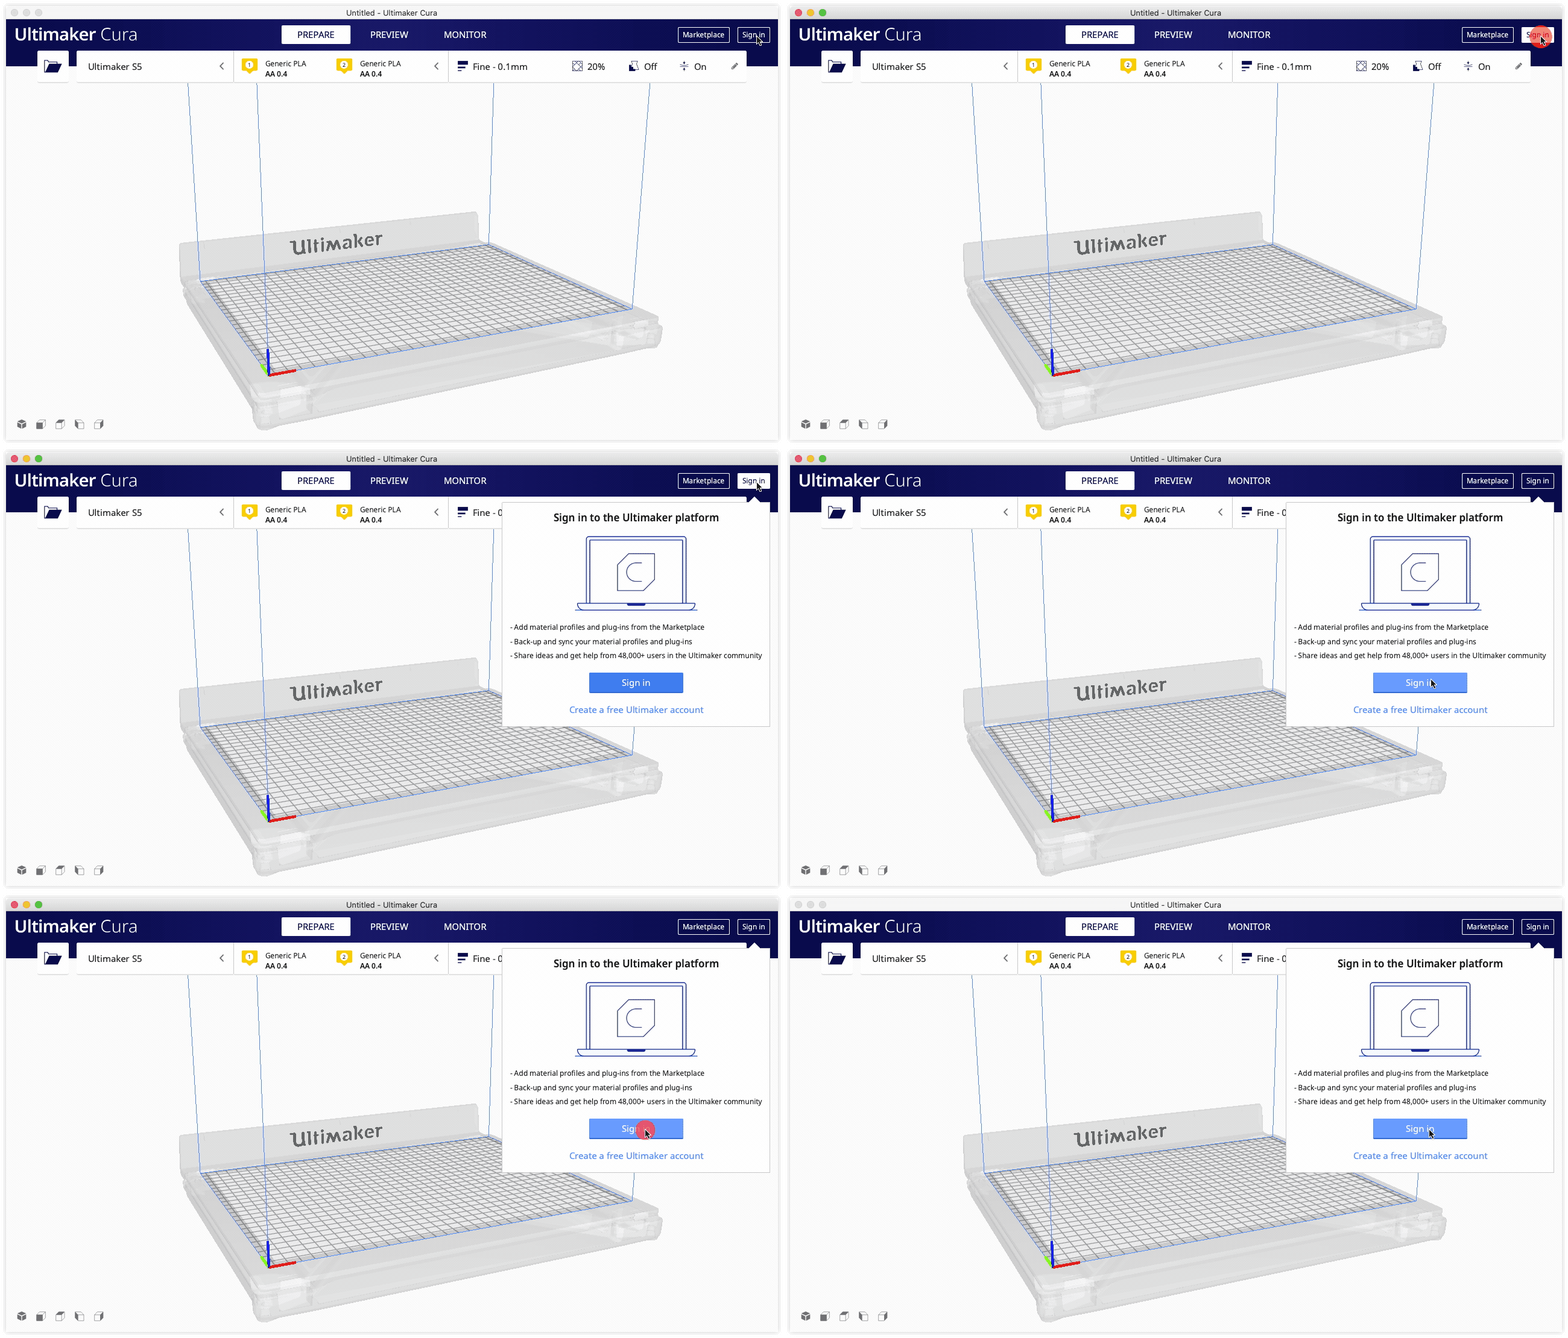
A browser window will appear showing the UltiMaker Account sign-in page. Enter your email address and password to sign in with your Ultimaker account. Don't have an UltiMaker account yet? Create one for free.
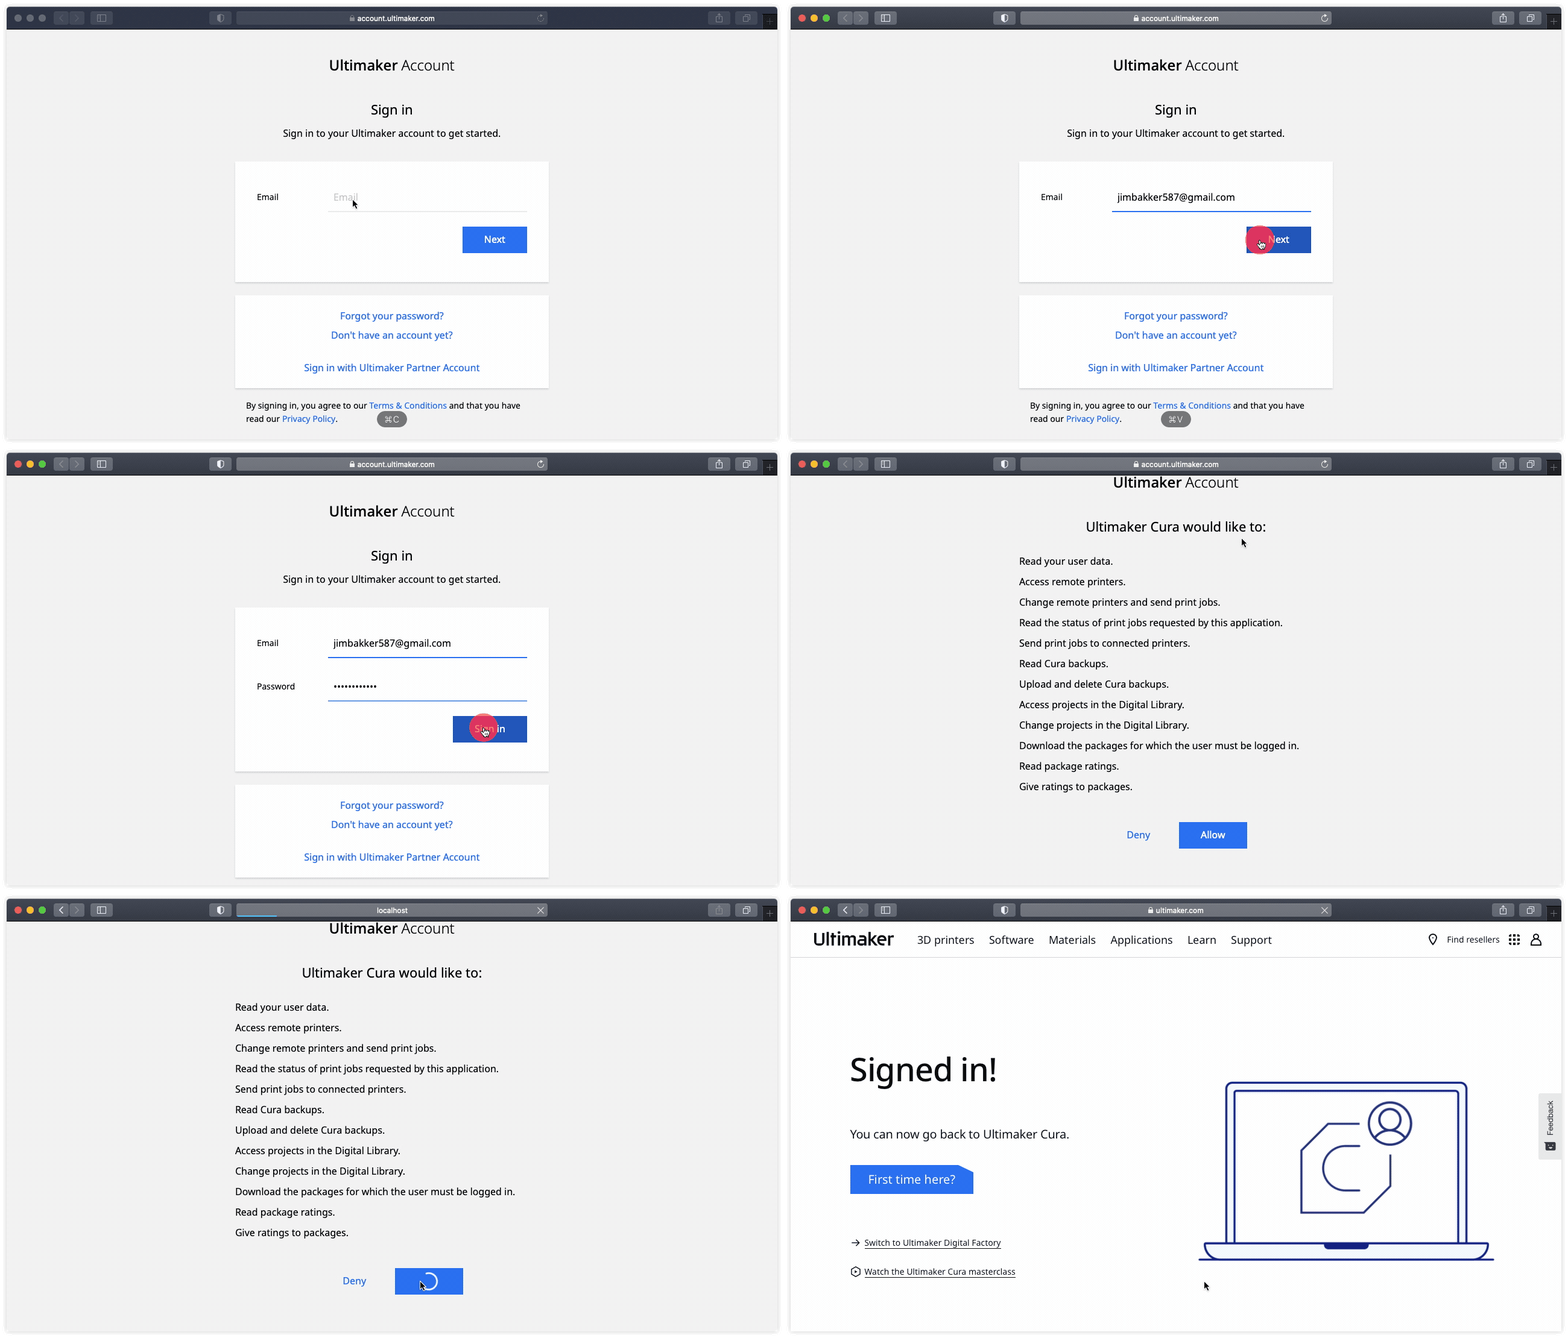
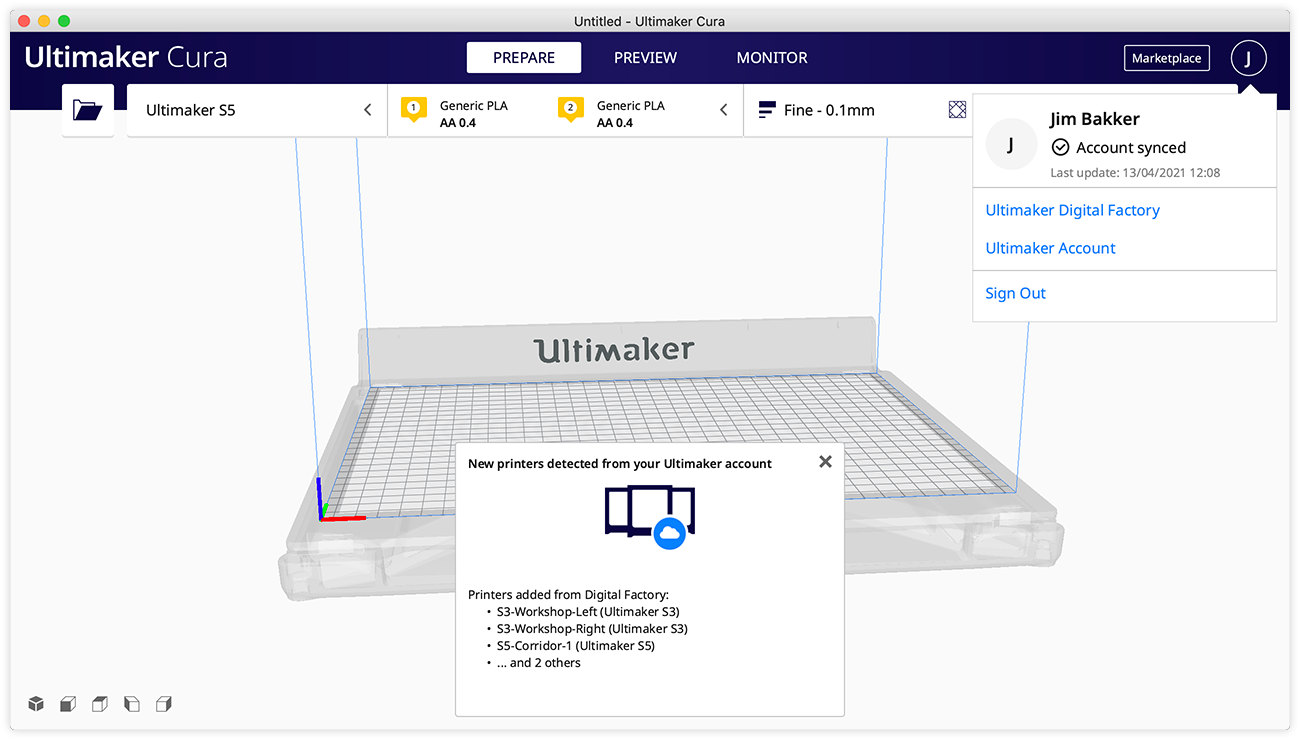
You can now go back to Cura. Notice that all your connected UltiMaker printers are now available to you in UltiMaker Cura. If you have not connected any printers to the Digital Factory yet, learn here how.
Import a 3D model
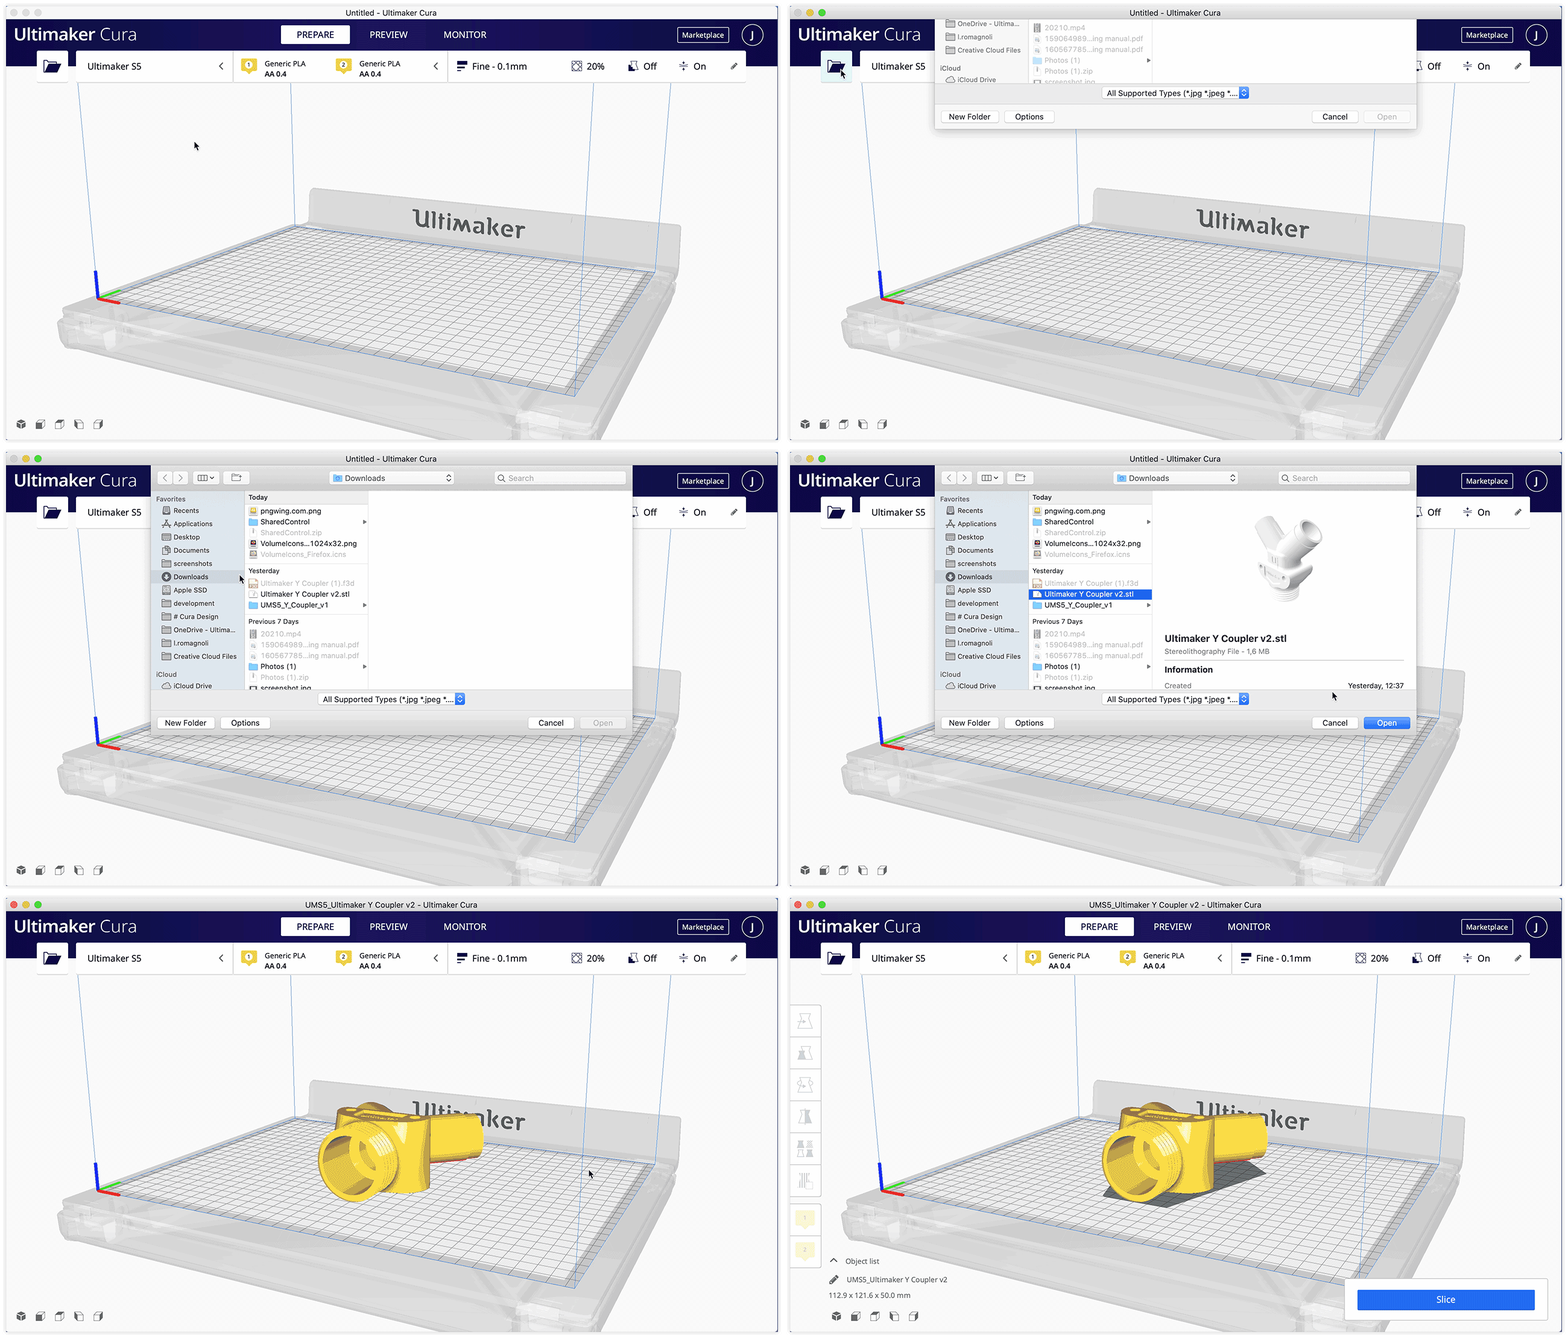
Click on the folder icon to load a 3D model or project file in UltiMaker Cura. By default, Cura is capable of opening multiple file formats, such as .stl, .3mf, .obj, and .x3d files.
Tip: If you already have projects and files saved to your Digital Library, you can also import 3d model directly from Digital Library into UltiMaker Cura. Learn more about the Digital Library
Set up your configuration
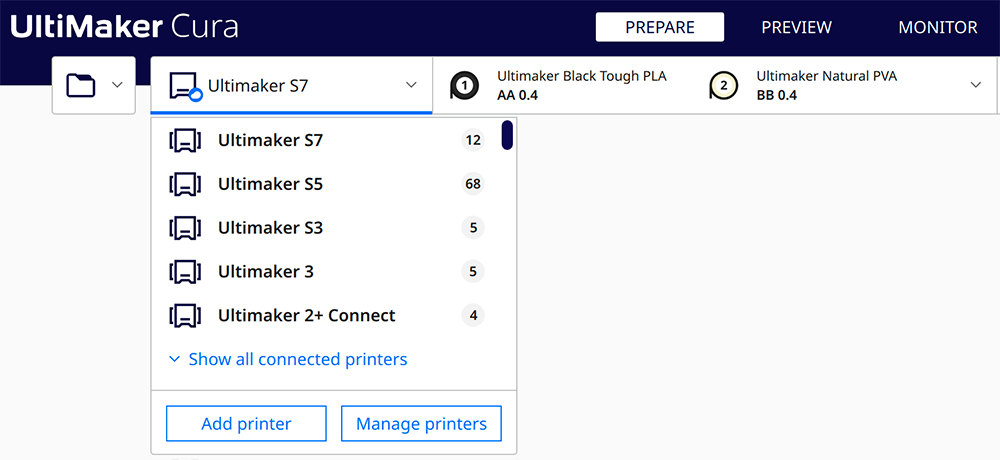
Start by selecting the printer from the Printers panel. Your connected printers will be automatically shown in this list. If you have connected more printers of the same type, they will be shown grouped. Just select the model you want to slice for. You can also click Show all connected printers to expand the groups, and choose a specific printer to limit the number of configurations shown.
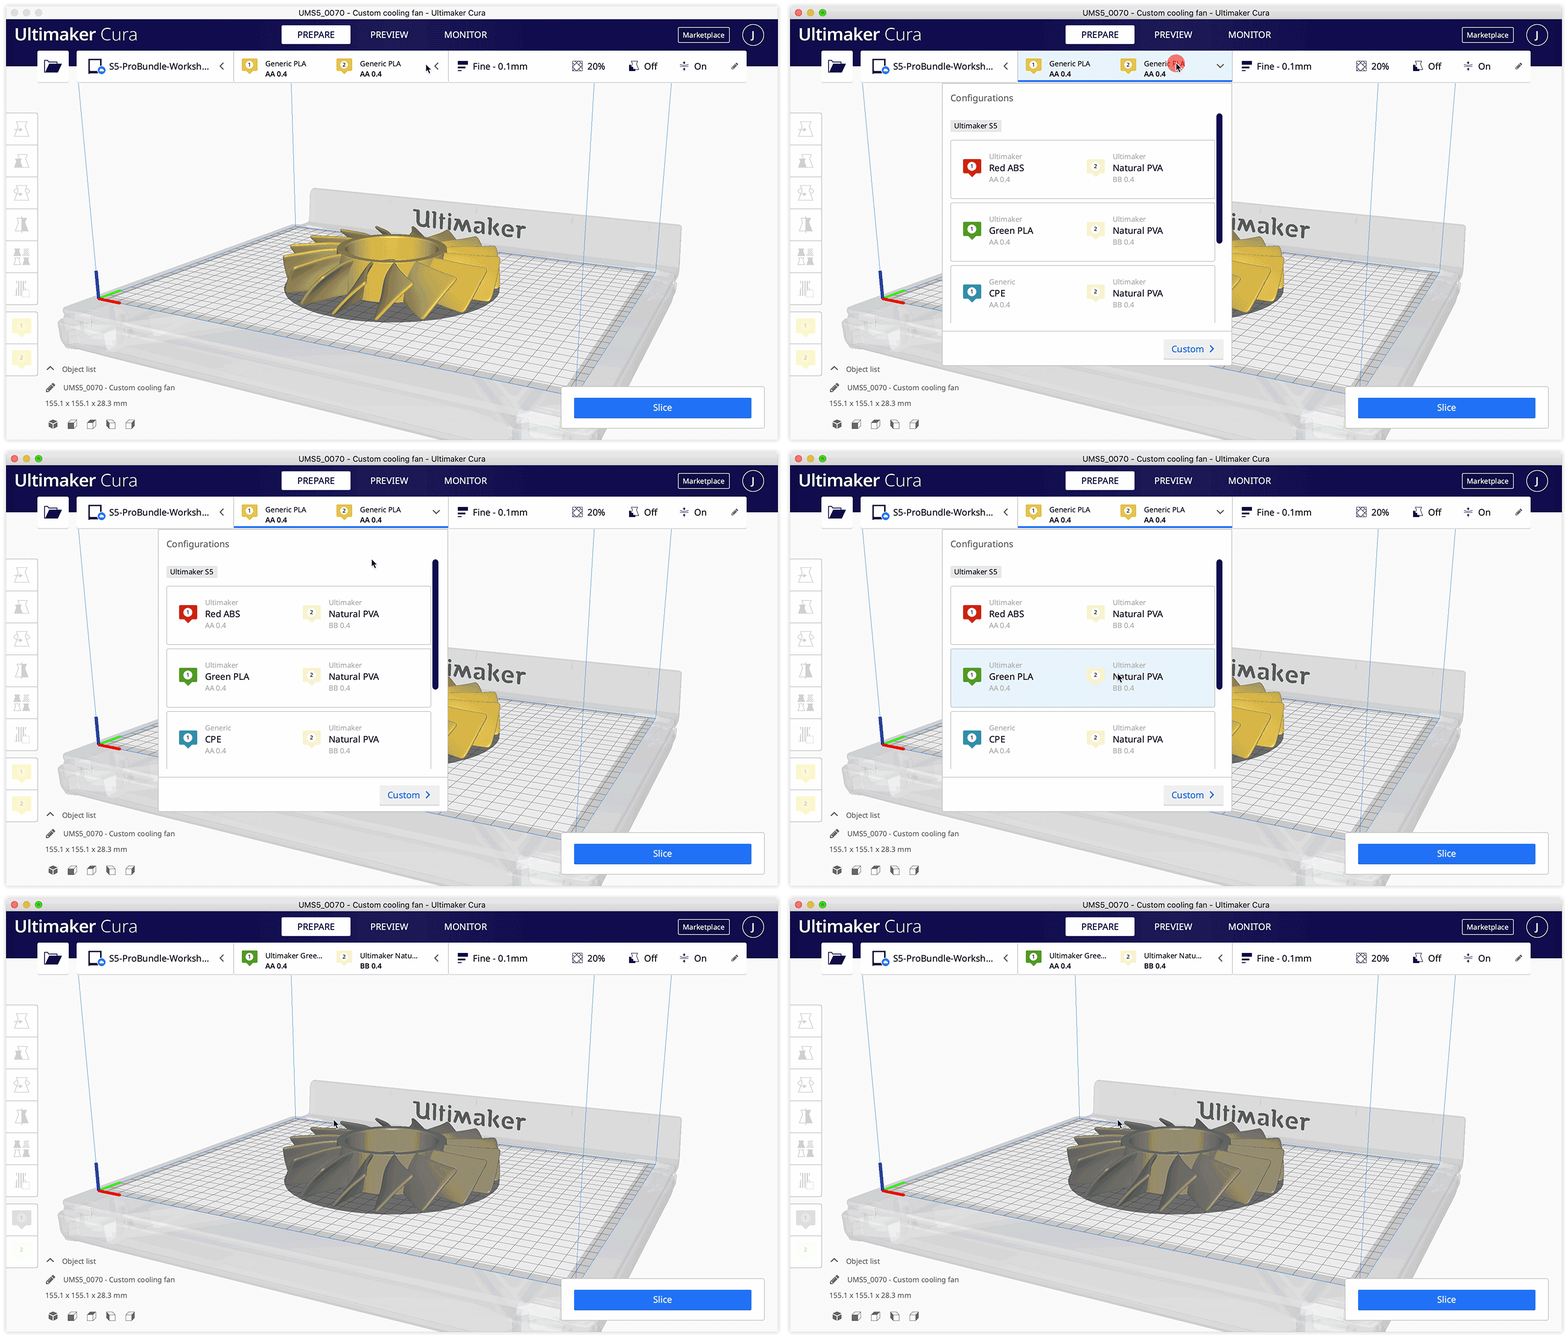
Next, choose your configuration. All available configurations for your selected printer or printer model are shown in the Configuration panel. Choose one of the available ones, or click Custom to set up a new configuration. Note that in this case, you will need to change the material(s) and/or print core (or nozzle) before the print can start.
If you have an UltiMaker S5 or S7 in combination with a Material Station, every available configuration will be shown.
Tip: If you want to print with third-party materials, first install the profile(s) via the UltiMaker Marketplace and sync them with your printer.
Select your profile and print settings
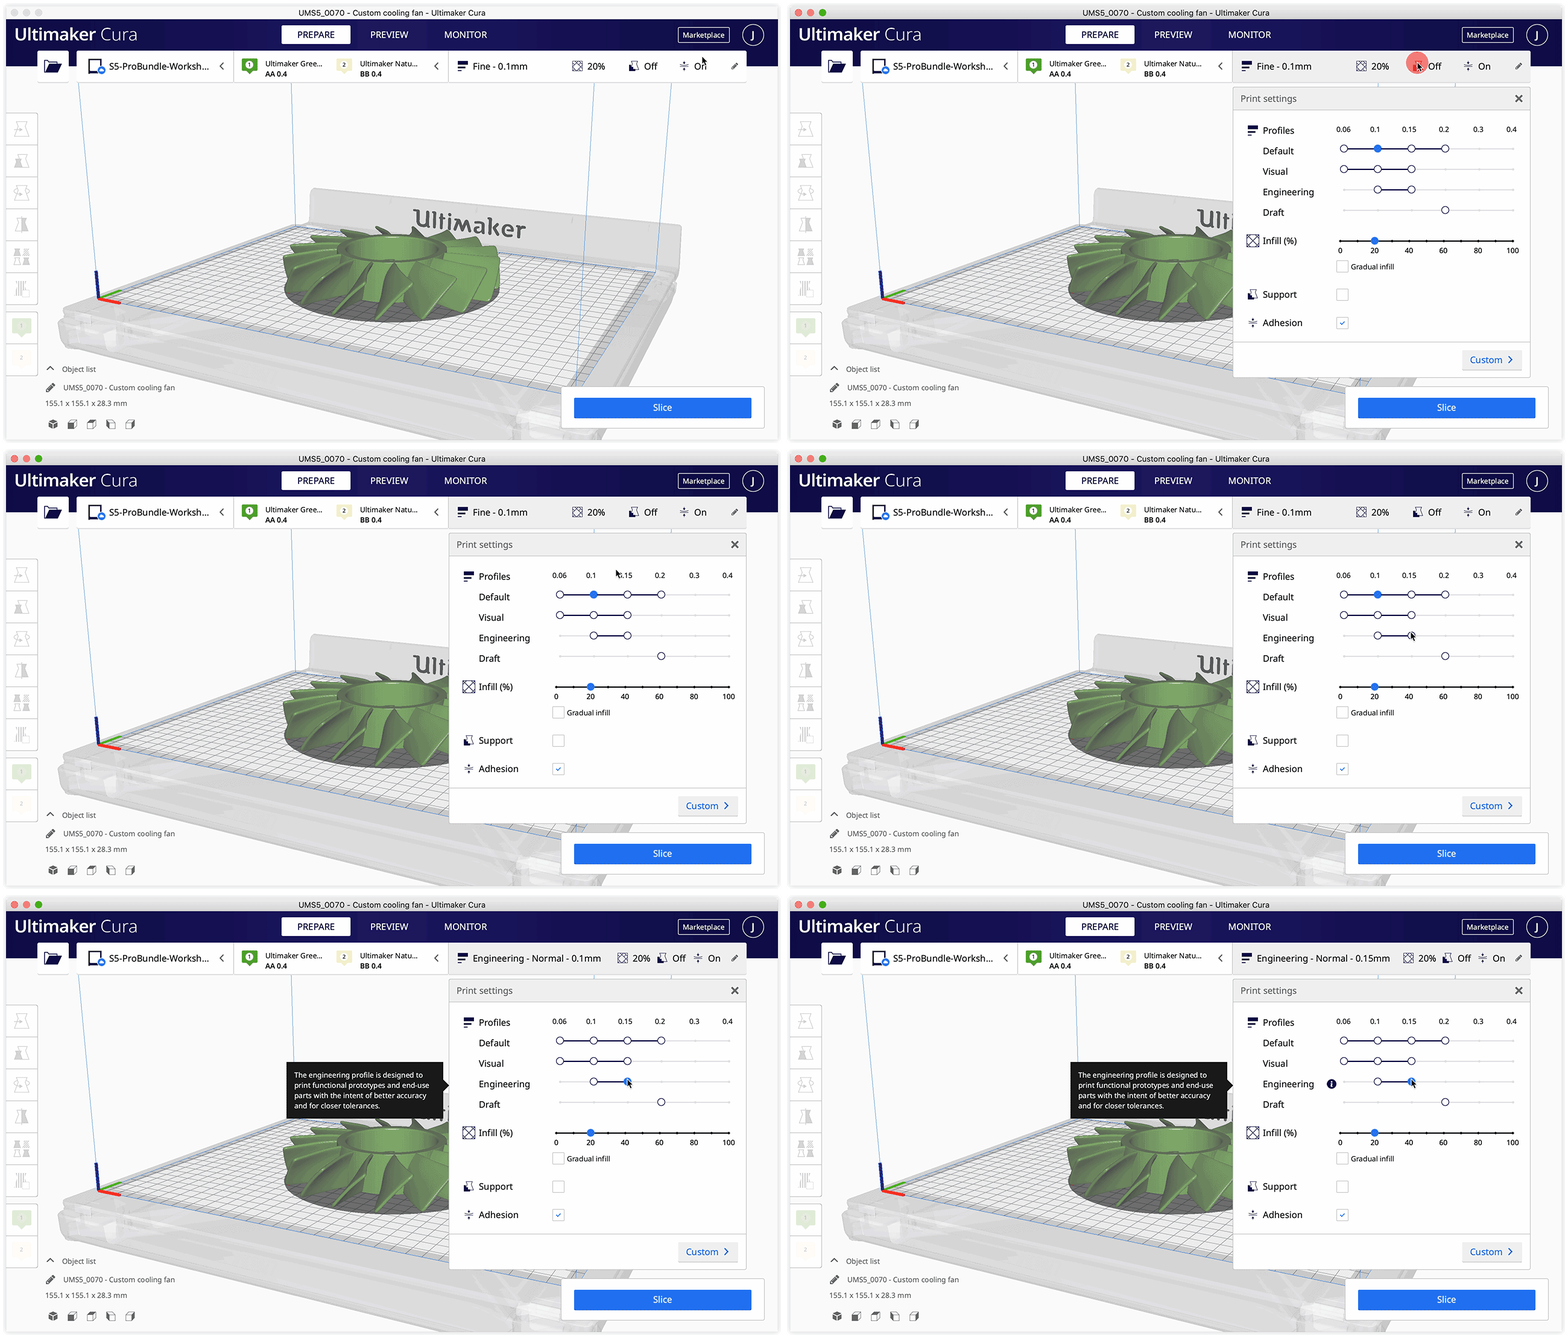
To start preparing your 3D model, choose your preferred printing profile. The availability of preset print profiles depends on your printer and chosen configuration. In the Recommended mode, you can quickly and easily change some settings, such as strength, support, and adhesion. If you want to change other settings for a specific printing strategy, you can do so in the Custom mode.
Tip: For selected materials and print cores on S series printers, you can choose between different intent profiles. These profiles have been optimized for specific applications.
Slice and preview
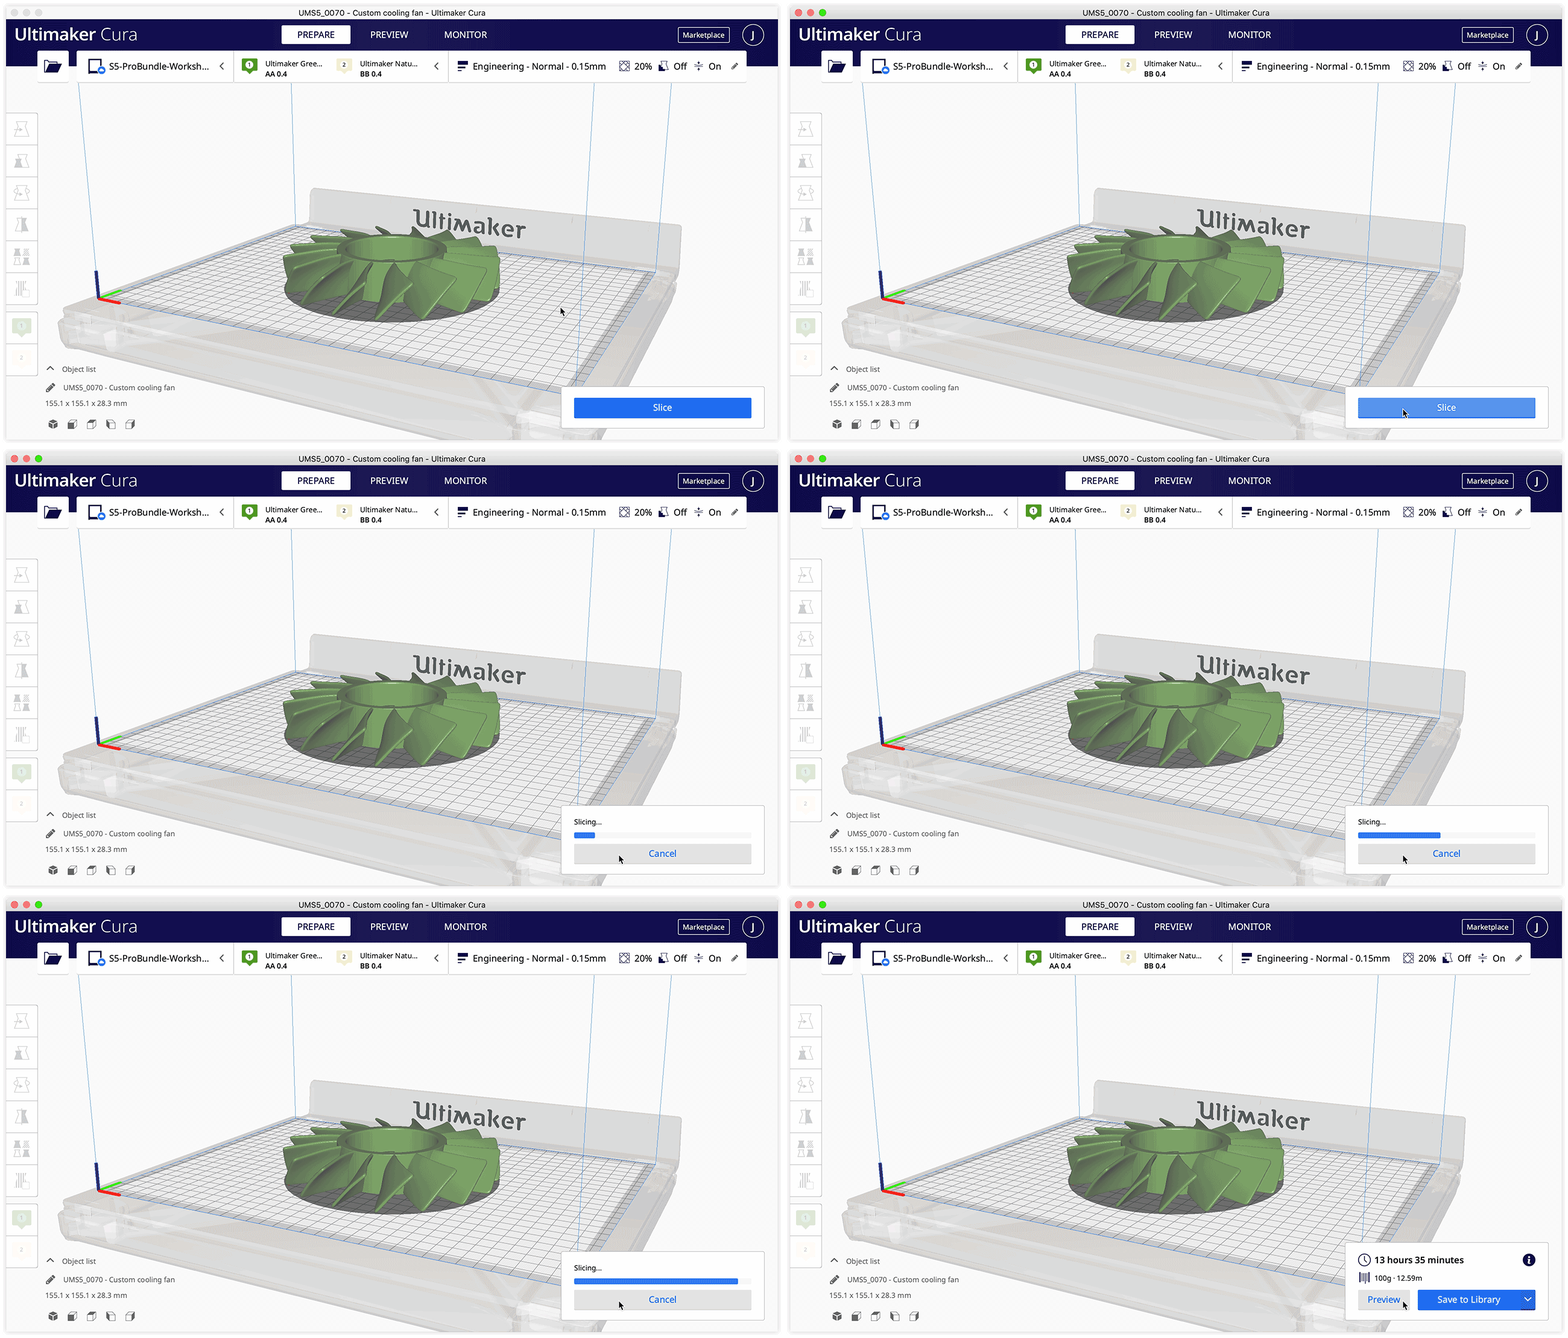
When you are satisfied with the chosen profile and settings, click the Slice button. This can take a few moments, depending on the size and complexity of the 3D model.
It is always recommended to check the slicing result in the Preview mode to see if the print will come out as expected. This is especially true when working with more complex models or highly specific print strategies. You can learn more about the Preview mode in this article.
Print or save
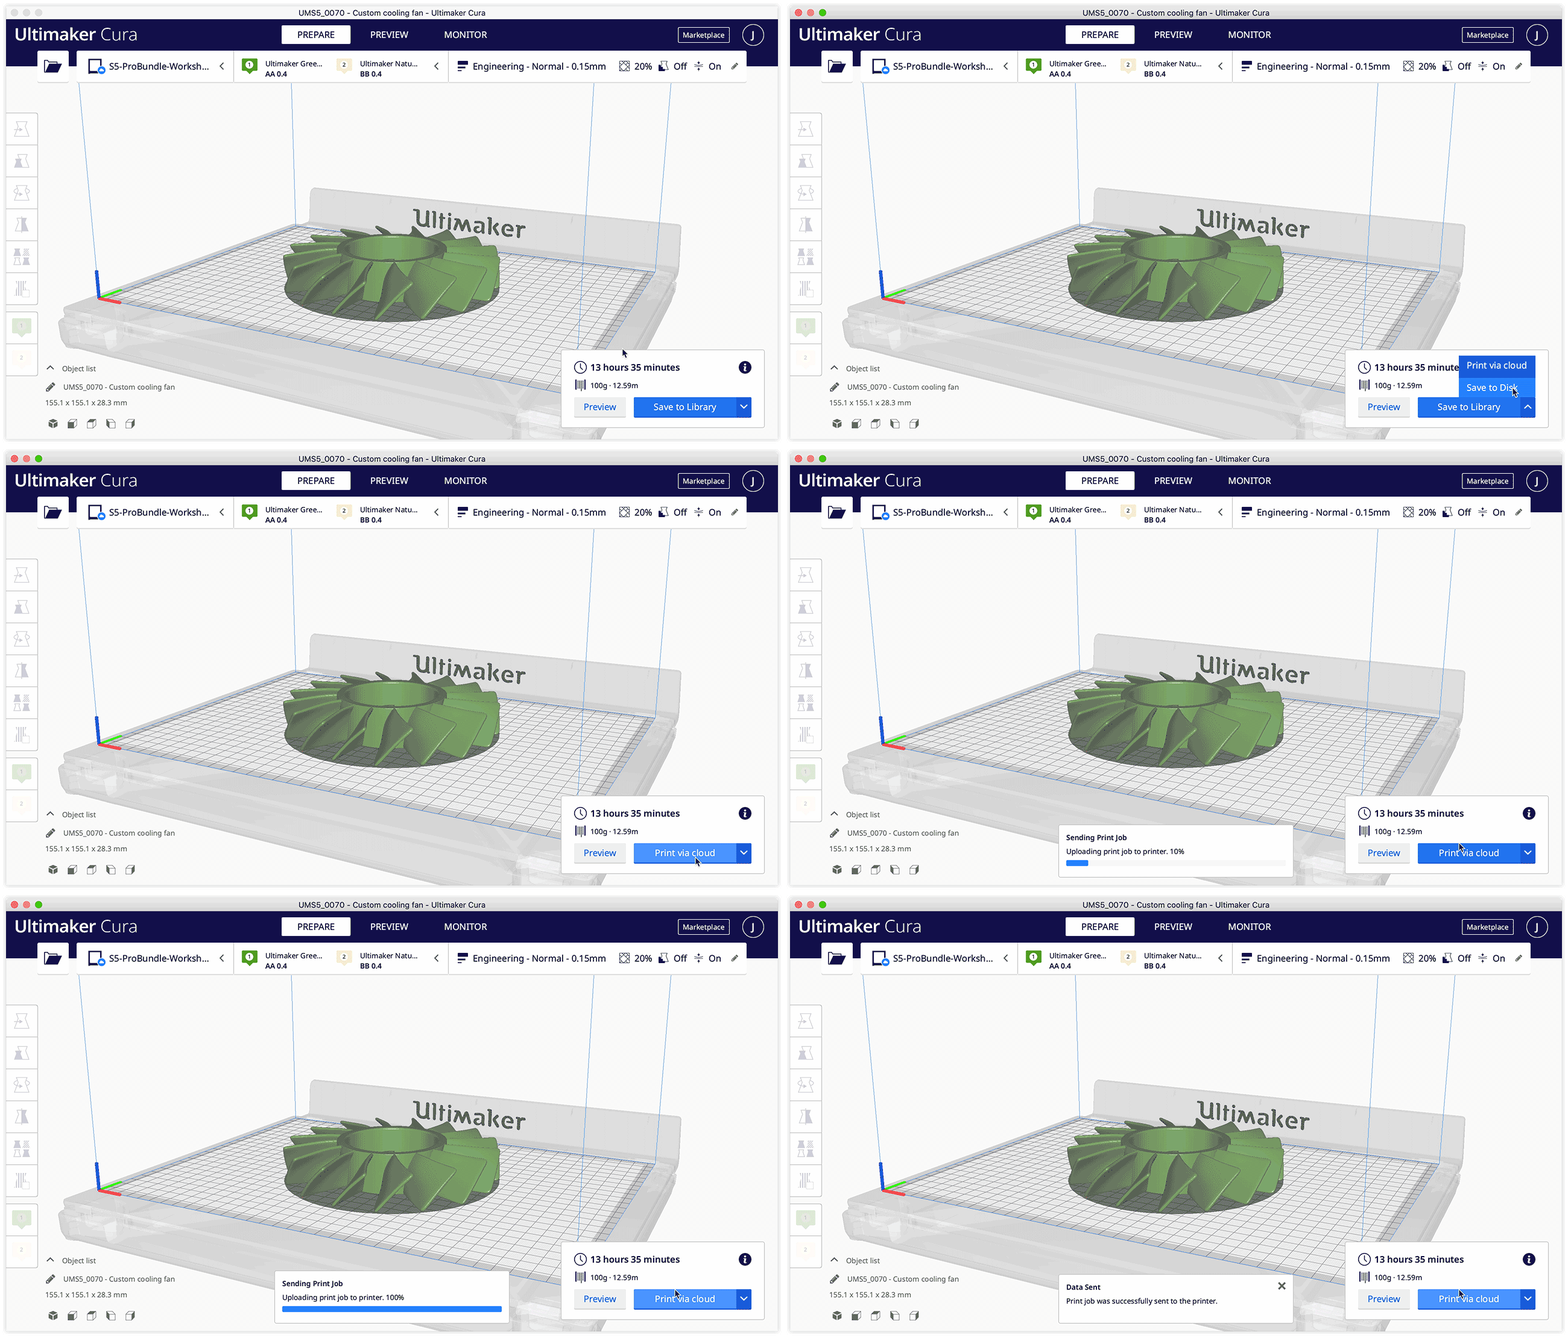
To start your print immediately or send it to a print queue, click the Print via cloud button in the action panel. If necessary, you can change the options for the button by selecting the dropdown arrow. After you select print, you will be shown an overview of the compatible printers. Choose one and click the printer icon to send the print job via the cloud.
Tip: Print jobs prepared for the UltiMaker S5 can also be printed on an UltiMaker S7 and vice versa.
If the printer has a matching configuration and is idle with no other waiting print jobs, the print will start straight away. If the selected printer is currently busy, the new job will be placed in the queue. If the configuration of the printer does not match with the received print job, the printer will await a change of material(s) and/or print core(s) before the job will start.
Alternatively, you can also save the print job and project file to the Digital Library. Here, you can easily collaborate with team members. Learn more about the Digital Library
Monitor your print progress
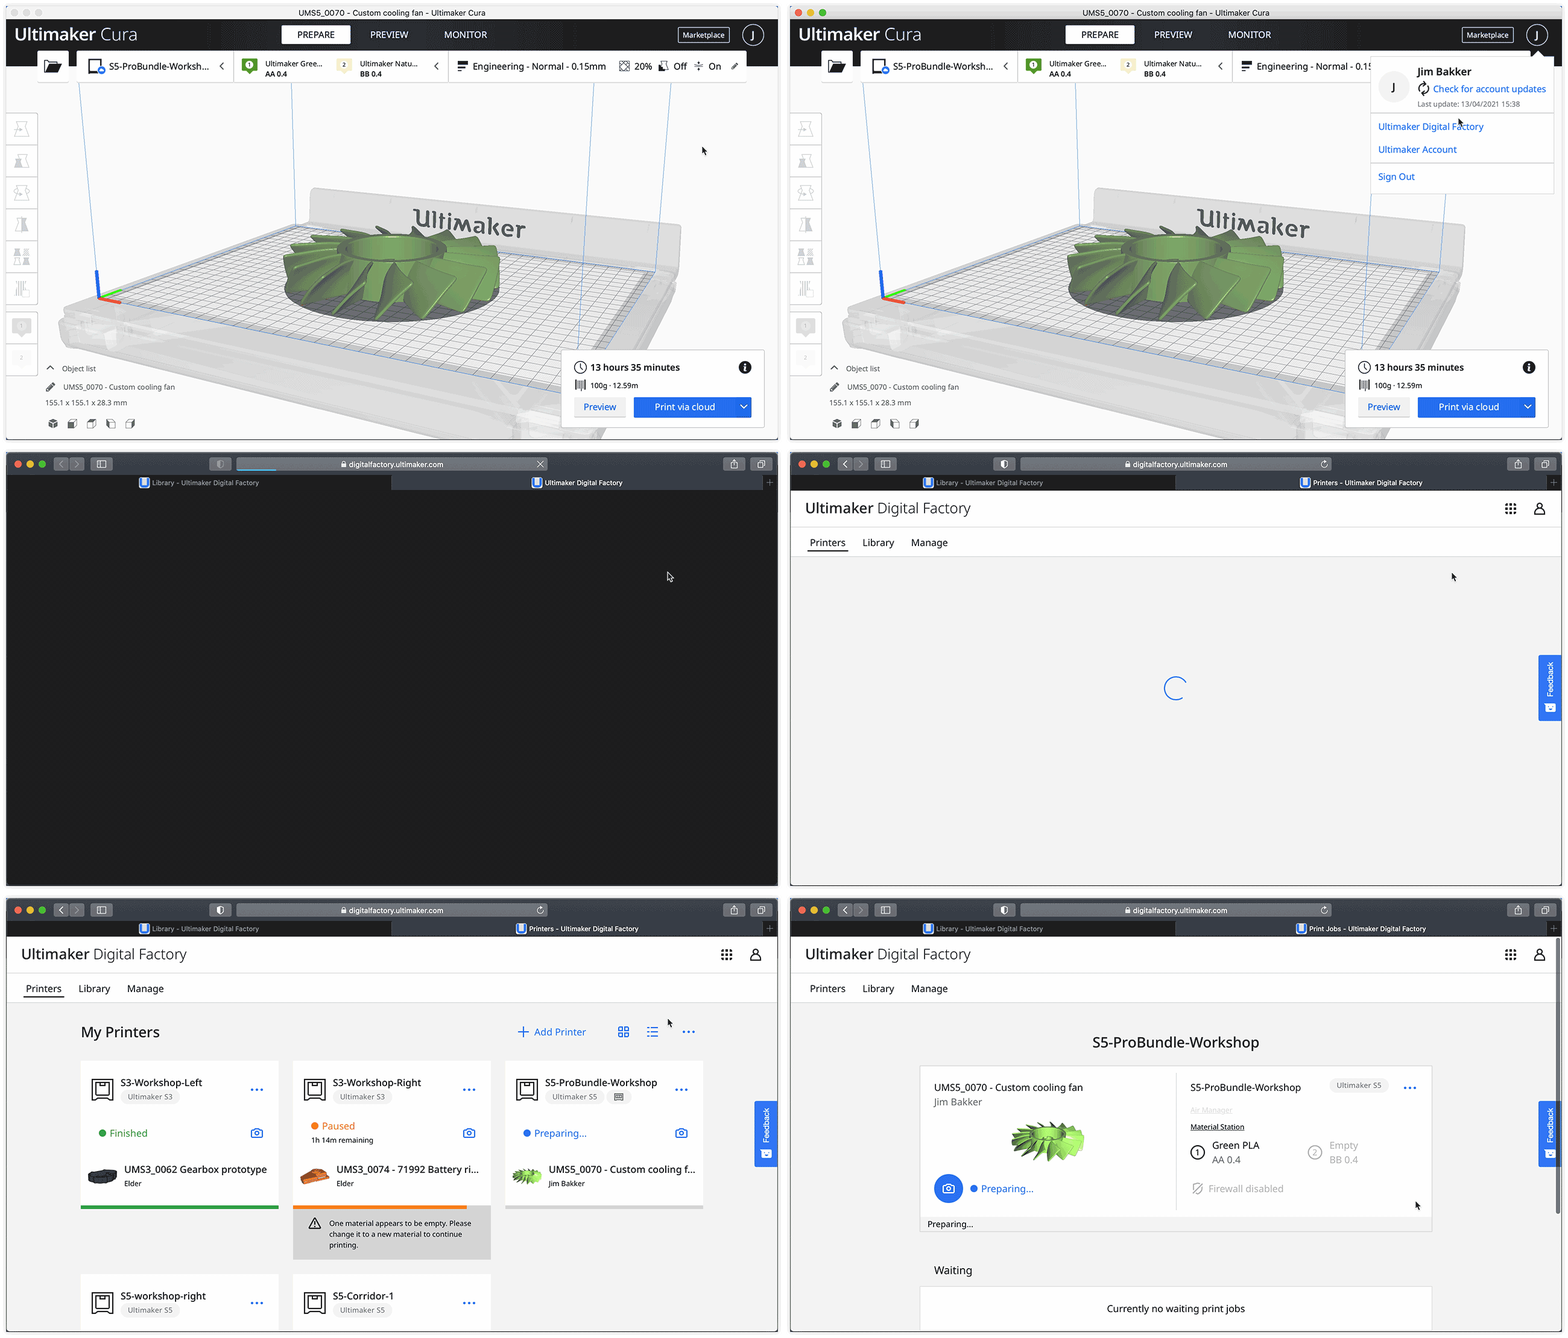
When the print is sent, you can click on the Monitor tab or your account icon to easily navigate to the Digital Factory. On the Printers page you can see all printers you have access to. Click on a printer and monitor the status of your print job.
You can see the status, the print progress, and the expected finishing time. For the Ultimaker 3 and S series printers, you can also check the camera feed. This refreshes every 10 seconds. If necessary, you can also pause or abort the print job remotely.
As the print job is progressing, feel free to prepare new projects and add them to the queue!


