UltiMaker 3D printers with an active network connection can be connected to UltiMaker Cura in two ways: add a new networked printer or connect an already configured printer in UltiMaker Cura.
Tip: Networked printers are configured automatically, which provides benefits to the 3D printing experience. Learn more here.
This article explains how to connect UltiMaker printers to Cura via the local network. It is strongly recommended to set up your UltiMaker 3D printers in the Digital Factory to benefit from additional features, increased ease of use, and a more efficient workflow. If you can't or don't want to use Digital Factory but want to use a local network connection instead, continue reading this article.
Tip: First, ensure that your UltiMaker printer is connected to the network. This is part of the welcome setup, but you can always set up a new connection or change the network later. Learn here how
Add a new networked printer
The easiest way to connect your networked 3D printer to UltiMaker Cura is by adding your printer via the Printers panel and selecting Add printer. Cura will show a list of all UltiMaker printers available on the local network. For more information, follow the instructions on how to add a networked printer in this article.
Connect an already available printer
If you have already added an UltiMaker printer with network capabilities from the list of non-networked printers, you can connect it to Cura later. First, connect your printer to Wi-Fi or Ethernet, of course. You can connect to a printer that is already added via Manage printers in the Printers panel in the UltiMaker Cura interface.
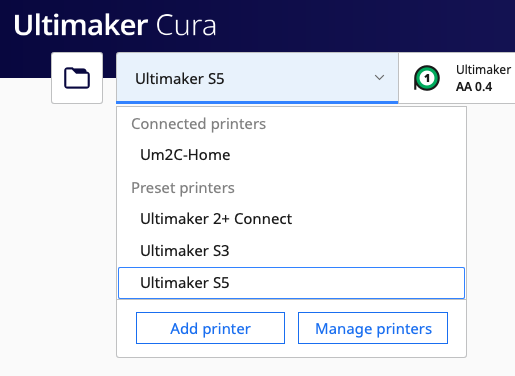
The printer management window shows a list of all printers currently available in UltiMaker Cura. Extra options are displayed for the active printer.
Tip: If you want to connect to a different printer than the one that is currently active, click the icon with the three lines and select Activate.
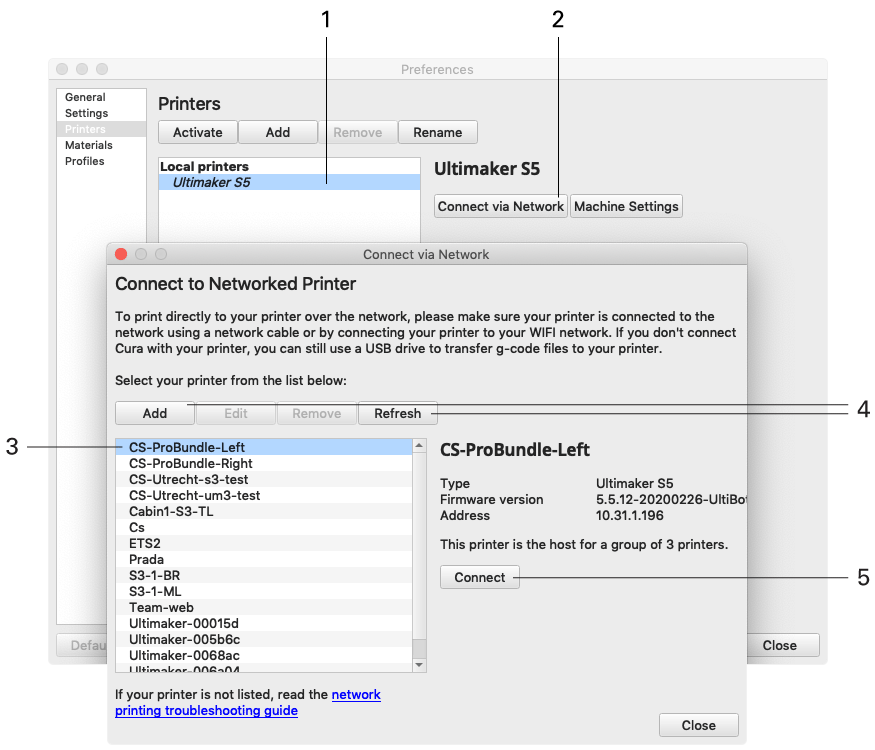
- Select the local printer you would like to connect to and ensure it is active (shown in italics).
- Select Connect via Network to open the network connection window.
- Select your printer from the list of available networked printers. This list is automatically populated with printers available on your local network
- If the printer does not show up, try refreshing the list manually. Alternatively, the Add button allows to manually enter the IP-address of the printer to connect to it.
- Select Connect to establish the network connection.
Note: The Ultimaker 3 and S series printers can be added locally. This is not available for the UltiMaker 2+ Connect, as this printer requires a cloud connection.


