Under-extrusion is when the printer is unable to supply the right amount of material. This is visible in the print as missing layers, very thin layers, or small holes in the surface. The extrusion is influenced by many factors, so it can sometimes be difficult to troubleshoot.
Tip: This article specifically applies to UltiMaker 3D printers, including the 2, 3, and S series. However, most of the advice on this page can also be applied to other printer types.
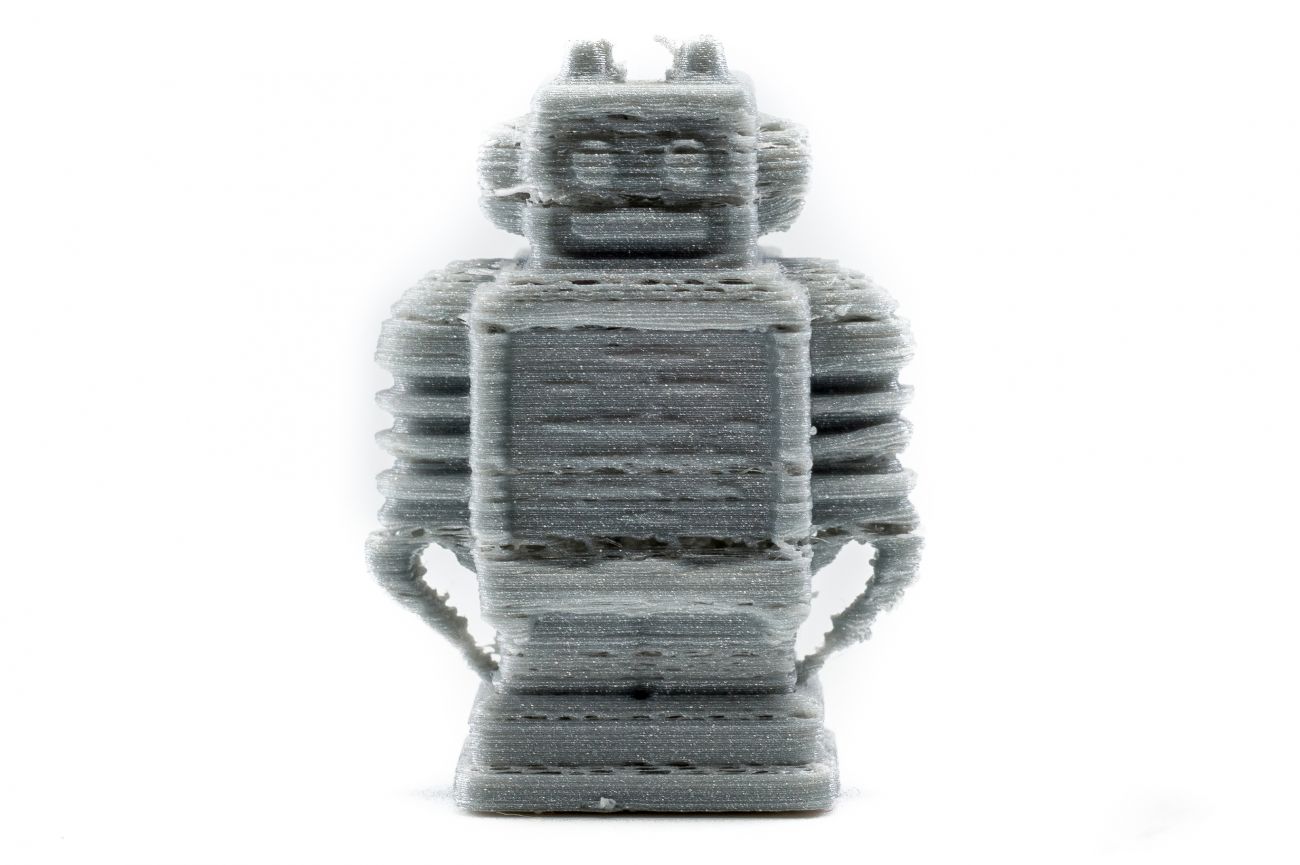
Note: If your print is just missing a single layer in the print, this may not be under-extrusion. Especially on the UltiMaker 2 series, if the missing layer is between 1 and 2 cm into the print, there could be a problem with the bearings in the Z stage. Contact support for more information and assistance.
Extrusion problems can be related to the material used, software settings, hardware components, or a combination of these. This page lists several tips for all these areas to improve extrusion and print quality.
Material type and quality
The material properties are strongly related to the software settings, which will be covered in the next section. But, one of the first things to check is the material quality.
Material storage
Ensure that the material has been stored properly when not in use. Keeping opened spools in the wrong environment (especially too warm or too humid) can decrease the material quality. Check this page for storage recommendations for UltiMaker materials, or consult the material supplier when using third-party materials.
Tip: When putting away a used spool, insert the end of the filament through one of the holes in the spool or affix it to the coil to prevent the material from getting tangled.
Filament diameter
Always check that the actual material diameter matches with what is specified. UltiMaker 3D printers are designed for use with 2.85 mm filament and material profiles have been set up for this diameter. If you suspect the filament is thicker or thinner than 2.85 mm, you can measure it with calipers and update the material profile.
Note: A deviation of +/- 0.1 mm is acceptable. It is not recommended to exceed this tolerance. Never use filament that is > 3 mm.
If the material has inconsistent sections with extreme deviations, it is not recommended to use this spool for printing. This is most likely caused by a production error. Contact support if you see inconsistencies in UltiMaker material, or reach out to the material supplier when using third-party material.
Material and slicing settings
Firstly, it is important that the material selected in UltiMaker Cura matches the material installed on your printer. Different material types can have very different print settings; especially the temperature and speed relate to (under)extrusion.
Note: On the UltiMaker 2(+) series, the material profile is selected on the printer instead of in UltiMaker Cura. This is not the case for the UltiMaker 2+ Connect.
The main factors that contribute to the flow rate of the material are the printing temperature, the nozzle size, the print speed, and the layer height. The flow rate is the volume of material extruded per second.
- Temperature. Too low or too high nozzle temperatures can easily lead to problems. When the temperature is too low, the material will not melt properly. Cooler plastic is more viscous and requires higher pressures to push it through the nozzle. When the required pressure becomes too high, under-extrusion will start due to material grinding or the feeder skipping back. On the other hand, if the temperature is too high, this can cause the material to degrade inside the hot end, which will lead to clogs. When using third-party materials, please check the spool or consult with the manufacturer for the correct printing temperatures.
- Nozzle size. Make sure to select the correct nozzle size in UltiMaker Cura, so it matches the nozzle or print core installed on your printer.
- Print speed. The speed at which the material is forwarded relates closely to the temperature. When increasing the speed, make sure to also increase the nozzle temperature. Never exceed the maximum print temperature that is specified by the manufacturer. When printing slower, a lower print temperature will maintain the correct material properties during printing.
- Layer height and line width. Like the print speed, the layer height and the line width influence the volume of material that is extruded. Try to find a good balance between the amount of material extruded and the chosen printing temperatures.
Hardware components
If you have verified that your material and slicing settings are not causing the extrusion problems, let's check the hardware components. UltiMaker 3D printers have a Bowden setup. This means that the 'extrusion train' is built up of several components: the feeder, the Bowden tube, and the print head.
The feeder
The feeder is the part of an UltiMaker 3D printer that 'feeds' or forwards the material from the spool to the print head. The feeder grips the material with a knurled wheel to push it forward. In case of extrusion problems, you may notice the feeder skipping back or grinding the material.
Tip: For in-depth information about troubleshooting problems with the feeder, please visit this page: How to fix feeder issues
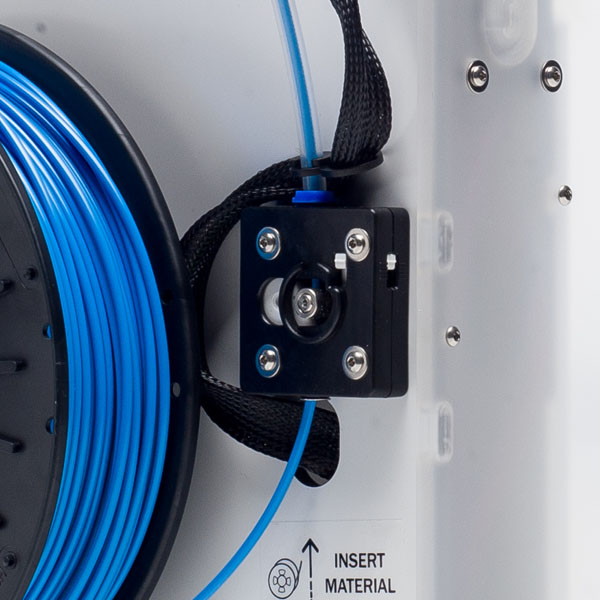 | 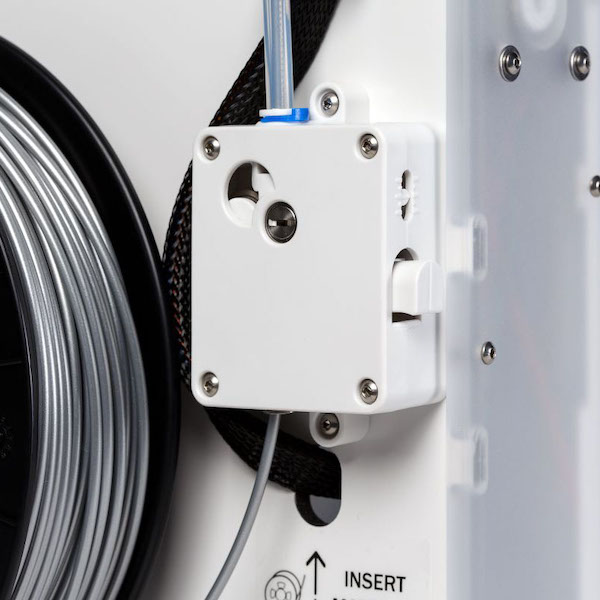 | 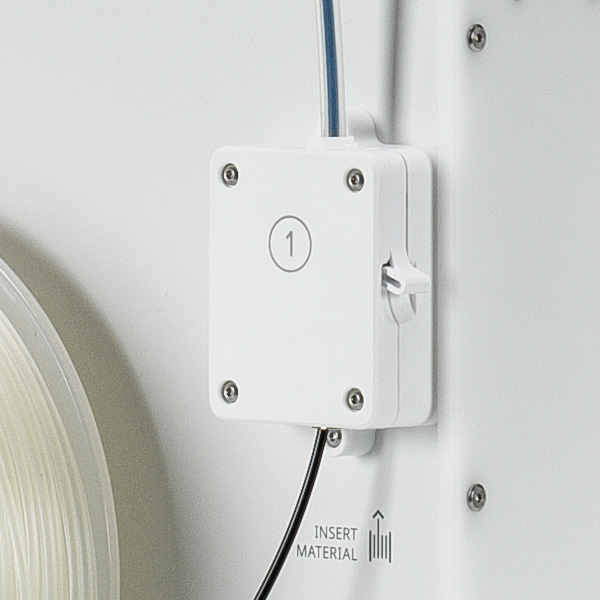 |
| UltiMaker 2 series feeder | UltiMaker 2+ and UltiMaker 3 feeder | UltiMaker S series and UltiMaker 2+ Connect feeder |
The first thing to check on the feeder is the feeder tension. The feeders of UltiMaker 3D printers have a tension indicator. For UltiMaker materials, this should be set in the middle. If the tension is too low, material can slip inside the feeder. If the tension is too high, material can be ground down and get stuck in the feeder. You can adjust the feeder tension using a 2 mm hex screwdriver in the top of the feeder housing.
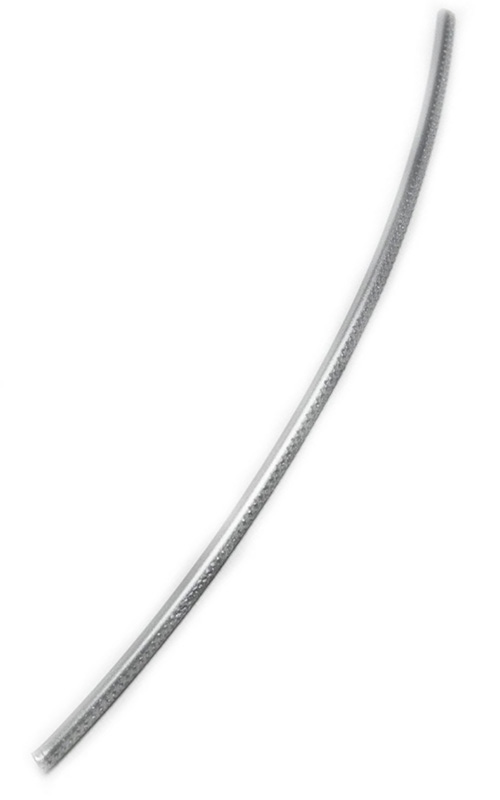 | 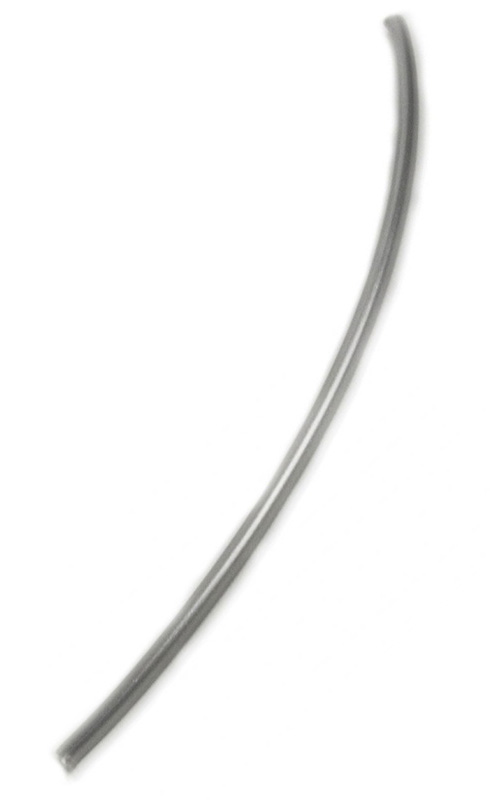 | 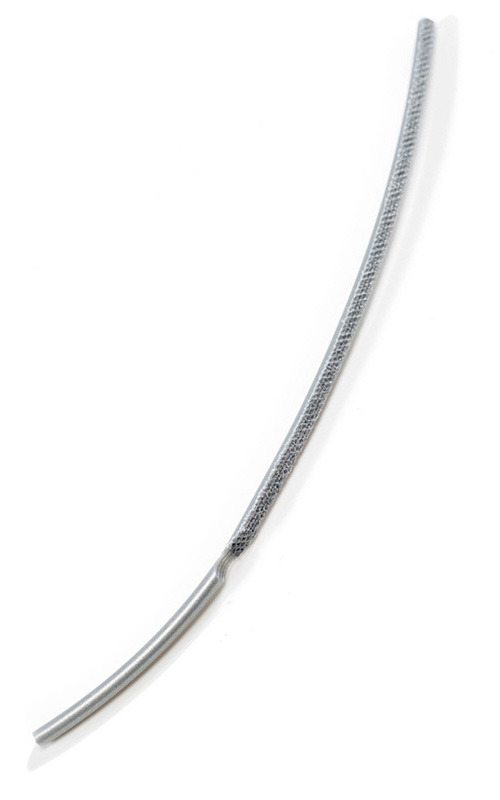 |
Good
Consistent marks on the filament indicate good feeder tension | Too low
No visible marks on the material indicate too low feeder tension | Too high
Flattened material or grinding indicates too high feeder tension |
Tip: Learn more about the correct feeder tension and how to adjust this in this article.
In addition to checking the feeder tension, also make sure to timely and properly clean the feeder according to the maintenance instructions. Small filament particles can accumulate inside the feeder and on the knurled wheel, which can reduce the grip on the material.
Tip: For instructions on how to clean the feeder, check your printer's user manual, or navigate to the Maintenance section for your UltiMaker 3D printer model in the 3D printers category of this knowledgebase.
The Bowden tube
The next component in the extrusion train is the Bowden tube. This tube guides the filament from the feeder to the print head. It is important that the material can pass through without too much friction.
If small particles have accumulated inside the Bowden tube (for example, after you have experienced grinding), this will increase the friction on the material. These particles can end up in the hot end and printed object and can also cause under-extrusion if the friction becomes too high. Clean the Bowden tube according to the instructions on this page:
How to clean the Bowden tube
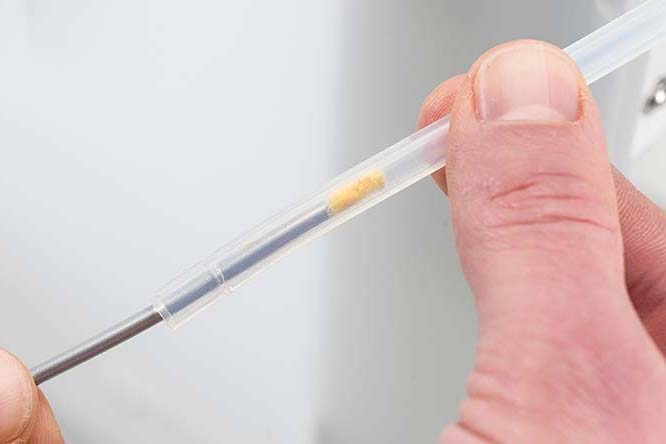
Additionally, check the inside of the tube for scratches and other signs of damage. If the tube is damaged, it must be replaced. For the best results, it is recommended to check and replace the Bowden tube(s) after about one year of printing.
Tip: Check the Maintenance section for your UltiMaker 3D printer model in the 3D printers category of this knowledgebase for additional advice.
The print head
The last part of the extrusion train is the print head. The material is heated up inside the hot end (on UltiMaker 2 series printers) or the print core (on the UltiMaker 3 and S series). The filament will then extrude from the tip of the nozzle. In case of extrusion problems, please check the following:
Blocked nozzle
Dirt or carbonized material inside the nozzle can prevent material from flowing through consistently. The nozzle can get gradually blocked over time, or when material is left in the hot nozzle for a while without extrusion.
In this case, you can replace the nozzle or print core, but the blockage can usually be resolved easily by cleaning the inside of the nozzle. You can do this with the 'hot and cold pull' method. This is a simple process that only takes a few minutes and does not require disassembly of the print head. You will only need to disconnect the Bowden tube. The process is very similar on all UltiMaker 3D printers. Follow the instructions on the pages below:
After cleaning the hot end or print core, reinstall the Bowden tube, reload your material and you can continue printing.
PTFE/TFM coupler
The print heads of the UltiMaker 2 series (including the UltiMaker 2+ and the UltiMaker 2+ Connect) are built up of individual components. Between the 'hot end' and 'cold end' of the print head is a coupler. This white part is made of PTFE or TFM. This part can wear over time due to the pressure in the hot end and the high temperatures from the heater block.
In case of extrusion problems, it is recommended to check this part and replace it when it is damaged, burnt, or deformed. This requires disassembling the print head. Follow the step-by-step instructions on the pages below:
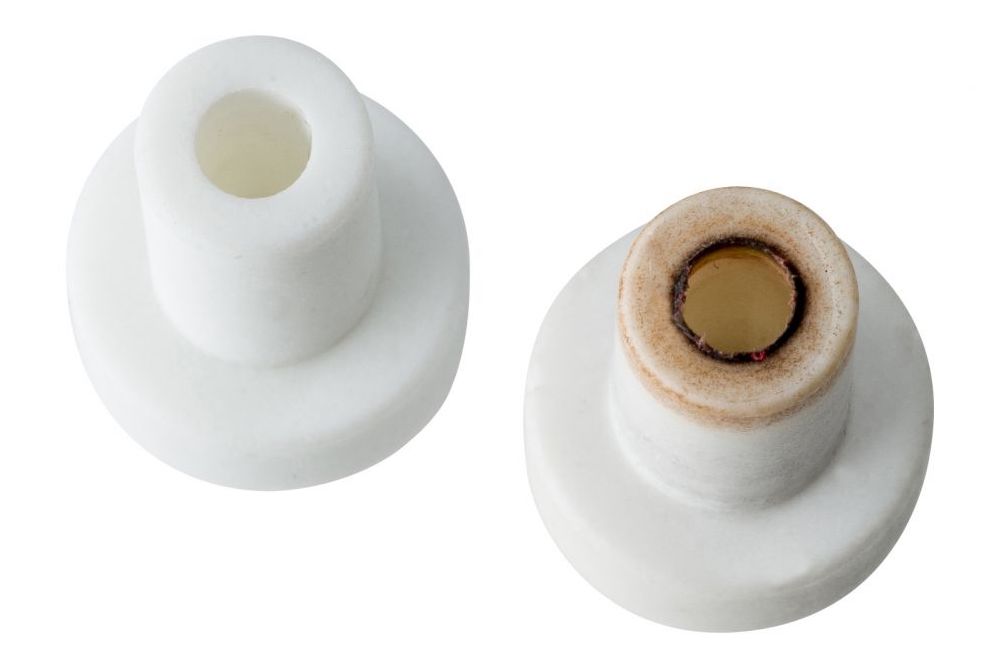
The image above shows a new coupler on the left and a worn-out coupler on the right. Note the burnt and frayed edge on the inside of the coupler.
Note: This does not apply to the UltiMaker 3 or S series printers. These printers use print cores which are built up differently and cannot be disassembled.
Fan
UltiMaker print heads have two different types of fans: two model cooling fans and a print head cooling fan. The fans at the side of the print head cool the model during printing to ensure that the deposited layers retain their shape. The other fan cools the print head. This fan is located at the back of the print head on all UltiMaker 2 series printers and at the front of the print head on the UltiMaker 3 and UltiMaker S series printers.
This fan should always spin if the nozzle is hot. It prevents the heat from the nozzle from traveling too far upward. If the fan is not functional, the filament may swell up inside the print head and get stuck. Never start a print if the fan is not working correctly.
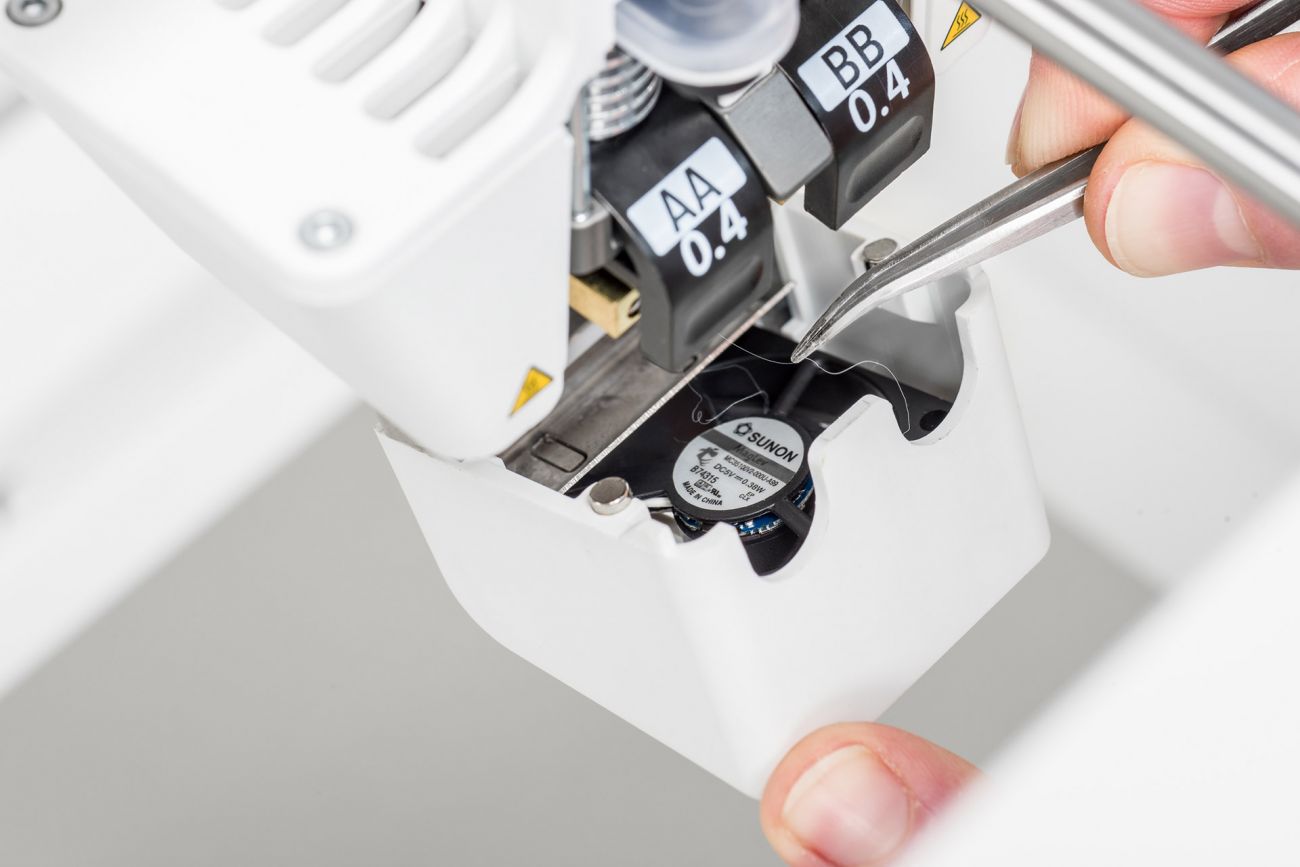
To check the fan, manually increase the nozzle temperature to 60 ºC or higher. On the UltiMaker 2 series, look at the back of the print head to see if the fan is spinning. For the UltiMaker 3 and S series printers, you can open the print head's front fan bracket to check the fan. If it is not spinning, turn off the printer, check if anything is stuck in the fan, and clean it if necessary. If this does not help to resolve the issue, the front fan must be replaced. Contact support or your local reseller for further assistance.
Note: Especially the front fan of the UltiMaker 3, UltiMaker S3, and UltiMaker S5 can be blocked by strands of filament. These are sucked into the fan during printing and can get stuck between the fan's blades. Check and clean the front fan at least every three months according to the maintenance instructions. See the instructions here: Clean the UltiMaker 3 front print head fan and Clean the S series front print head fan
Need further support?
If the tips on this page have not helped to resolve the extrusion problems, contact support for further assistance. For the most efficient troubleshooting, please share as much relevant information as possible. This can include:
- Pictures of the print results
- Pictures of the print head, Bowden tube, and feeder
- Your UltiMaker Cura project file
- Which steps have you already taken and what was the result?


