|
Note: This article contains information about UltiMaker 2.85 mm PET CF material. Similar quality cannot be guaranteed with third-party filaments. This material can be used on Factor and S Series printers, but is not compatible with older-generation UltiMaker printers, Method, Sketch, or Replicator.
UltiMaker PET CF is a carbon fiber-reinforced version of Polyethylene Terephthalate (PET). It has the same reliable printability as PETG, but with enhanced stiffness, chemical resistance, and temperature resistance (up to 180 °C after annealing). It is therefore the go-to composite material for 3D printing in industrial environments for functional prototypes and manufacturing aids.
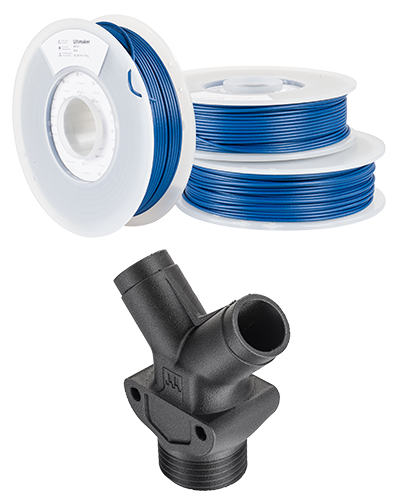
UltiMaker PET CF is available in the following colors:
|  |
In this article:
- Compatibility: Information about printer, print core, and dual material compatibility
- Printing recommendations: Overview of the advised temperatures, adhesion, and environment
- Maintenance and troubleshooting: Advice for printer maintenance and material storage
- Health and safety: Important information about printing safely with UltiMaker PET CF
|
Related articles for UltiMaker PET CF:
|
Compatibility
UltiMaker PET CF can be printed on Factor and S Series; these printers are prepared for printing abrasive composite materials. Use an abrasion-resistant print core to print PET CF (CC, CC+, or HT). See the compatibility table below:
| Printer | Compatible print cores |
|---|
| UltiMaker Factor 4+ | CC+ 0.6, CC 0.4 (experimental), CC 0.6 (experimental), HT 0.6 (experimental) |
| UltiMaker Factor 4 | CC 0.4, CC 0.6, HT 0.6 |
| UltiMaker S6 and S8 | CC+ 0.6, CC 0.4 (experimental), CC 0.6 (experimental) |
| UltiMaker S3, S5, and S7 | CC 0.4, CC 0.6 |
Printer and print core compatibility notes
- UltiMaker PET CF has optimized settings for the Pro Bundle, Air Manager, and Material Station. This ensures a good end-of-filament and end-of-print experience in the Material Station and an optimal build environment with the Air Manager. Please make sure to use the latest version of UltiMaker Cura and keep the printer's firmware up to date. The minimum Cura version that includes PET CF is 5.4.
- For the high-speed printers running the Cheetah motion planner (UltiMaker S6, S8, and Factor 4+), the CC+ 0.6 print core is preferred; profiles for the standard CC print cores (and HT for Factor 4+) are experimental.
- For the S6 and S8, Cura also offers compatibility with the CC+ 0.4 print core. These profiles are still available in Cura, but this print core has been discontinued due to reliability concerns. Use the replacement CC+ 0.6 print core instead.
- Use a CC 0.4 for detailed prints and a CC 0.6 for faster printing. Note that increased maintenance (nozzle cleaning) is needed for the CC 0.4 nozzle to prevent clogging and extrusion problems.
- UltiMaker PET CF is not supported on the UltiMaker 2(+) series, UltiMaker 3 series, or Original(+). These printers are not abrasion resistant; components such as the feeders and nozzles will wear at an excessive rate when used with composite materials.
Dual material combinations
PET CF can also be used for dual-extrusion prints, in combination with a support material or another color of PET CF.
Support materials:
- PVA
- Breakaway
- Self-support (PET CF)
| Dual combinations:
- PET CF (dual color)
- TPU 95A (experimental)
|
Note: The experimental and not supported combinations have not been verified, since limited use cases are available. Printing PET CF in combination with TPU 95A is listed as experimental because of the potential oozing of TPU 95A in dual prints. Make sure to pre-dry your PET CF and TPU 95A for better results.
Printing recommendations
Although UltiMaker PET CF is one of the easiest to print and reliable composites, PET CF is an advanced material. Engineering materials offer advanced properties but may require more printing experience to achieve consistent results, even when using default settings.
Tip: Always use the latest version of UltiMaker Cura and make sure that your 3D printer is updated with the latest firmware version to include the correct material profile for UltiMaker PET CF.
Cura profiles
Note: Profiles for PET CF are included in UltiMaker Cura 5.4 and higher and S Series firmware 8.2 and higher.
UltiMaker PET CF supports intent print profiles. The Engineering profile is optimized for dimensional accuracy, and the Balanced profile offers a good compromise of all settings. PET CF also has an Annealing profile for when the print will be post-processed. This profile retains the dimensional accuracy of the printed part after annealing and improves strength, stiffness, and thermal resistance.
Note: No Visual intent profiles are available for PET CF, as this is intended as an engineering material.
Temperatures
UltiMaker PET CF prints at nozzle temperatures between 265 °C and 270 °C. Depending on the selected profile in UltiMaker Cura, there are small differences in the nozzle temperatures. These have been optimized to print properly with the selected print core size and layer height profile. The build plate temperature is set to 80 °C for reliable adhesion. This is the same for all supported UltiMaker printers (Factor and S Series).
Tip: The temperatures are automatically set correctly based on the printer, nozzle size, and profile you select in UltiMaker Cura.
Adhesion
See the advice below regarding the use of adhesives on the build plate. The recommendation depends on the build plate type.
|
Glass build plate (S3, S5, S6 Glass)
For reliable adhesion and to reduce the chance of the glass plate chipping, a thin layer of UHU glue should be applied to the glass plate. This glue stick was included with the printer.
Caution: The use of glue on the glass plate is recommended to improve adhesion and thereby prevent the chance of print failure and printer damage. Additionally, the use of glue can prevent over-adhesion that could otherwise lead to damage to the glass build plate.
|
|
Flexible build plate (S6 Flex, S7, S8, Factor 4, Factor 4+)
When printing PET CF on the flexible build plate, prepare the plate with 3DLac Plus or Magigoo Supergrip. This improves adhesion and protects the surface of the build plate.
Caution: Printing PET CF on the flexible build plate without the additional adhesives mentioned above can damage the plate when the printed parts are removed.
|
In UltiMaker Cura, the default build plate adhesion method for all PET CF profiles is a brim. A brim is made of extra lines printed around the perimeter of the initial layer of your 3D print to ensure successful adhesion to the build plate, even for larger models.
When the print is finished, let the build plate cool down before attempting to remove the print. A warning bar is shown on the display until the build plate temperature drops below 60 °C, but it is recommended to let the plate cool down completely, both for safety and to make print removal easier.
Print environment
PET CF does not require additional accessories to create a stable printing environment. Simply ensure to keep the glass door(s) closed during printing to protect the print from external drafts.
Annealing
Annealing means the treatment of a 3D printed part in an oven. For UltiMaker PET CF, annealing will improve its mechanical properties and, most importantly, its heat resistance from 80 °C to 180 °C. UltiMaker Cura has specialized annealing intent profiles with the best settings that ensure dimensional accuracy remains intact.
Tip: Read more information about annealing on this page.

Improve Z strength
Due to the fiber orientation, the strength and stiffness of the printed object are the highest in the XY and YZ planes. Therefore, it is important to take the orientation of the part into account during the design and/or slicing process.
Tip: More tips and tricks to improve Z strength can be found on this page.
Maintenance and troubleshooting
For the best results with UltiMaker PET CF (as with any material), apply general maintenance to your UltiMaker printer(s). Find the recommended preventive maintenance schedule for your printer type here:
Regularly clean the inside of the print cores using the hot and cold pull process. For the CC, CC+, and HT cores, this is recommended fairly frequently, about every 100 printing hours. This prevents buildup of fibers from composite materials. Note that cleaning the CC 0.4 print core is especially important, due to the small nozzle size.
Also, ensure to keep the nozzle tips clean on the outside. Manually heat up the print core and use tweezers to pluck away any material stuck to the outer surface of the nozzle. This improves bed leveling reliability and extends the lifespan of the silicone nozzle cover.
Because PET CF uses a relatively high nozzle temperature, this can increase wear on the nozzle cover. Regularly check the nozzle cover for signs of wear and replace it if needed. Printing with a damaged or missing nozzle cover can cause temperature inconsistencies or errors, or lead to print failures, which may also damage your printer (such as a flooded print head).
In case of extrusion or print quality issues, check if the filament is dry. If the material has absorbed moisture, you may hear popping noises as the filament extrudes. Excessive stringing and oozing, layer inconsistencies, or dimensional inaccuracy can also be signs of elevated moisture content. Dry the material in case of issues, or pre-dry the material preventively before use for the best results. PET CF must be dried at 70 °C for 10–20 hours, depending on the moisture level. Always properly store the spools when not in use. Place the spool in a resealable bag, in a cool and dry place, and out of direct sunlight.
Tip: Learn more about drying in this article.
For a reliable loading process, especially when using the Material Station, ensure the filament has a clean, pointy tip. Use cutting pliers or wire cutters to remove any bent or damaged sections from the end of the spool, then cut the filament at an angle. A double cut will create a sharp tip that feeds smoothly.
Health and safety
UltiMaker PET CF emits low levels of gases and particles when 3D printed in accordance with the recommended temperatures mentioned above. To ensure a comfortable and healthy working environment, it is always recommended to print in a well-ventilated area.
The use of an Air Manager is highly recommended in smaller rooms or rooms with multiple printers. The UltiMaker S7, S8, and Factor Series feature integrated air management systems for increased safety and air quality. For the UltiMaker S5 and S6, consider installing the optional S Series Air Manager (add-on).
Tip: For more information, download the safety data sheet for UltiMaker PET CF here.
Caution: UltiMaker PET CF uses relatively high temperatures for both the nozzle and build plate. Never reach inside the printer while it is in operation, and never touch heated components.
Factor and S Series printers include clear visual indicators to show when it is safe to touch:
- Build plate: When the build plate temperature is above 60 °C, an orange warning bar appears at the top of the display. The bar disappears once the build plate cools to a safe temperature. Keep in mind that 60 °C can still feel warm to the touch, so handle the build plate with care.
- Print cores: The print core status is indicated by the LEDs behind the cores. When a print job is not in progress but a print core is still hot (heating up or cooling down), the LED glows or pulses orange. When it turns blue, the print core has cooled and is safe to handle.


