UltiMaker S series printers are versatile. The S series offers peripheral products that enhance the workflow and functionality of the printers:
- The Air Manager enhances safety by filtering UFPs generated during the printing process and provides a physical barrier from hot and moving components.
- The Material Station enables 24/7 uninterrupted printing by automatically managing up to six spools in a humidity-controlled chamber.
The Material Station is compatible with all S series printers, except the UltiMaker S3. The Air Manager add-on can be installed on the UltiMaker S5 and S6. The S7 and S7 feature an integrated Air Manager.
The combination of the printer with Material Station and Air Manager (add-on or integrated) is called the Pro Bundle. This article will take you through the installation steps for all devices.
In this article:
- Installing the printer: An overview of where to find hardware installation instructions for your printer type.
- Installing the Material Station: How to connect this device to your S series printer.
- Installing the Air Manager: Assembling the different components (S5 and S6 only).
- Connections: How to correctly connect all cables.
Installing the printer
Before you get started with the peripherals, set up your printer. The unboxing and installation steps are slightly different for each model, but always take the following into account:
- It is recommended to remove the packaging materials with the boxes placed on the floor for safety. Always retain all packaging for warranty purposes.
- Due to the size and weight of UltiMaker S series printers, they must always be lifted by at least two people during unboxing and installation.
- Choose a suitable location to place the Pro Bundle. Leave sufficient space behind the devices for unrestricted airflow of the Air Manager fan and Material Station dehumidifier exhaust.
- Install the products on a flat, stable surface that is capable of carrying the weight of the total system (~ 50 kg / 110 lbs). Take proper measures to prevent the Pro Bundle from falling.
Find the installation instructions for your S series printer here:
Tip: Some installation steps are different when the printer is set up with the peripherals (for example, the included spool holder will not be used). These differences are indicated in the installation instructions.
Installing the Material Station
Tip: Instructions for the installation of the Material Station are also in the quick start guide that was delivered with the product.
To start with the Material Station installation, first unbox the machine. The packaging is similar to S series printers; remove the locking clips at the bottom of the box and slide the outer cardboard sleeve up and off the Material Station. Do not cut open the box at the top. Collect all packaging materials (please retain these for warranty purposes), and place the bag with accessories aside. You will need these during the installation.
Place the Material Station on a flat and stable surface. Make sure that you have sufficient space around the machine for installing the printer on top. Take into account that most installation steps are at the back of the Material Station and printer.
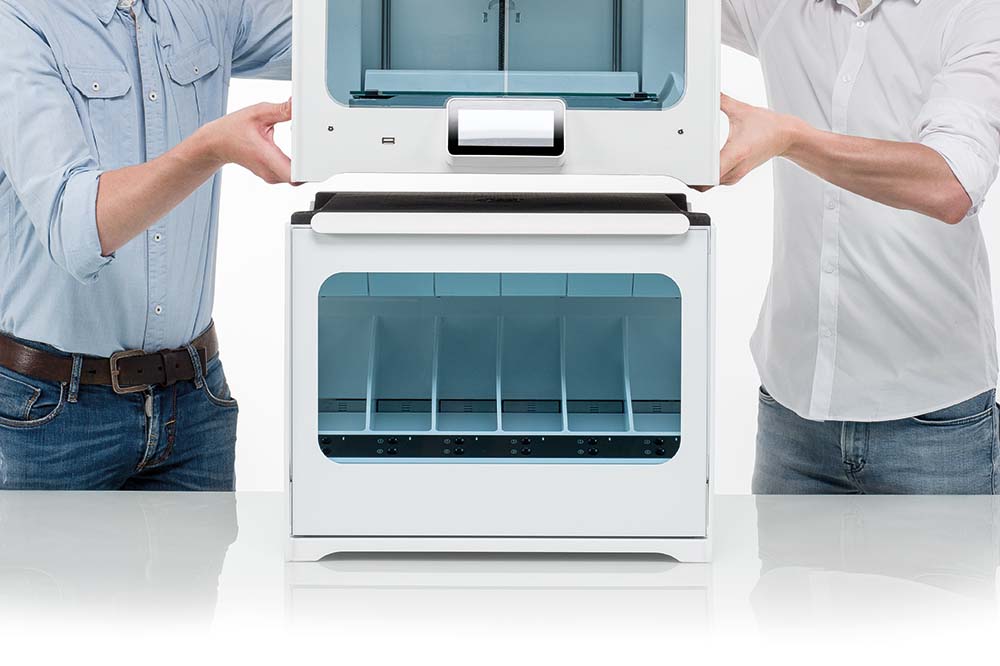
Caution: The printer must be lifted by at least two people during installation. Ensure that the printer and the Material Station are correctly aligned and that the Material Station's Bowden tubes do not get stuck underneath the printer.
 |  |  |
|
1. Install the printer
With at least two people, carefully place the printer on top of the Material Station.
|
2. Tube coupling collets
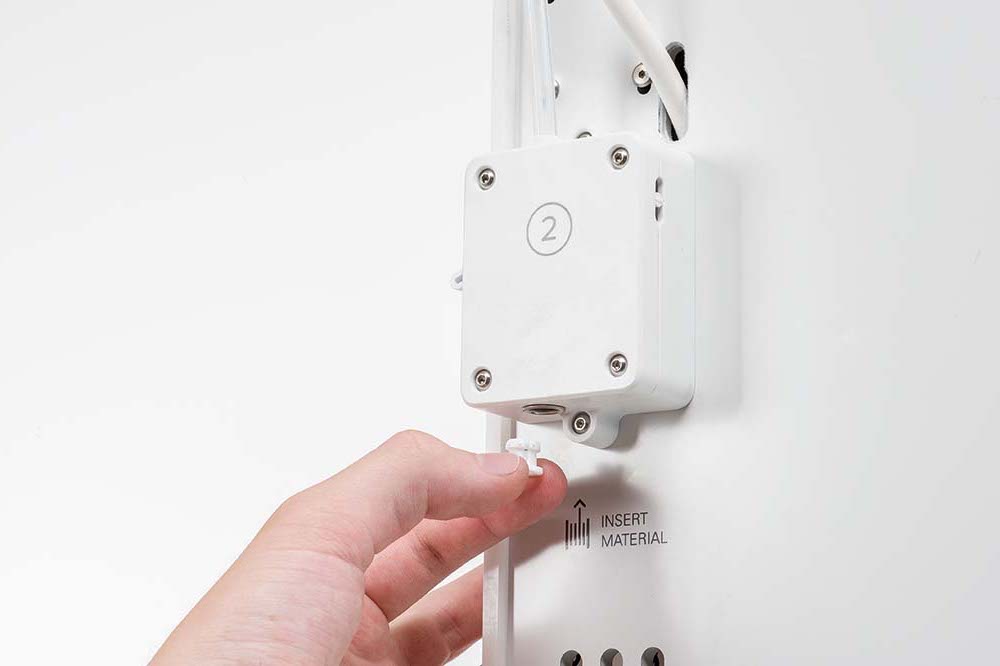
Insert a tube coupling collet in the bottom of each of the two feeders.
|
3. Insert Bowden tubes
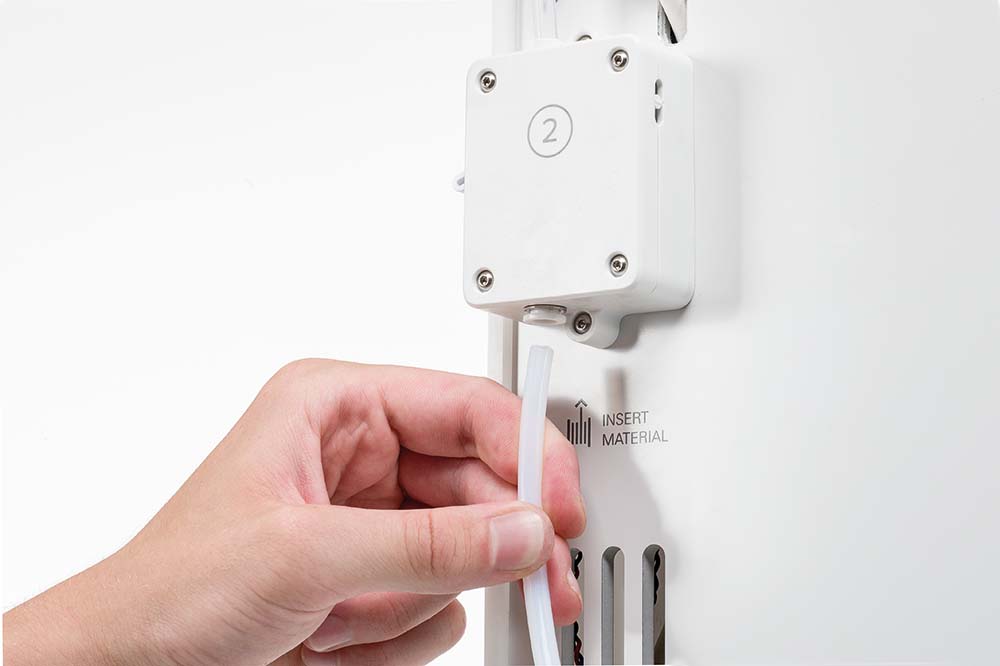
Insert the left Material Station Bowden tube into the left feeder, and the right Bowden tube into the right feeder.
|
 |  |
Tip: The cable connections will be explained later, in the Connections section of this article.
Note: Ensure that the Bowden tubes are routed to the correct feeders, that they are fully inserted into the feeders, and that there is nothing restricting the movement of the tubes (the Bowden tubes must be able to move up and down during printing.
|
|
4. Clamp clips
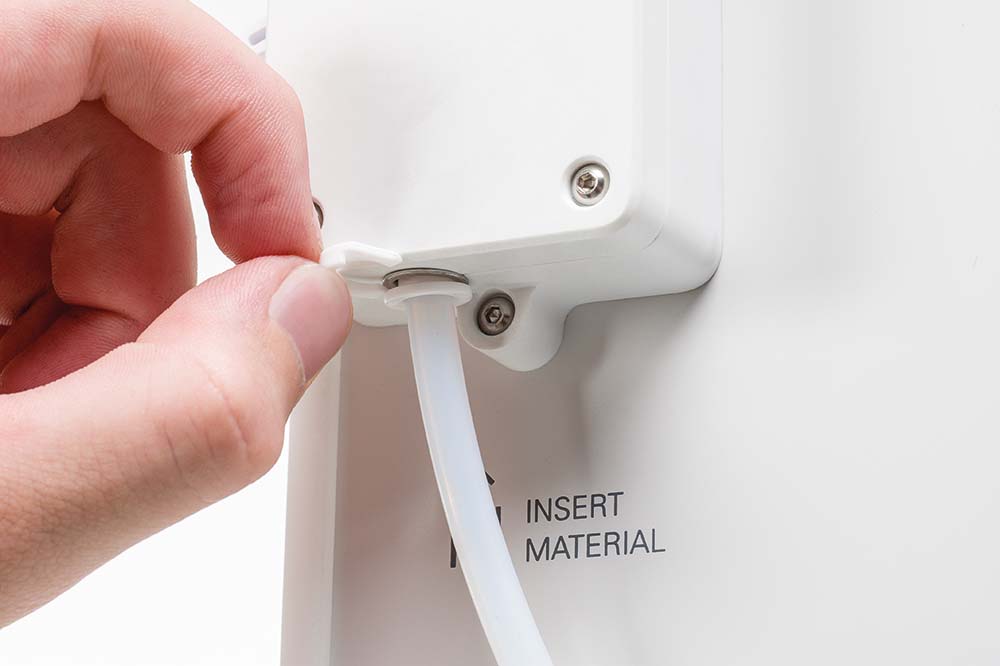
Place a clamp clip around each collet in the bottom of the feeders to secure the Bowden tubes.
|
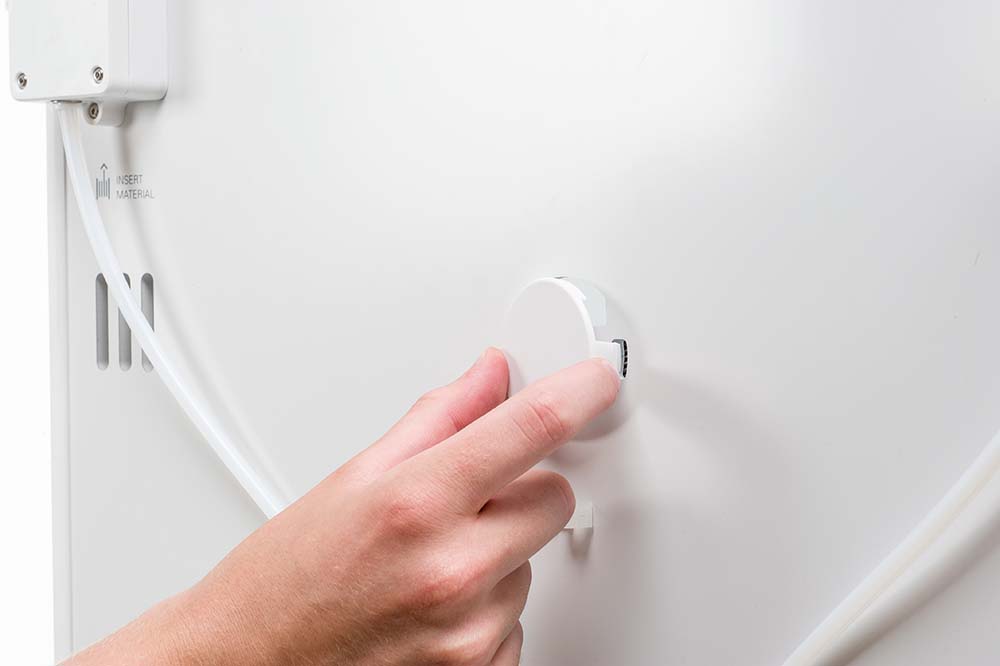
5. Spool holder cap
Place the spool holder cap into the hole for the spool holder in the printer's back panel.
|
Installing the Air Manager
Note: This section is only for the Air Manager add-on, which is compatible with the UltiMaker S5 and S6. The UltiMaker S7 and S8 have an integrated Air Manager; no installation is required, except placing the filter (included in the printer installation steps) and the cable connections (explained in the Connections section in this article).
Start unboxing the Air Manager by removing the plastic locking clips at the bottom of the box. Holding the handles, lift the upper section of the box. Place the six foam pieces and documents aside.
Tip: The rest of the boxes will be removed during the installation of the Air Manager.
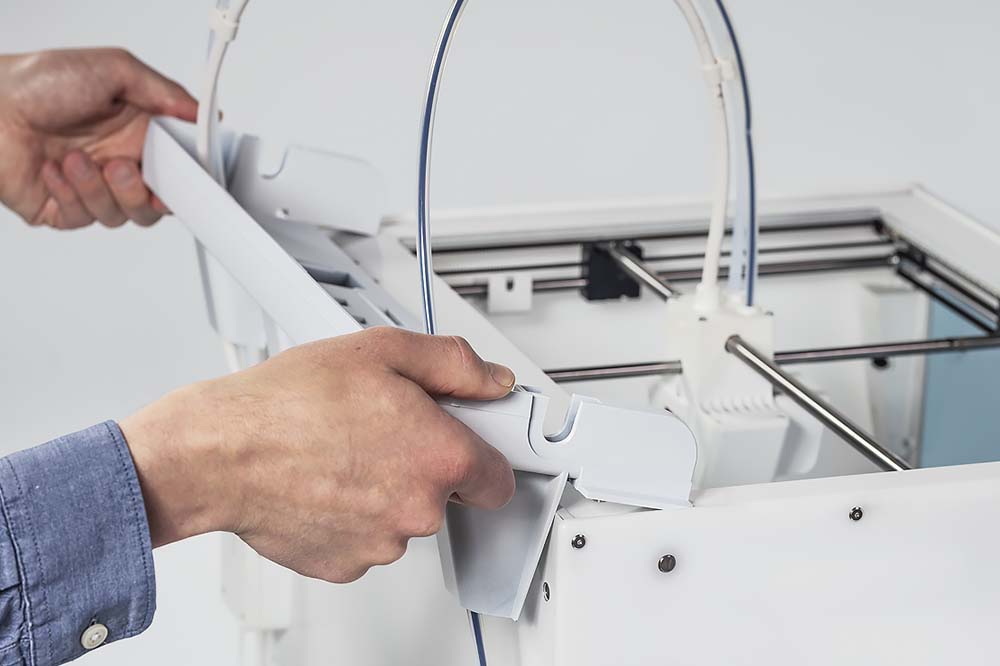 |  |  |
1. Mounting bracket
Align the mounting bracket with the back of the printer. |
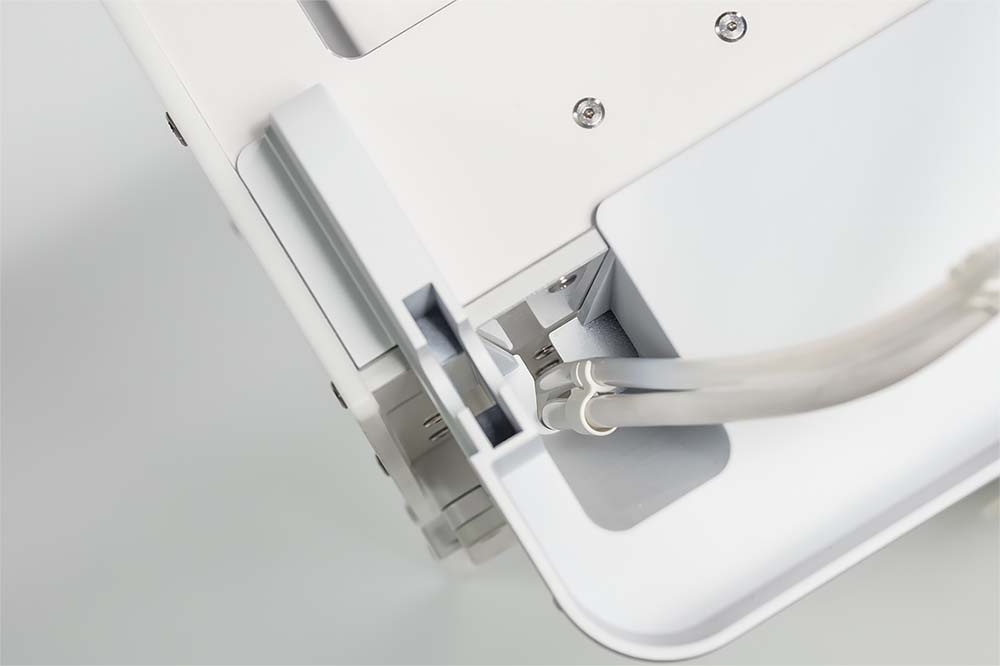
2. Bowden tubes
Guide the Bowden tubes into the mounting bracket slots. Ensure that Bowden tube 2 is placed in front of the print head cable.
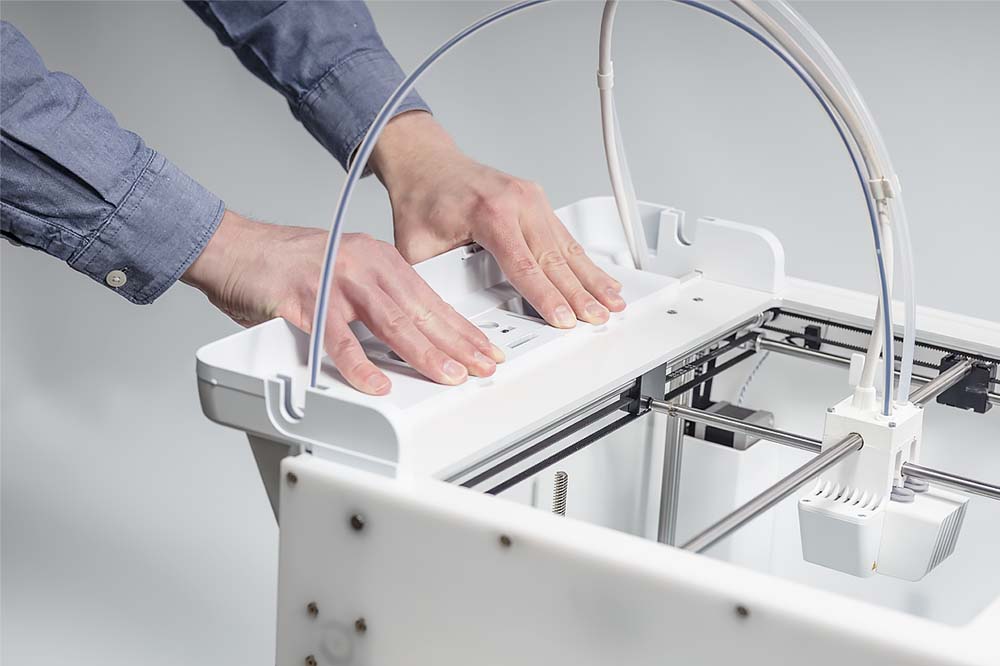
| 3. Fix the mounting bracket
Gently push down on the mounting bracket until it clicks firmly into place. |
 |  |  |
|
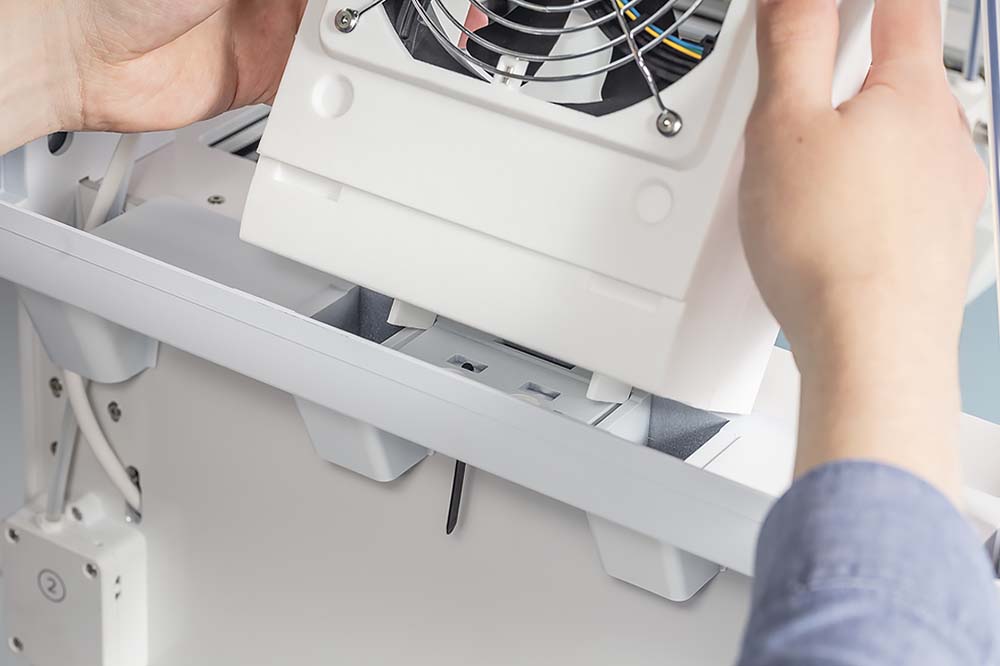
4. Filter housing
Align the bottom of the filter housing with the slots in the mounting bracket and push into place.
|
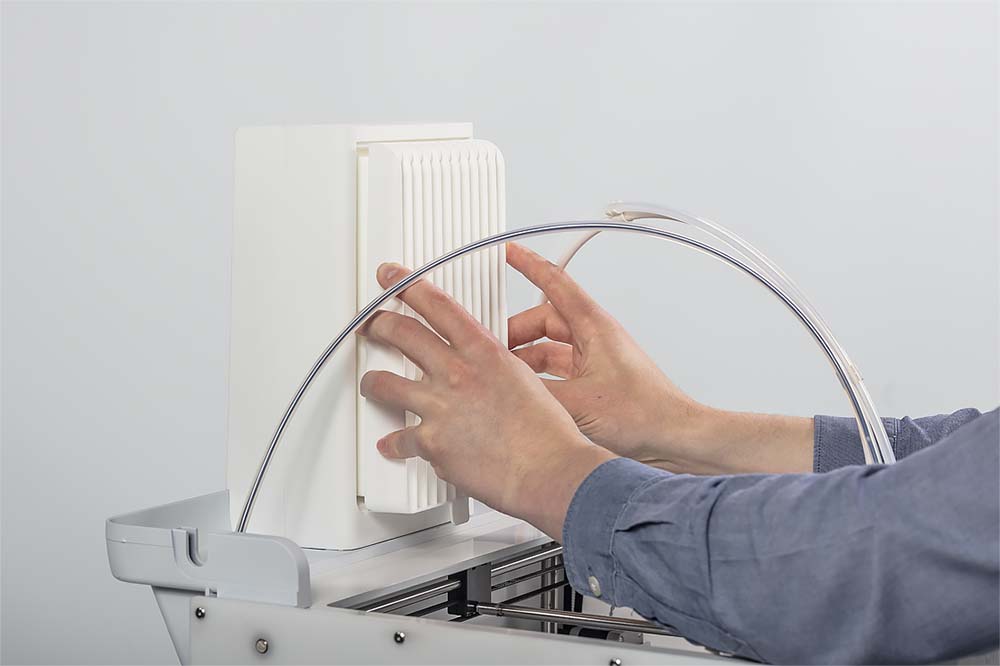
5. Filter
Align the filter with the housing, with the tab toward the bottom. Push it fully in place.
|
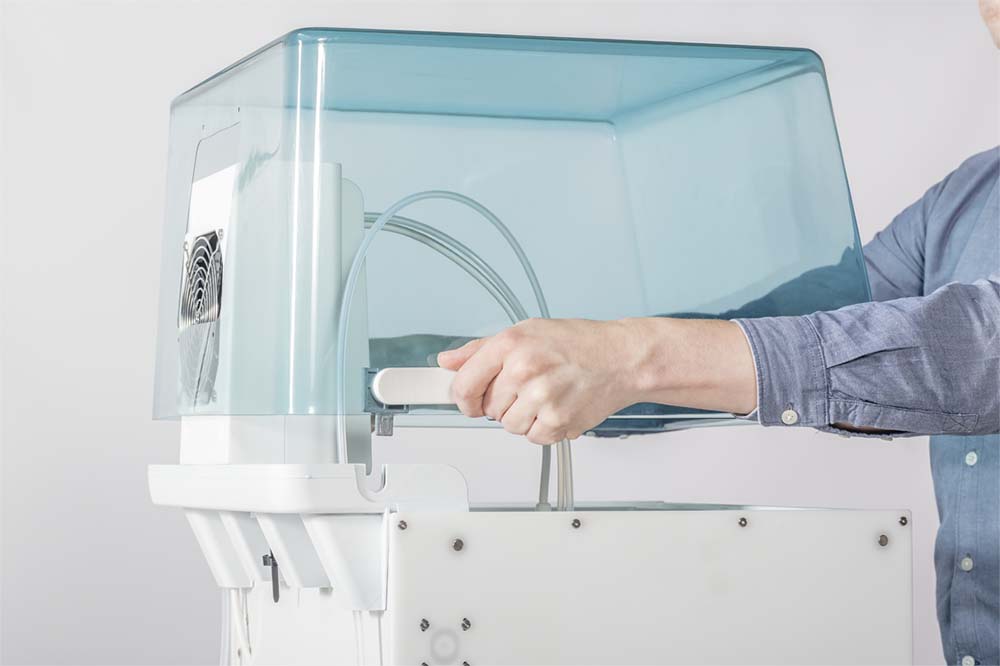
6. Cover
Lift the cover using the handles on each side, and place it over the filter housing.
|
 |
Tip: The cable connections will be explained later, in the Connections section of this article.
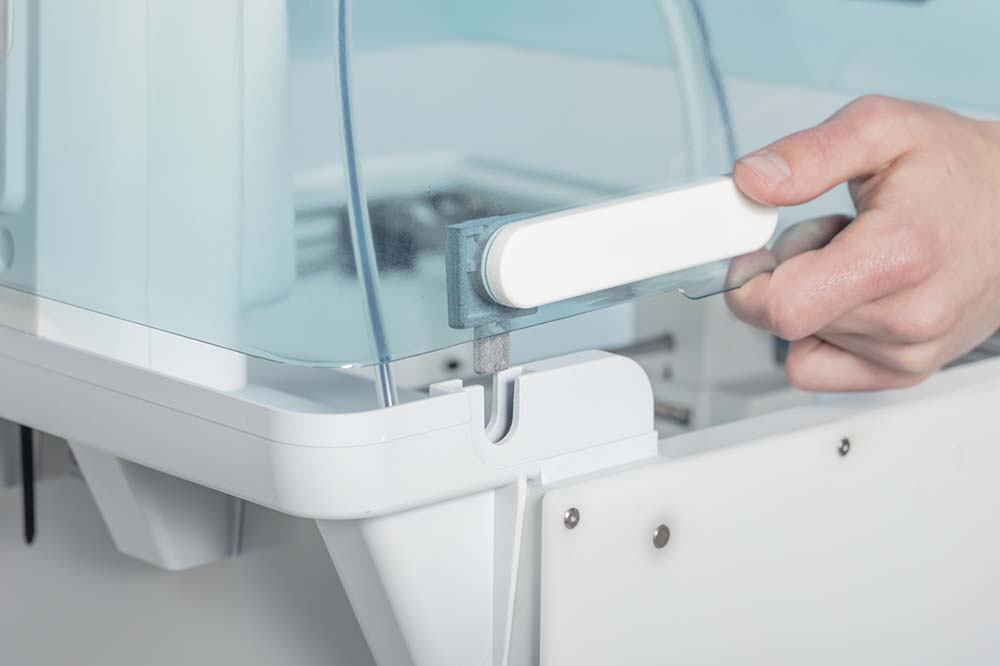
Note: Ensure the hinges are fully inserted. If necessary, open the cover and push on each until you hear it click into place.
Note: When the Air Manager cover is closed, make sure that it is aligned well with the printer's frame and that there are no gaps.
|
7. Hinges
Align the hinges on the cover with the slots in the mounting bracket and drop the cover into place.
|
Connections
Finally, connect all the cables to complete the installation of the Pro Bundle. You will need the short white Material Station cable, the longer white Air Manager cable, the power extension cable, and the power cable.
Tip: For the UltiMaker S7 and S8, the Air Manager cable is already connected to the Air Manager electronics at the top of the printer frame and secured to the back panel. Some steps can be skipped; these are indicated as "add-on only".
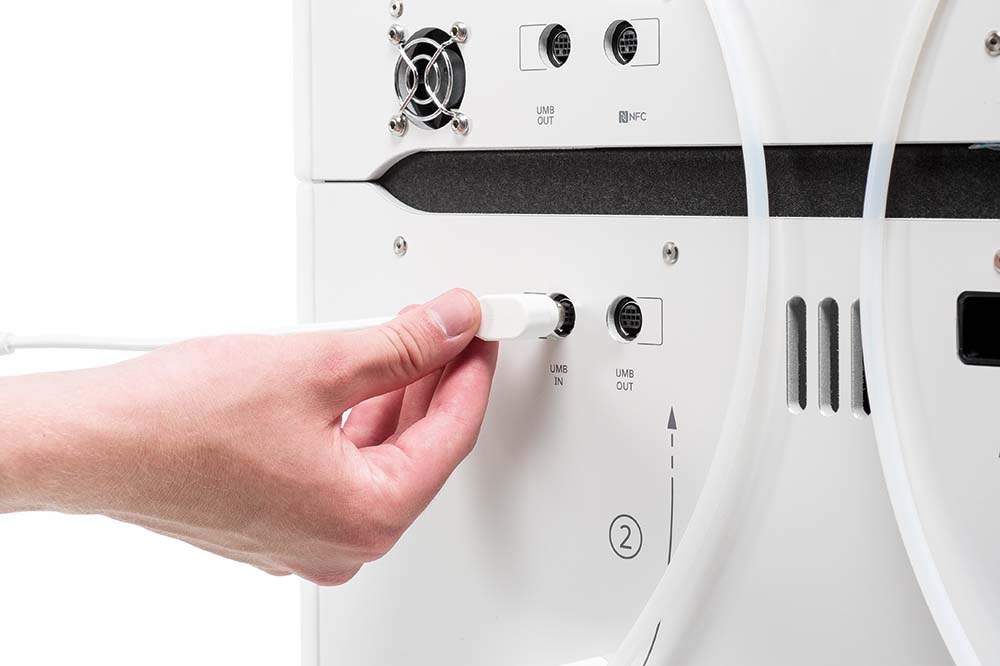 | 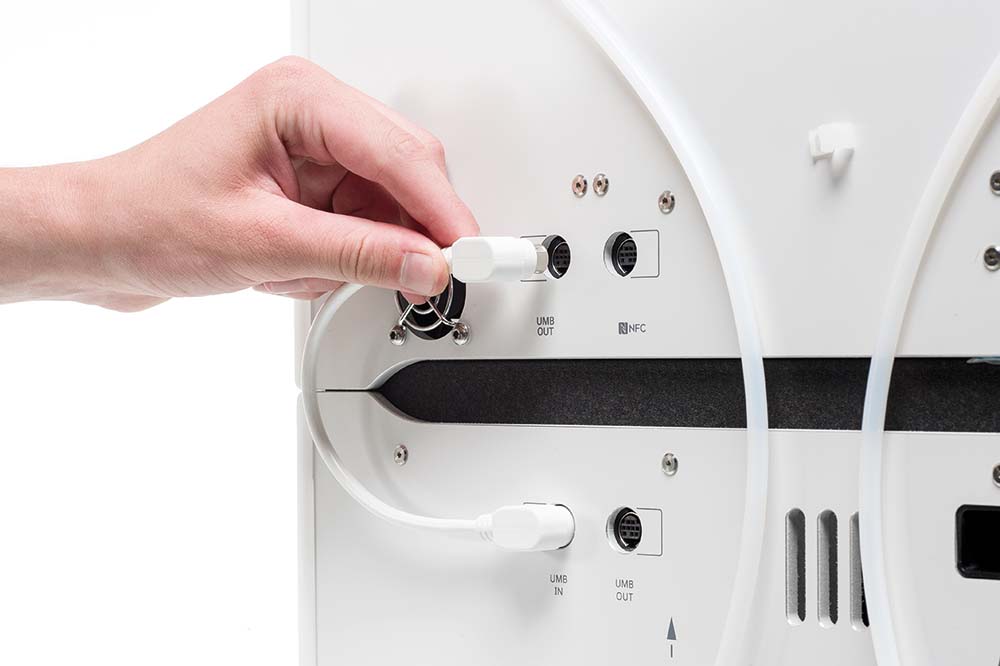 | 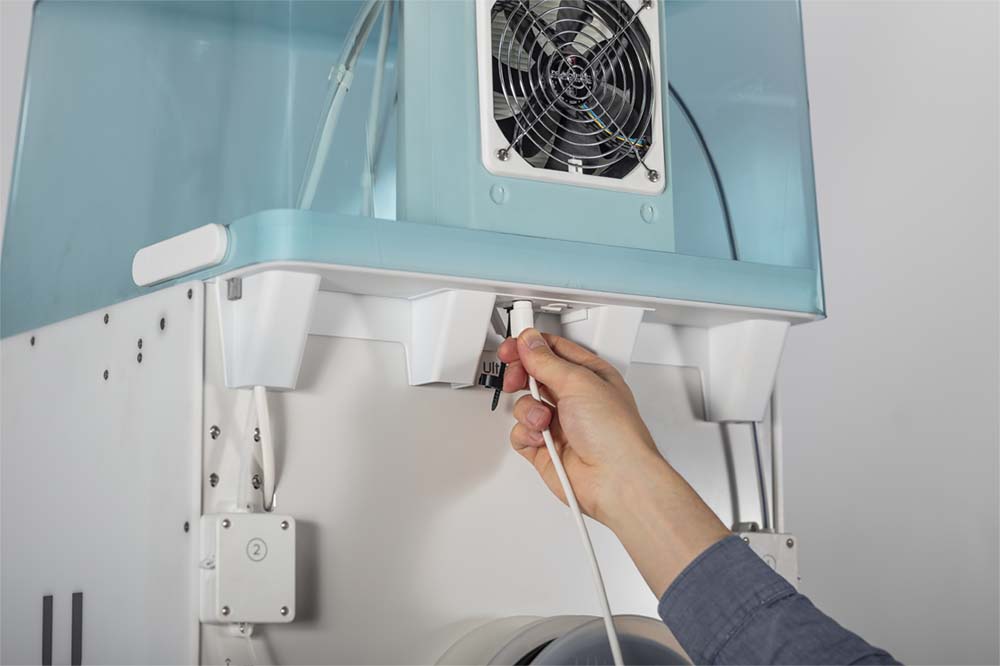 |
|
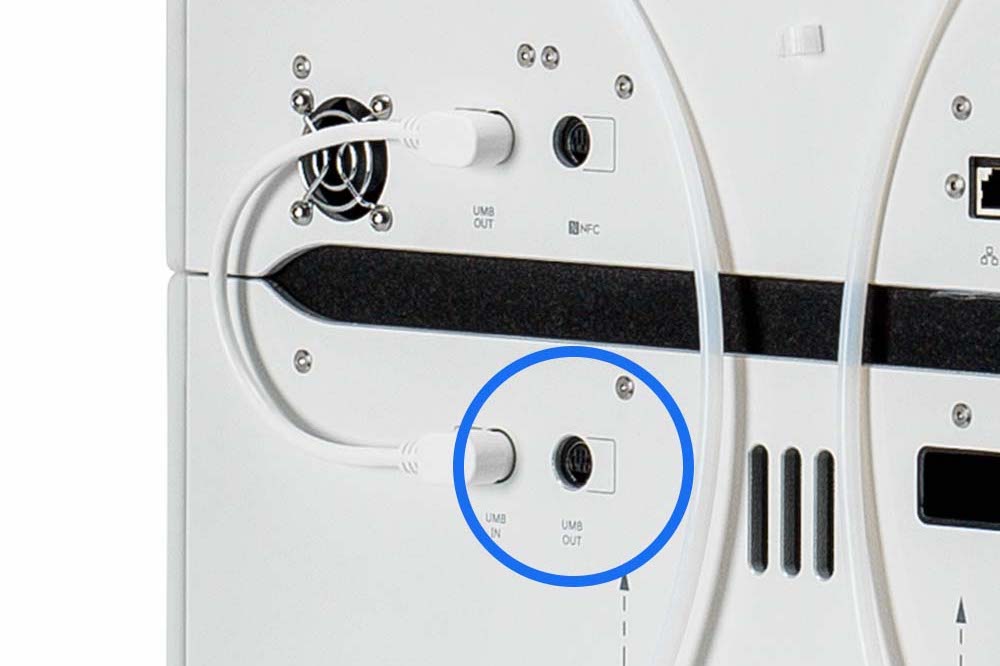
1. Material Station cable - UMB IN
Connect one side of the short Material Station cable to the UMB IN port at the back of the Material Station.
|
2. Material Station cable - UMB OUT
Plug the other end of the cable into the UMB OUT port at the back of the printer.
|
3. Air Manager cable (add-on only)
Connect the longer Air Manager cable to the port at the back of the Air Manager.
|
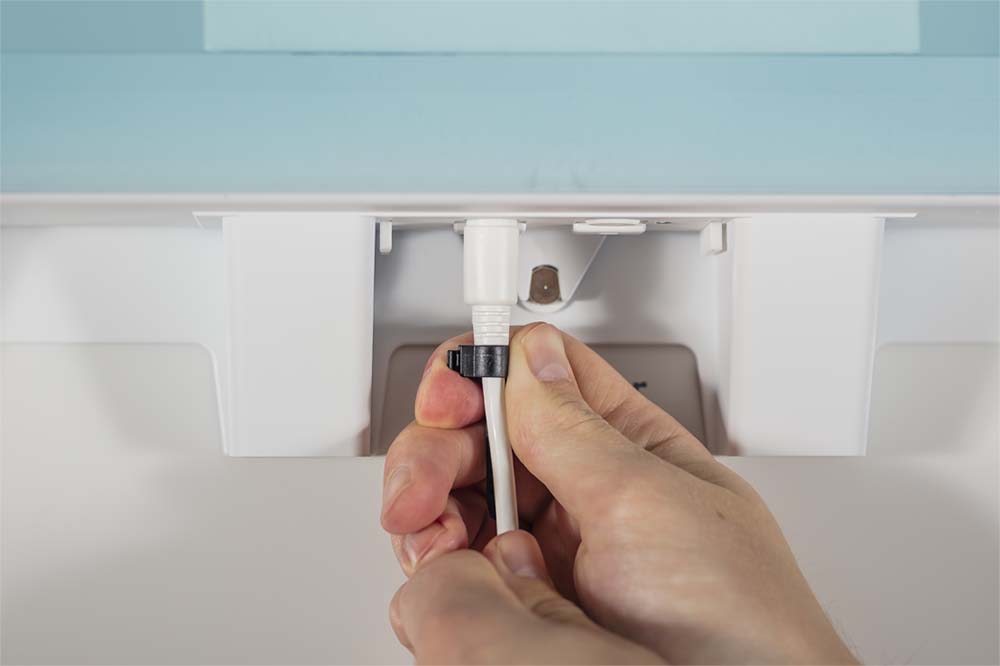 |  |  |
|
4. Air Manager cable (add-on only)
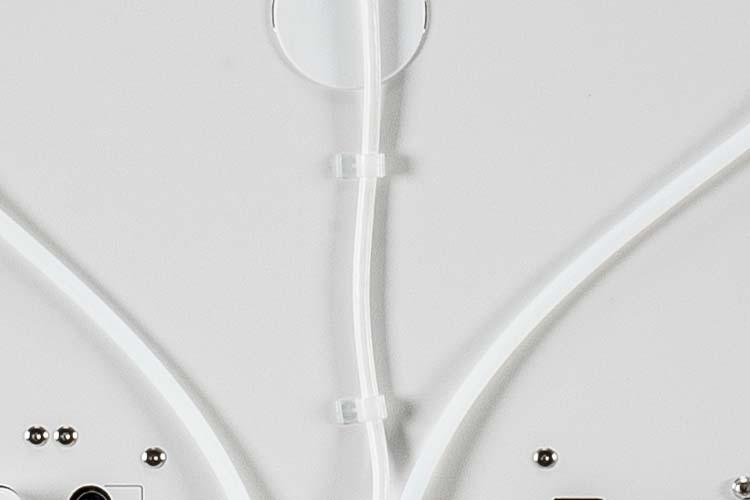
Secure the cable with the stress relief clip. Place the clip around the cable and slide it upwards.
|
5. Air Manager cable (add-on only)
Place the Air Manager cable behind the plastic clips in the S5 or S6 back panel.
|
6. Air Manager cable - UMB OUT (both variants)
Connect the end of the Air Manager cable to the UMB OUT port at the back of the Material Station.
|
 |  | 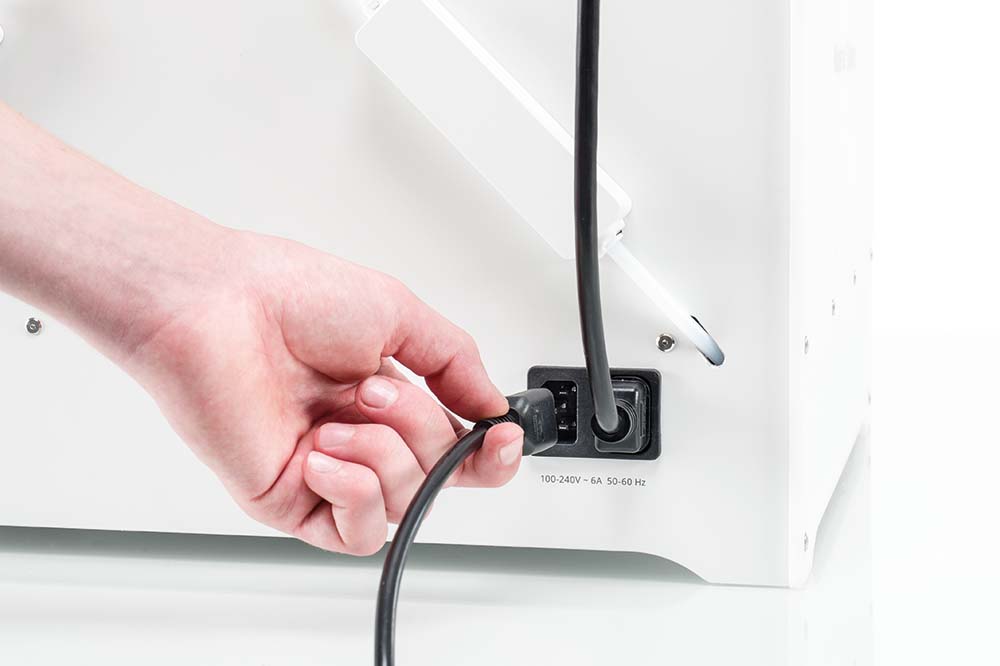 |
7. Power extension cable
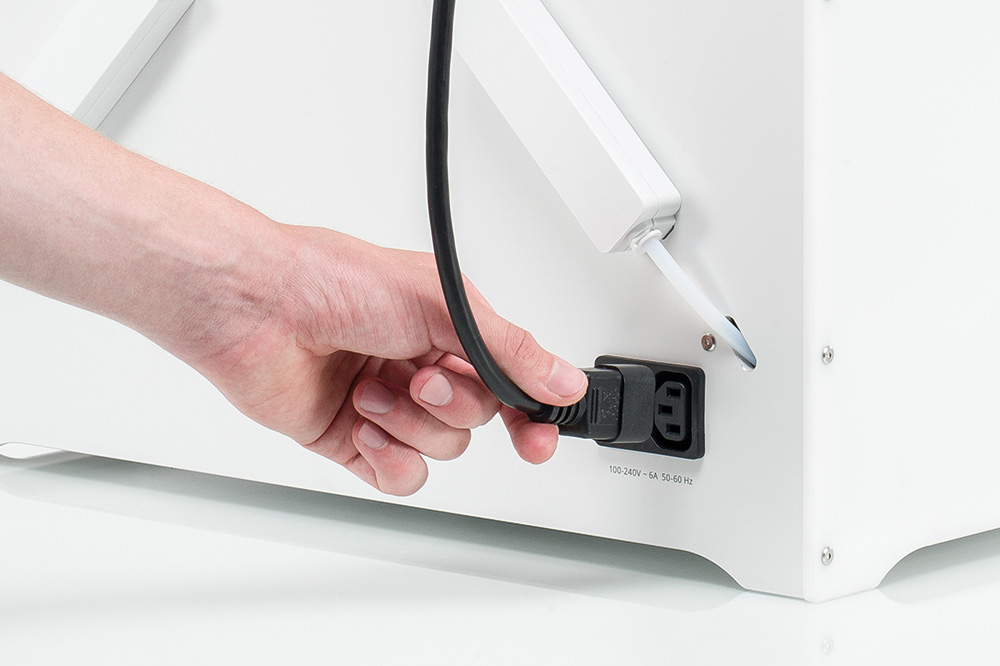
Insert the male end of the power extension cable into the power entry of the printer. | 8. Power extension cable
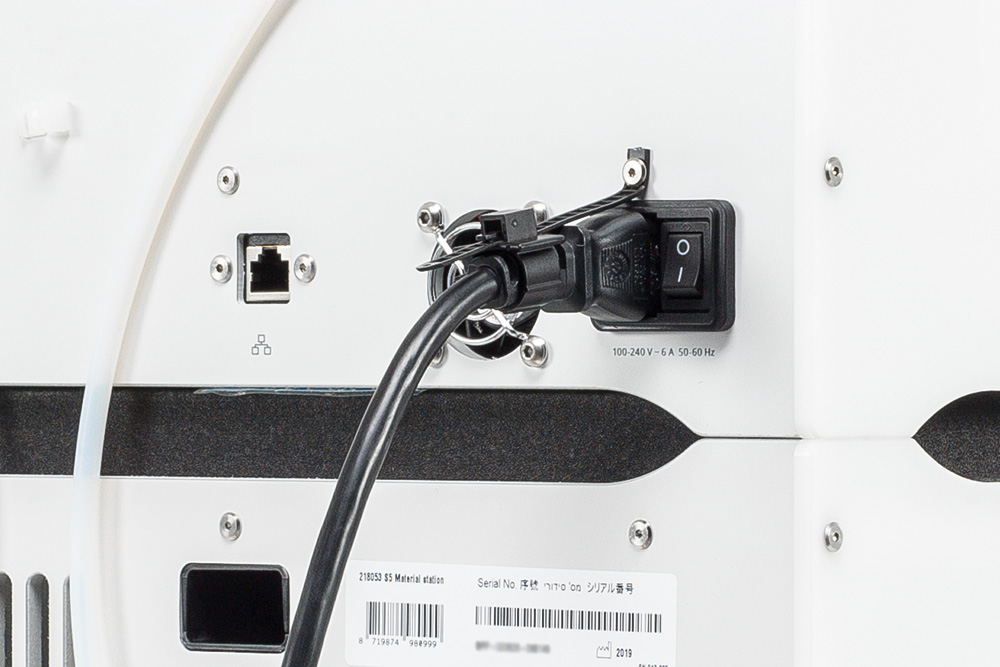
Connect the female end to the right side of the Material Station power entry (as seen from the back). | 9. Power cable
Connect the power cable that came with the printer to the left side of the Material Station power entry, and the other end to a power outlet. |
Caution: A mains socket with a protective earth/ground terminal must be used. Make sure that the building installation has dedicated means of overcurrent and short-circuit protection.
Connection overview
See the reference images below (left = S7 and S8, right = S5 and S6) to check if everything is set up and connected correctly.
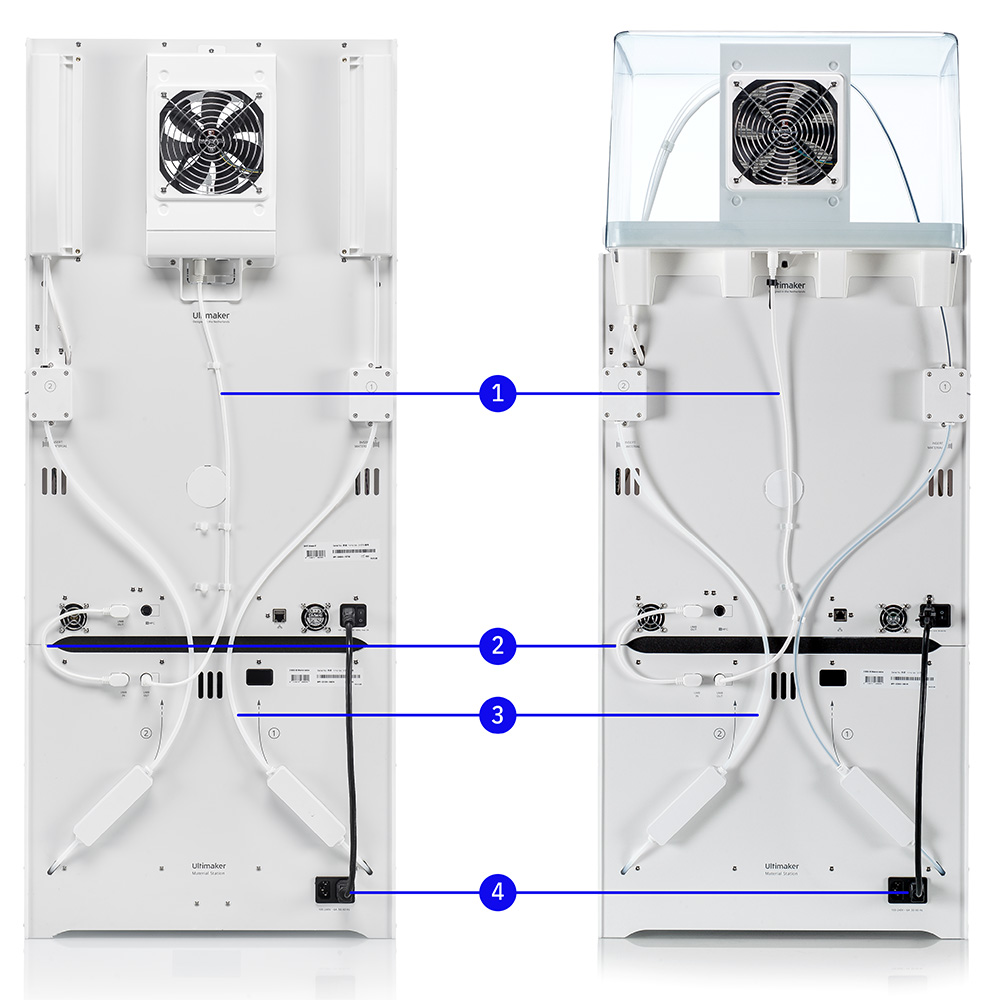 |
1. Air Manager cable
The cable for the Air Manager must be securely connected to the bottom of the Air Manager and to the UMB OUT port of the Material Station. The cable can be secured behind the clips in the printer's back panel.
For the UltiMaker S5 and S6: The clips that were included with the Air Manager accessories are not used in the complete Pro Bundle setup.
For the UltiMaker S7 and S8: The cable is already secured behind the clips at the factory.
2. Material Station cable
The short Material Station cable runs between the UMB IN port of the Material Station and the UMB OUT port of the printer.
3. Decoupler Bowden tubes
Ensure that the Bowden tubes are inserted into their respective feeders and secured with the clamp clip.
The Bowden tubes must not be secured to each other or any cables. They should be able to move freely.
4. Power cable
The power extension cable is connected between the Material Station and the printer. The power cable that was included with the printer is connected to the Material Station and a (wall) socket.
|
Caution: A mains socket with a protective earth/ground terminal must be used. Make sure that the building installation has dedicated means of overcurrent and short-circuit protection.
Note: The Material Station will automatically power on when power is supplied. This way, the humidity can be continuously controlled while the door is closed.
Your Pro Bundle is now fully assembled and connected, and ready for first use! Turn on the printer using the power switch at the back. The printer will guide you through the welcome setup via instructions on the display.


