1. Check the lift switch calibration
It is important that the print core switching functions well. If not, the active leveling procedure will detect the same height for both cores, which also 'exceeds realistic values' and could therefore cause this error message.
If the print head does not move to the switch bay correctly, perform a lift switch calibration to properly store the position. This only takes a few minutes. Our support pages have detailed instructions on how to perform this calibration:
Note: If the print cores still do not switch correctly after performing the calibration, there could be a different problem. Check this article for more information and troubleshooting: Print cores not switching correctly
2. Check the capacitive sensor wires and connector
Note: This section applies to the UltiMaker 3, S3, and S5. Other S series printers use an inductive sensor with a flexible copper flatwire. Instead, check if this flatwire is still connected to the PCB at the back of the print head. On the Factor 4, check if the cable at the back is not damaged.
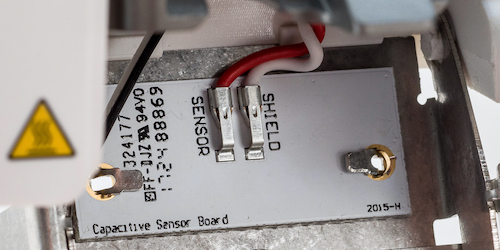
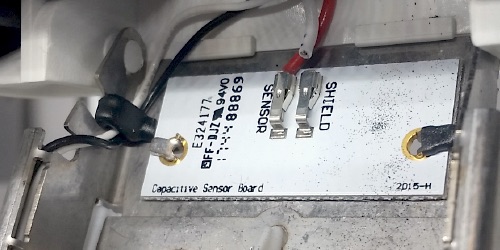
The capacitive sensor board which enables active leveling is located in the front fan bracket of the print head. This is connected with a red (sensor) and white (shield) wire. Check if both of these wires are still properly connected. If they have come loose or show signs of damage, the capacitive sensor wires must be reconnected or replaced. Contact support for further assistance.
See the following pictures for reference:
 |  |
|
OK: Both wires are securely connected to the board and no damage is visible.
|
Not OK: One of the wires is broken and disconnected from the board.
|
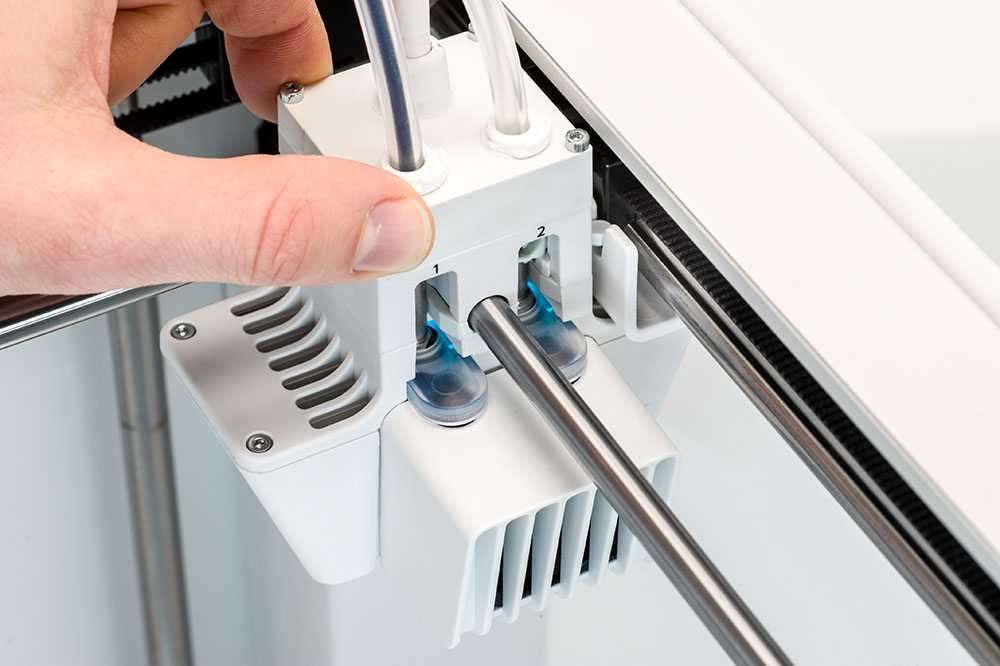
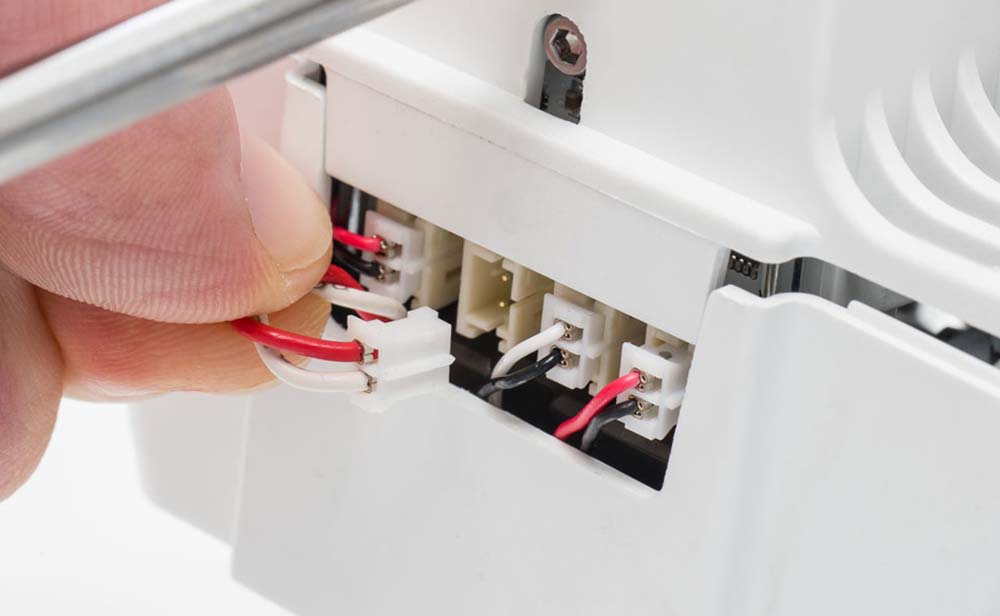
Also check the connection of the wires to the print head PCB. This connector is visible at the back of the print head. The capacitive sensor wires are the second connector from the left, as seen from the back:
3. Check the front fan cable
Note: This section applies to the UltiMaker 3, S3, and S5. On other S series printers, the front fan is connected to the inductive sensor board on the inside of the fan bracket and is less susceptible to damage or cause interference. It also does not apply to Factor 4 because the print core cooling fan is at the back and the hardware is very different.
If one of the wires of the front fan has become damaged through wear and tear or improper placement, it could lead to electrostatic interference on the capacitive sensor board. This would result in incorrect readings during the active leveling process.
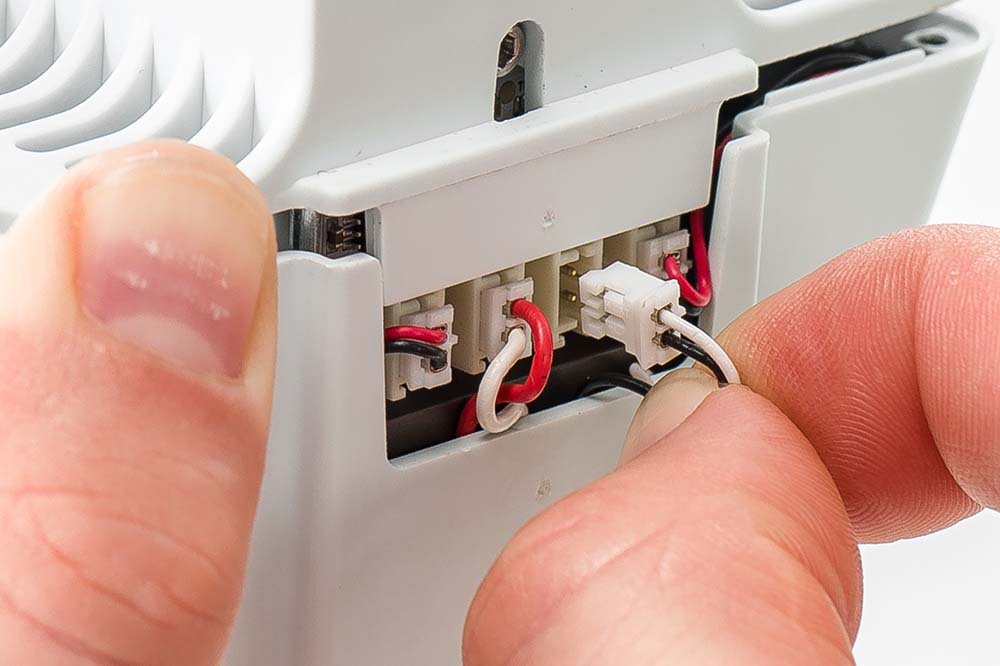
It is not easy to check the whole wires without disassembling part of the print head. Instead, try temporarily disconnecting the front fan before retrying active leveling. The front fan (black-white wires) is the third connector from the left, as seen from the back:
Tip: If it is not possible to easily disconnect the fan, you can remove the two screws on each side of the header bracket, to slightly lower the side fan bracket. After disconnecting the fan, realign the side fan bracket and secure it with the screws.
Start another print and observe the leveling process. If active leveling succeeds with the front fan disconnected, the fan is defective. When the wire's insulation is damaged, the core can come into contact with the metal fan bracket, which disrupts the leveling measurements. The front fan should be replaced; contact support or your local reseller for further assistance.
Caution: Only disconnect the fan for testing purposes; do not run prints with the front fan unplugged. Stop the print after the active leveling process is done. The front fan cools the print cores. Without it, the filament will swell in the print cores, causing extrusion failures. In severe cases, the swell may block print core removal. If this happens, you will need to disassemble the print head.
4. Check the fan bracket alignment
Note: This section does not apply to Factor 4; the hardware of the print head is very different from the UltiMaker 3 and S series.
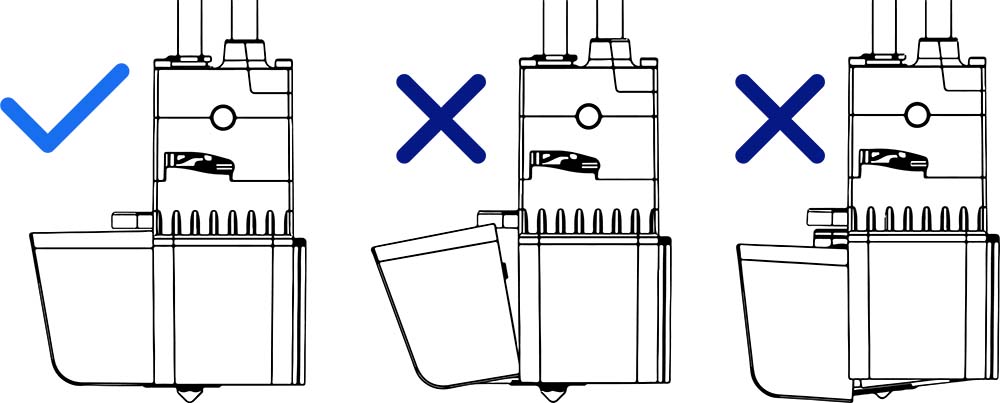
Make sure that the fan bracket closes properly and the bottom of the print head is completely flat. If the fan bracket, which contains the capacitive or inductive sensor board, is at an angle to the build plate, the readings will not be accurate.
If it is tilting forward, something may be preventing the bracket from closing completely. This could be due to material on the print core's heater block, an incorrectly placed nozzle cover, or an incorrectly placed fan. When it's tilting backward, the metal of the fan bracket could be bent. In these cases, it is recommended to contact support for further assistance.