Product notification
This product has been discontinued, and its end-of-service date has passed. While it is no longer supported, the information on this page remains available for your reference.
|
The switch bay enables the second print core to be lifted and lowered. The switch bay (left) is the white bracket on the right side of the frame, which changes the position of the lift switch (right) in the print head.
It is important that the print core switching functions well for active leveling and a correct nozzle alignment in dual-extrusion prints. The lift switch is already calibrated at the factory, but calibration can also be performed manually if needed.
Tip: In case of errors during the active leveling process, it is recommended to check if the print cores are switching as expected. If not, follow the steps below to correctly calibrate the position of the switch bay and resolve the leveling problems.
To perform switch bay calibration:
- Go to System → Maintenance → Calibration → Calibrate lift switch to start the process.
- Use your finger to move the lift switch on the side of the print head to point towards you.
- Move the print head by hand so that the lift switch fits in the switching bay.
- Confirm to continue the process on the UltiMaker 3.
- Wait for the print head to go to the home position and test the lift switch.
- Carefully observe the print head. Did the lift switch lower and raise the print core? If so, press Yes to complete the calibration. If not, select No to perform the calibration again.
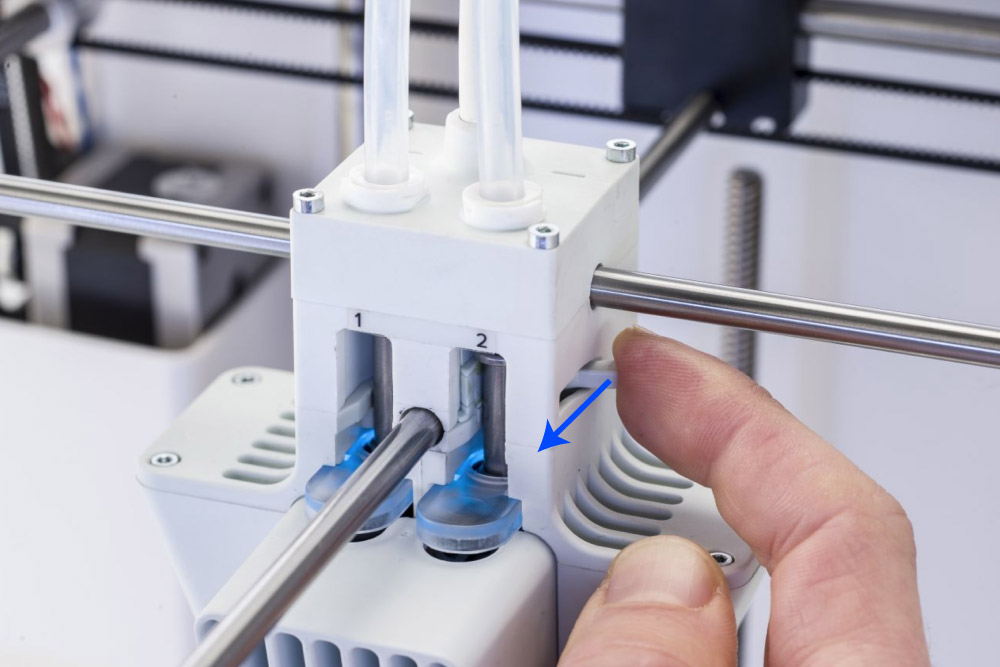 | 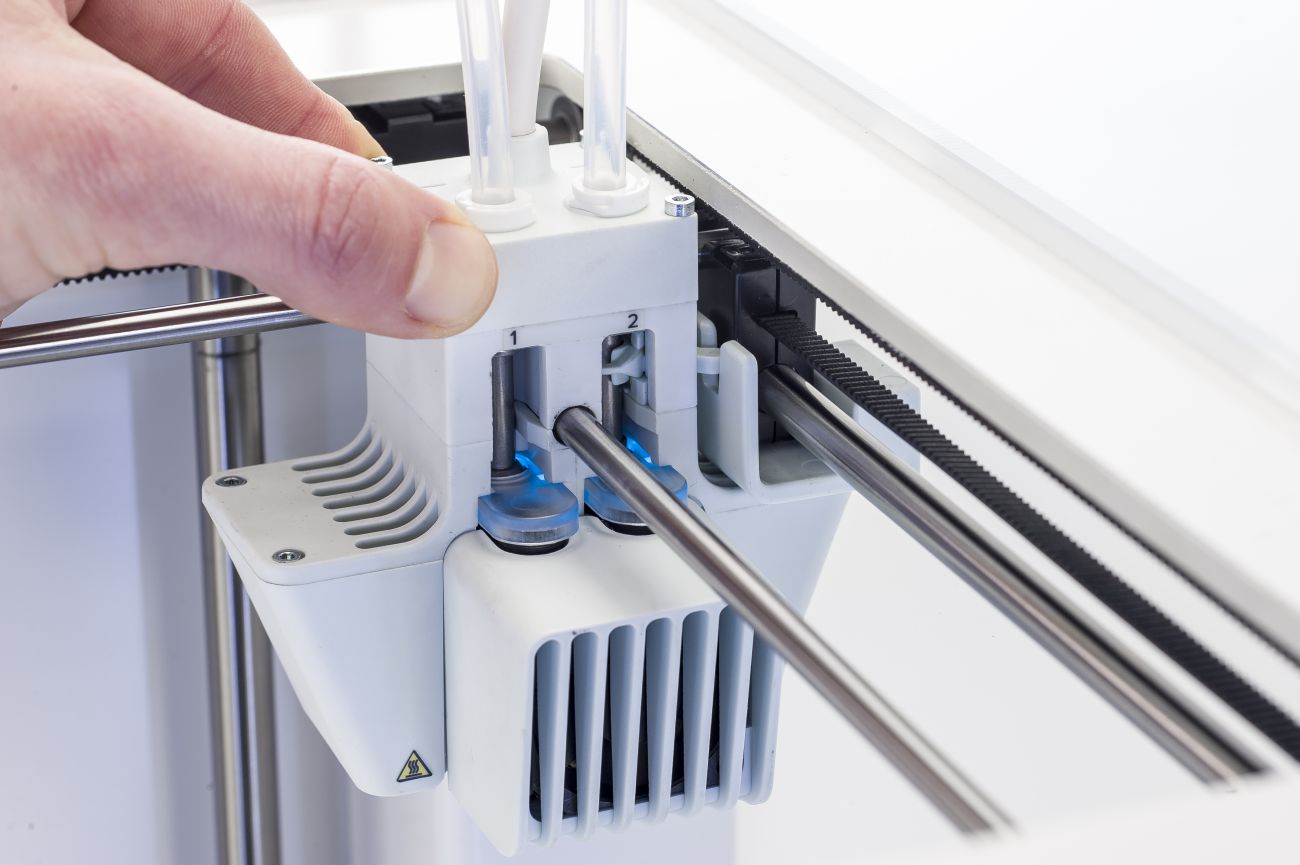 |
| Manually move the lift switch to the front | Place the print head in the switch bay |
Note: If the lift switch is properly activated, but you do not observe that the second print core is lifted and lowered, there could be a problem with the lift switch mechanism inside the print head. Visit this page for additional information.


