Note: This error message was removed in firmware version 7.0.3. This version includes a different diagnostic test. The result is the leveling sensor noise level displayed as a number. Firmware versions 7.0.2 and lower will still display ER45 as a result of the leveling sensor diagnostic.
The information in this article applies to the UltiMaker S3 and S5 (but only when running older firmware, see the note above). These S series printers use a capacitive sensor for the active leveling process. This sensor is on the PCB inside the print head. With the help of another small board located at the bottom of the print head, the capacitive sensor measures the distance between the build plate and the print head during active leveling.
Your printer may report ER45 after performing the capacitive sensor diagnostic procedure. This could mean your sensor is not working properly.
The printer can report ER45 in two situations:
- The capacitive sensor has low performance
- There is interference on the capacitive sensor signal
On this page, you will find information on how to respond in each case.
Low performance detected
When low performance is detected, the active leveling functionality of the printer is affected. This is for two main reasons:
- The capacitive sensor has permanently reduced sensitivity
- The wires of the sensor into the print head or to the sensor board are loose or disconnected (see images below)
The information below will help troubleshoot the capacitive sensor.
Note: Power off the printer and remove the power cable before performing these checks.
Checking the sensor connector
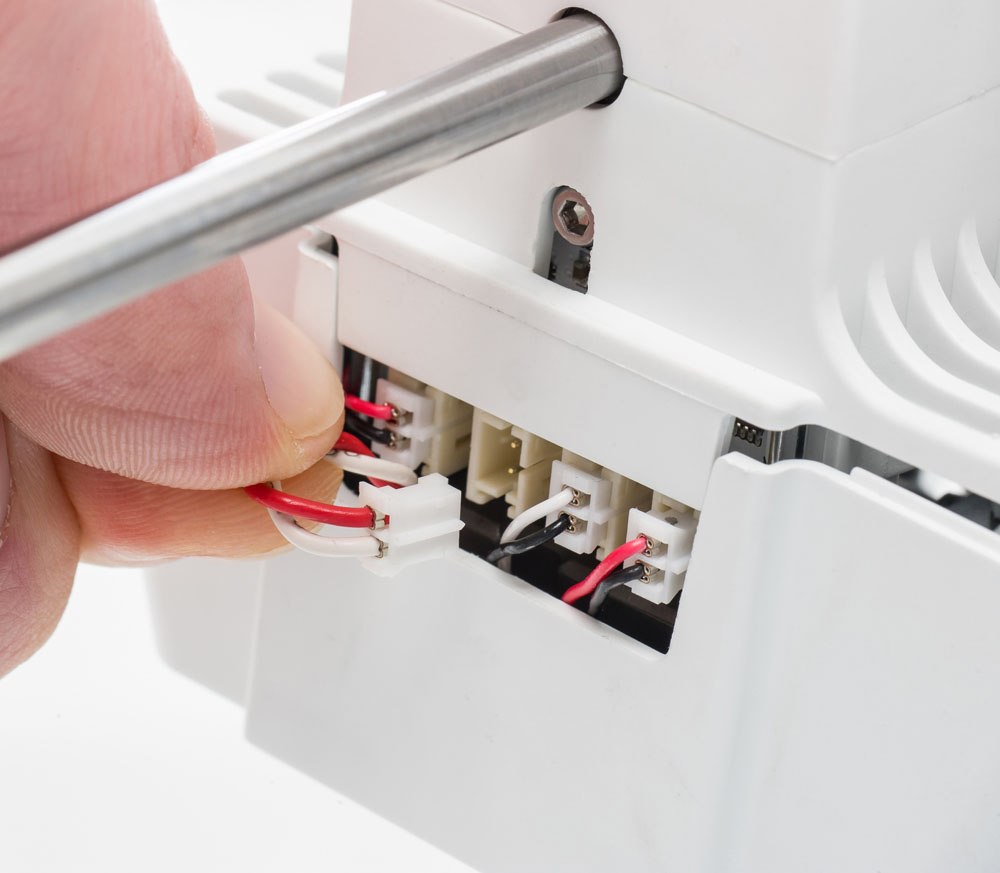
- Move the print head to the front of the printer and inspect the four connectors at the back of the print head.
- Ensure all four connectors are properly seated. Pay particular attention to the second connector from the left, with white and red wires – this is the capacitive sensor connector.
- If a connector is loose, reseat it in its socket. If necessary, use tweezers or the hex screwdriver to firmly push the connector in place.
- Inspect the wiring for any signs of damage.
Checking the sensor wiring
- Unload both print cores.
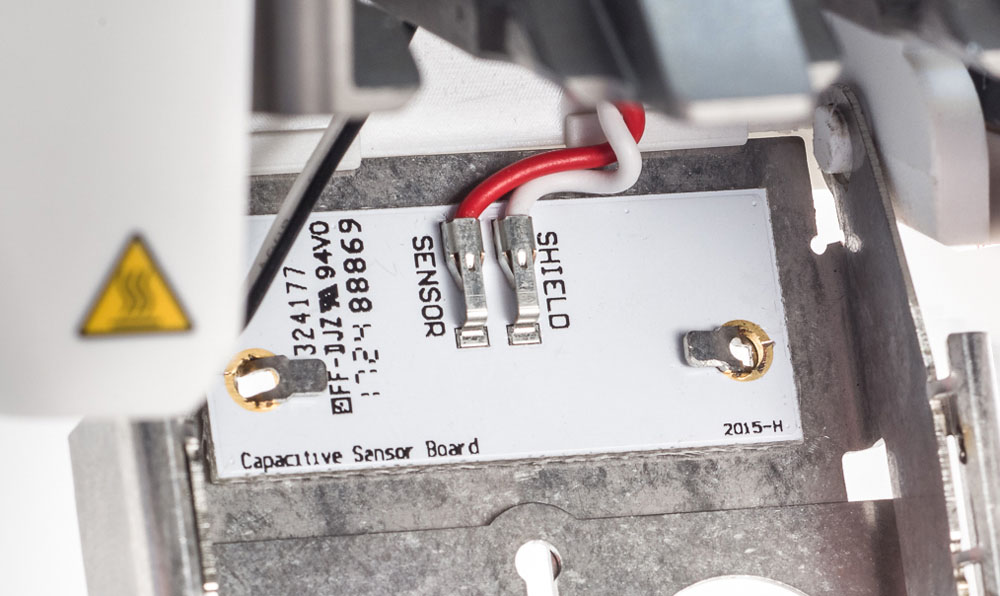
- Open the front fan bracket and inspect the two wires connected to the capacitive sensor board.
- Ensure both the red (sensor) and the white (shield) wires are securely connected and inspect the wires for signs of damage.
- If any wires are loose or damaged, you can reinsert or replace them. TContact support or your local reseller for further assistance.
Interference on the sensor signal
When interference is detected, the sensor is operational but detects more noise than usual. In order to avoid disturbance on the capacitive sensor measurements, be mindful of the following:
- Electrostatic discharge. The capacitive sensor is sensitive to electrostatic discharge (ESD). Make sure there are no machines that produce electromagnetic interference (e.g. electric motors, combustion engines), or any other electrical noise nearby. ESD can result in permanently reduced sensor sensitivity.
- Do not touch the printer or print head during active leveling, specifically the metal parts, including the shafts, as this will disturb the measurement.
- Do not reach inside the printer during active leveling. This is recommended for safety reasons, but moving your hands in front of or behind the print head will also disturb the active leveling measurement.
- Prevent printer vibrations. Ensure that the Ultimaker S3 or Ultimaker S5 is placed on a flat, sturdy surface so that it will not move or vibrate during the active leveling process.
Repeat the capacitive sensor diagnostic, while avoiding the disturbances above. Go to Maintenance → Diagnostics → Capacitive sensor diagnostic. If the printer reports "interference on the signal" consistently and you encounter frequent issues with active leveling, please contact support.
Need further support?
If you are unable to resolve the issues with active leveling and the capacitive sensor diagnostic, please contact support.
However, please update the firmware of your printer first. The support team is unable to assist with further troubleshooting if the printer is running outdated firmware. After updating, redo the diagnostic test and report the sensor noise level number. Share the log files of your printer for more efficient troubleshooting.
Tip: Before saving the logs, ensure to reproduce the issue. In this case, repeat the diagnostic test and test the active leveling process by starting a test print.


