Available on: All Plans
Note: Storage limits are dependent on your subscription plan.
This article explains how to use Print Submission Links to collect 3D models from users who are not part of your Digital Factory workspace.
In this article, you will learn:
- What a Print Submission Link is and why it's useful.
- How to generate and share a submission link.
- How submitted files appear in your workspace.
What is a Print Submission Link?
A Print Submission Link is a unique URL you can generate for a project in your Library. This link creates a simple, public-facing upload page where anyone can submit a 3D model directly to your project without needing an UltiMaker account. This feature is ideal for educators who need to collect student assignments or for professionals who need to receive files from external clients or collaborators.
How to Use a Print Submission Link
- Generate the Link
- Open the project where you want to receive files.
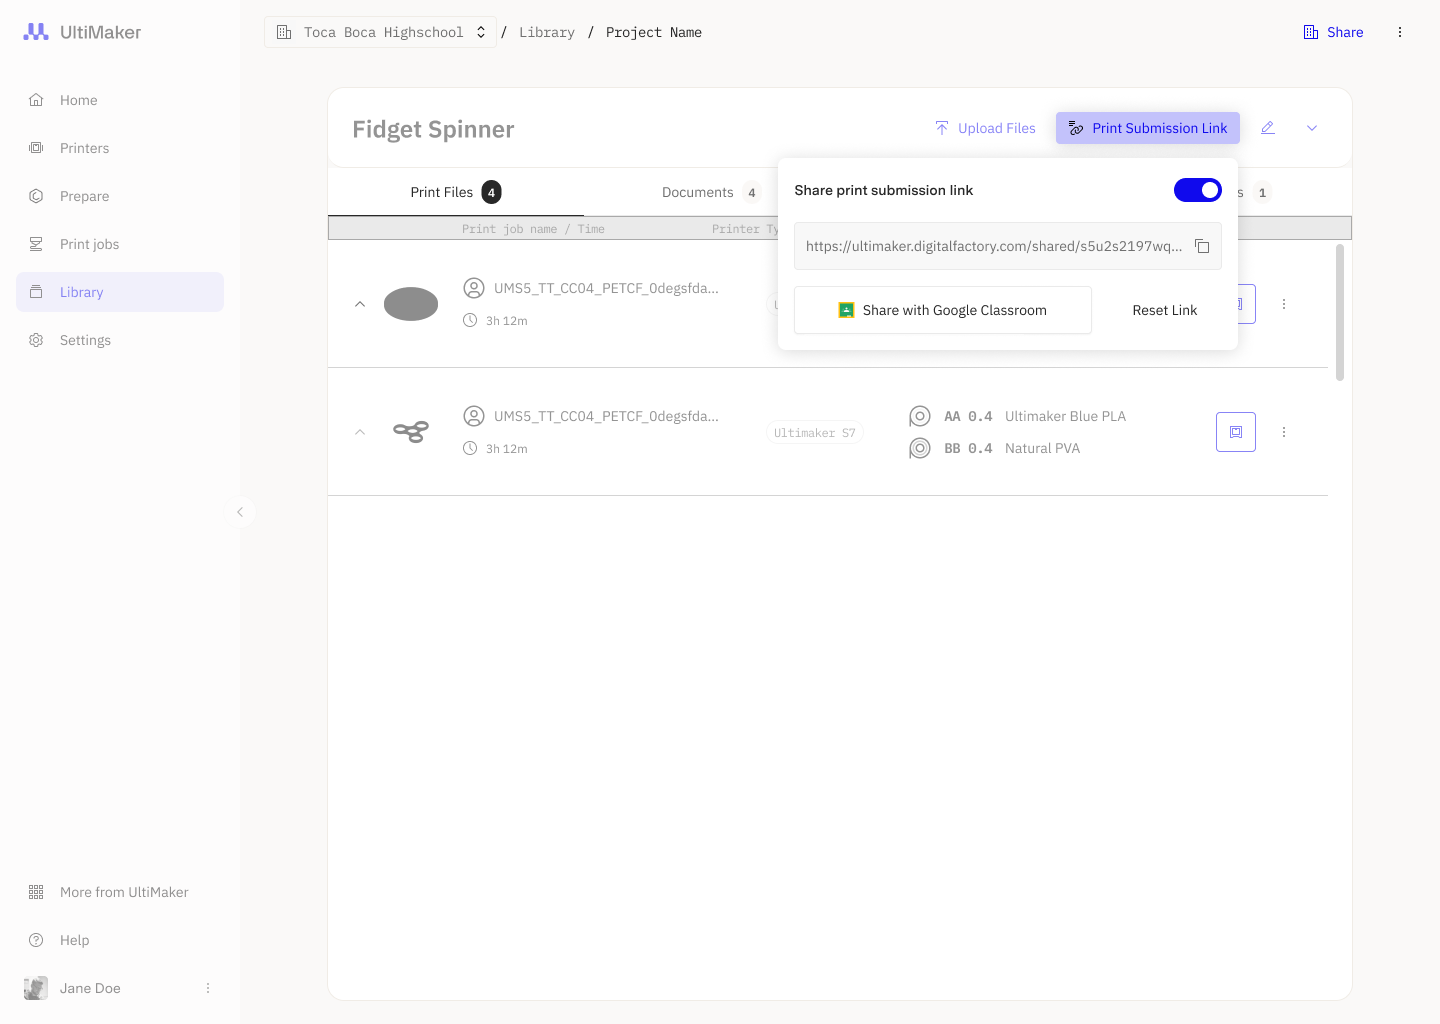
- Click the Print Submission Link button in the top-right corner of the project page.
- In the pop-up window, toggle Share Submission Link
- Share the Link
- Click Copy to copy the unique URL to your clipboard.
- Share this link with your students, clients, or collaborators.
- Receive and Review Files
- When a user opens the link, they will see a page where they can upload their file (e.g., an STL) and add notes.
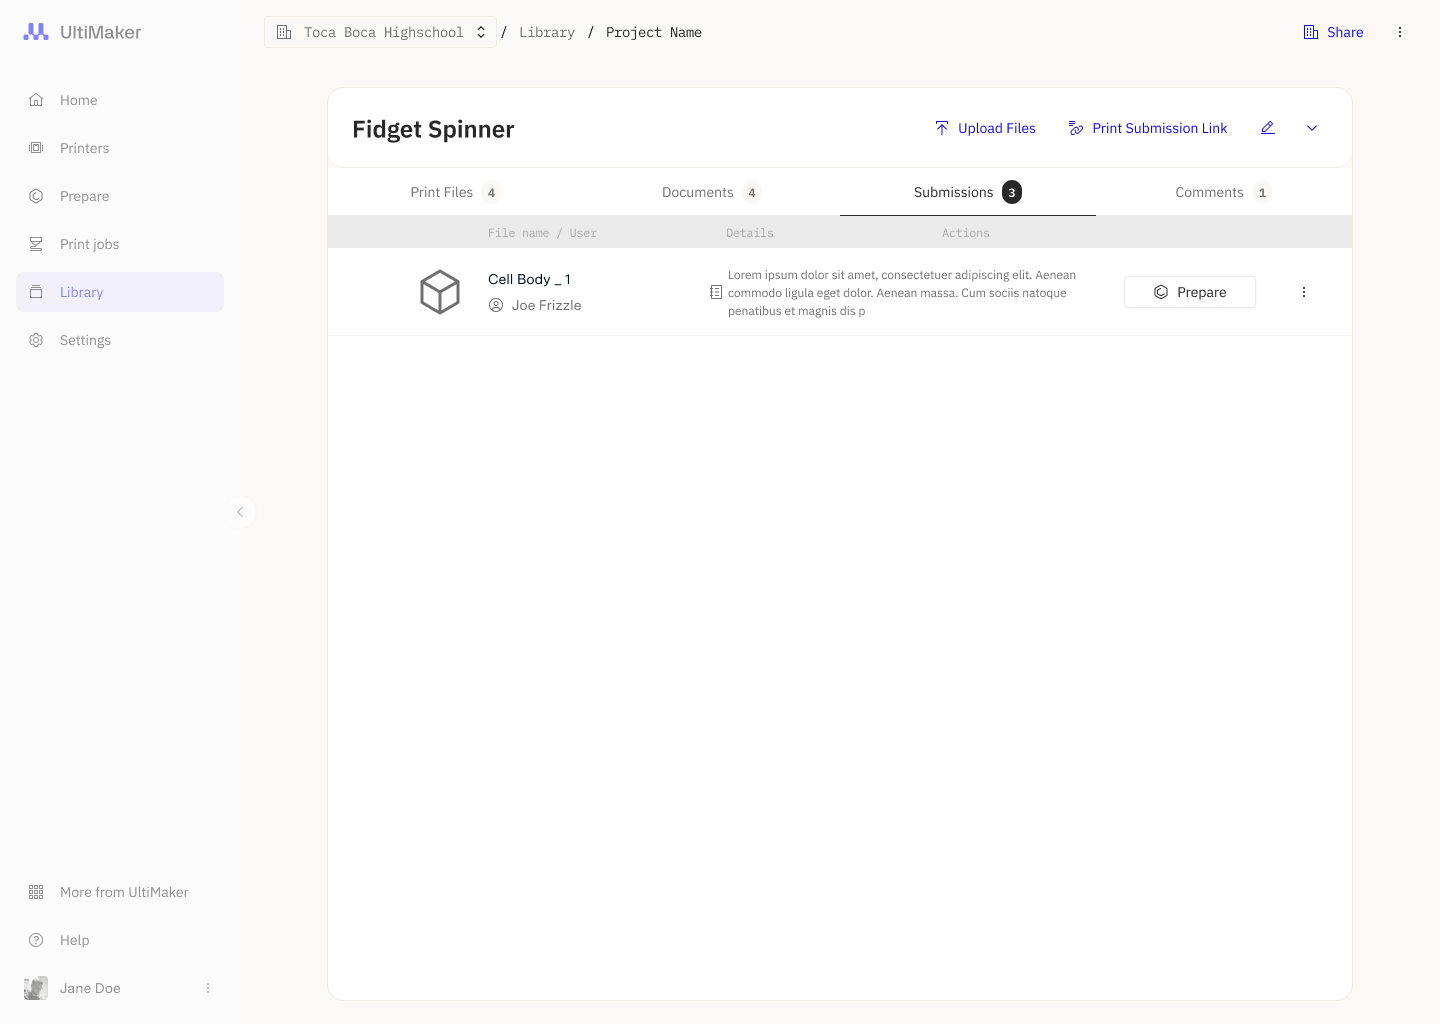
- After they click Submit, the file will automatically appear in the Submissions section of your project, along with any notes they provided.
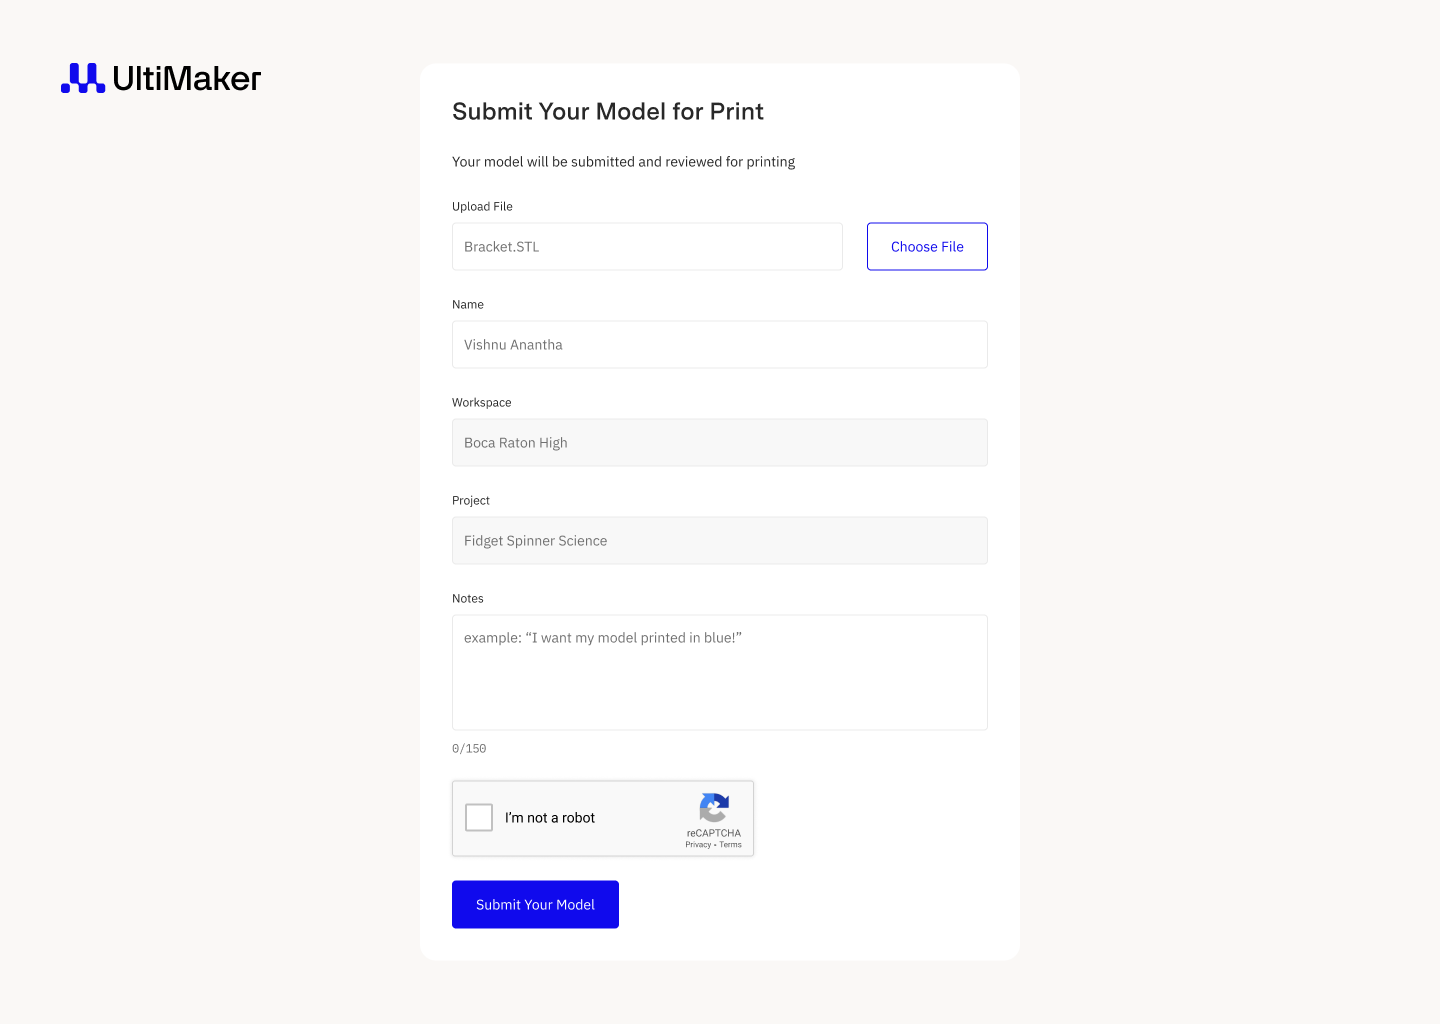
Tip: When you send the link, clearly instruct users on what to include in the "Notes" field, such as their full name or project title, to help you stay organized.
Understanding Submitted Files
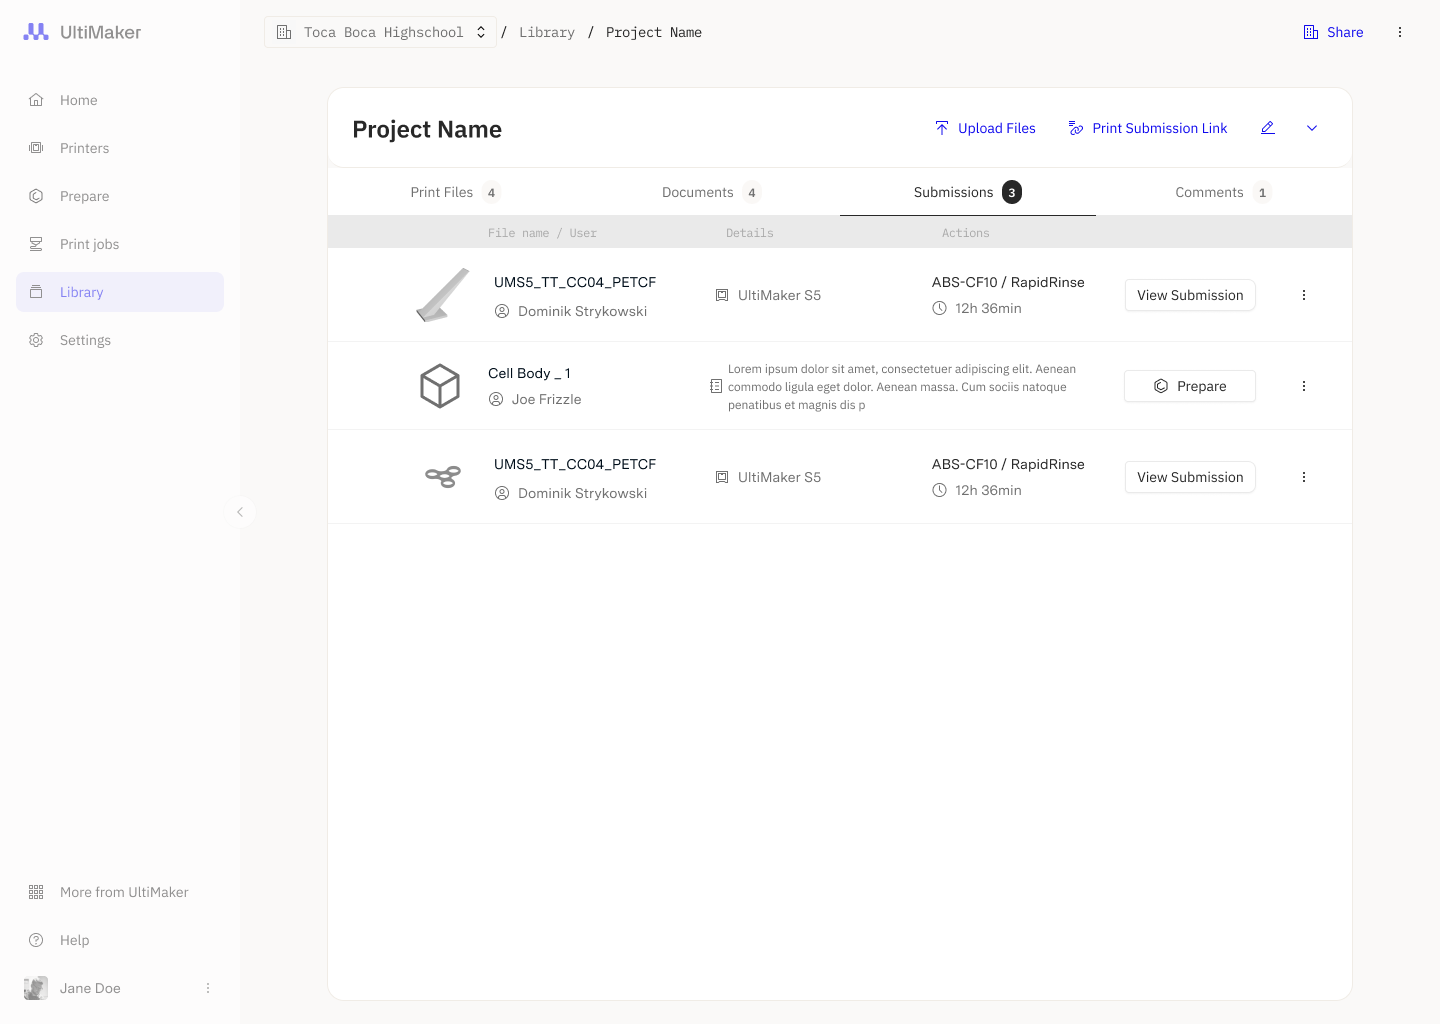
When a file is submitted, its state determines the next steps you can take.
- For un-sliced files (such as .stl or .3mf), you will see a Prepare button. Clicking this will open the model in the Prepare section, where it can be sliced and prepared for printing.
- For sliced files, you can select a printer and send the model directly to print.
Note: For a full walkthrough on preparation, see our guide on Preparing a Print Job with Cura Cloud.
Related Articles


