Available on: All free and paid plans
Note: Cura Cloud is not available not legacy Digital Factory subscriptions (Personal, Essentials, Professional, Excellence)
This article explains how to use the Prepare page in UltiMaker Digital Factory to slice your 3D models for printing without needing to install desktop software.
In this article, you will learn:
- What Cura Cloud is and its benefits.
- How to load and position a 3D model.
- How to select a printer and configure print settings.
- How to slice your model and preview the toolpath.
- How to send a print job to your printer or save the file.
Understanding the Prepare Section
The Prepare section is where you interact with Cura Cloud, our full-featured, browser-based 3D printing slicer powered by the robust Cura engine. It allows you to prepare your models for printing directly from the cloud, offering a seamless and convenient workflow.
Key benefits include:
- No Installation Needed: Access your slicing workflow from any device with a web browser, with no software downloads or updates required.
- Always Up-to-Date: Cura Cloud is automatically updated with the latest print profiles, material settings, and feature optimizations.
- Seamless Workflow: Prepare is fully integrated with your printers and the Digital Factory Library. You can slice a model and send it directly to a printer's queue or save it to your Library with a single click.
- Reliable and Easy to Use: The interface is clean and simple, offering recommended settings for excellent results on most prints while still allowing you to adjust key parameters when needed.
How to Prepare a Print
Follow these steps to upload, slice, and print your 3D model from the cloud.
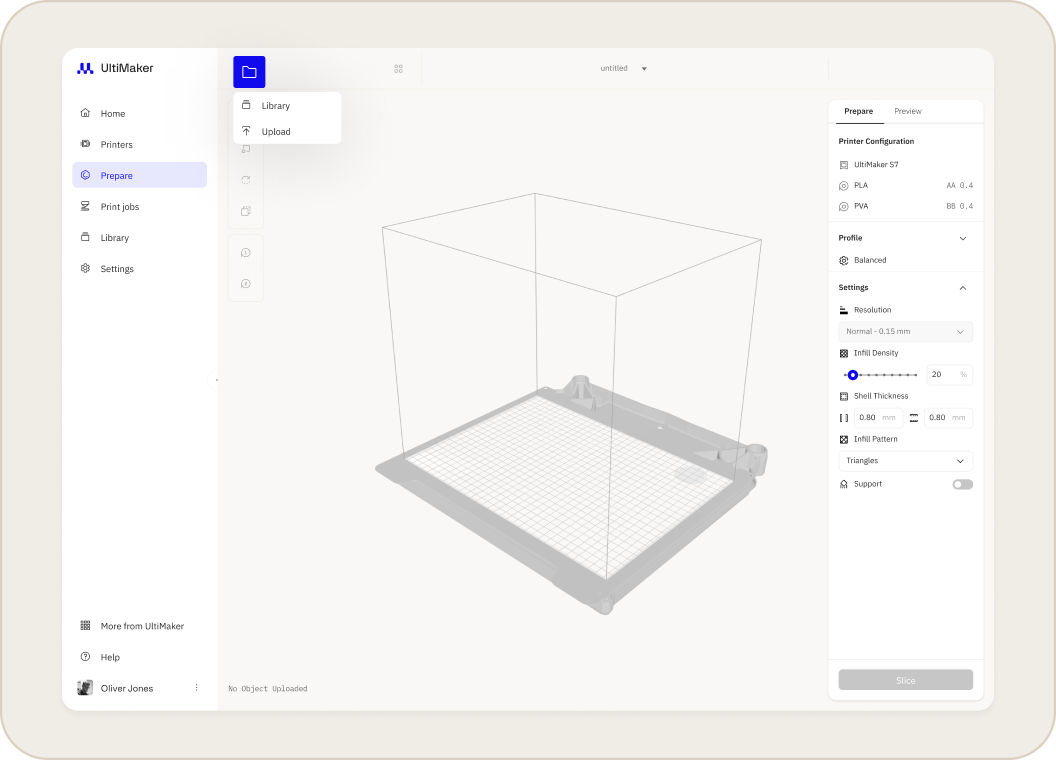
- Go to the Prepare Section and Load a Model
- Log into your UltiMaker Digital Factory account.
- In the left navigation menu, click Prepare.
- Click the folder icon in the top bar to import a 3D file. You can upload a file from your computer (e.g., .stl, .obj) or open a model directly from your Library. The model will appear on the virtual build plate.
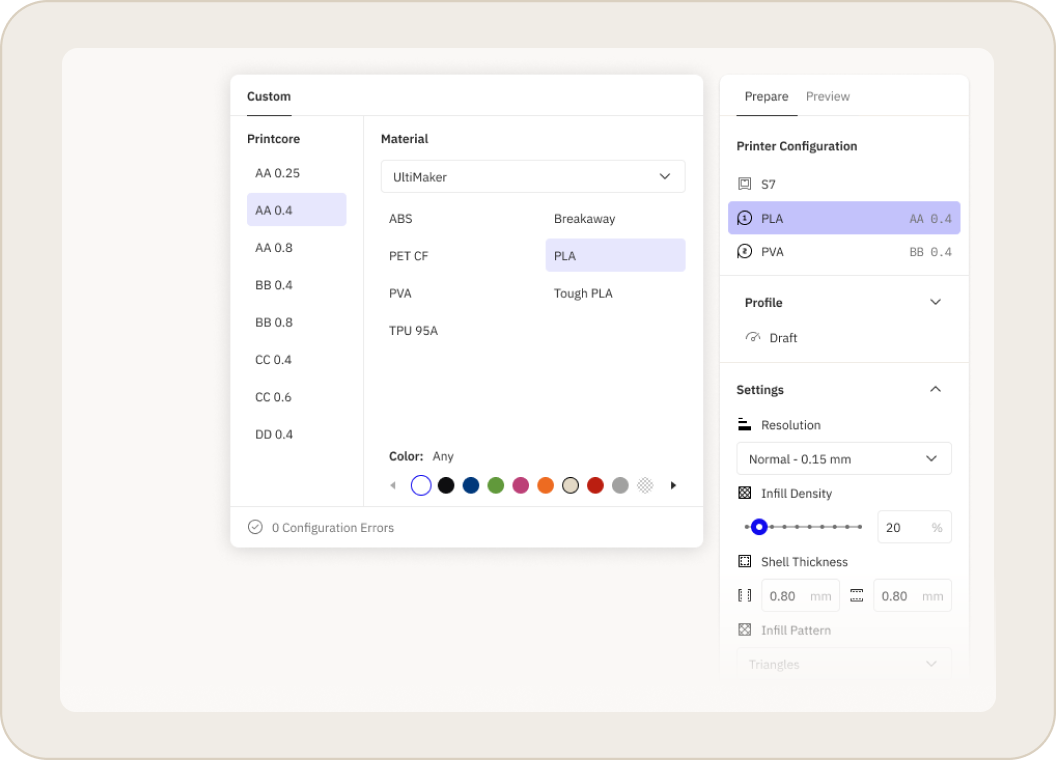
- Select Your Printer and Material
- In the settings panel, use the dropdown menus to select the printer model you wish to print on.
- Choose the material and print profile (quality settings) that match your intended print job.
- Arrange the Model and Configure Settings
- Slice and Preview the Model
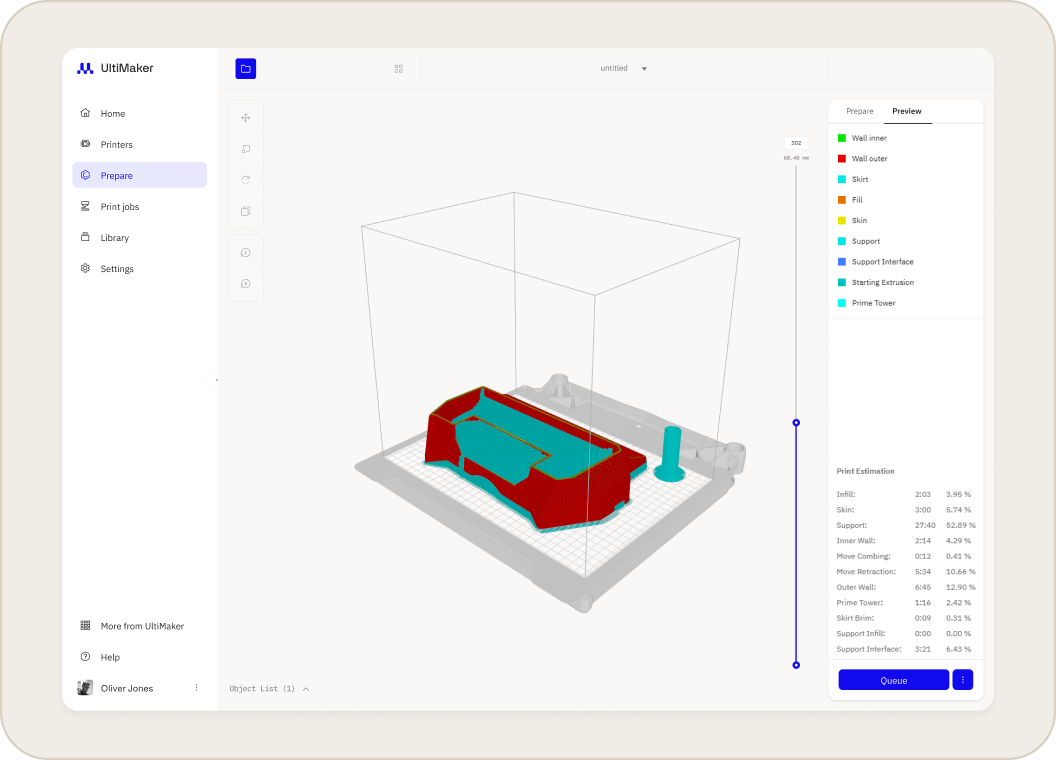
- Once you have configured your settings, click the Slice button. The cloud slicer will process the model and generate a print file.
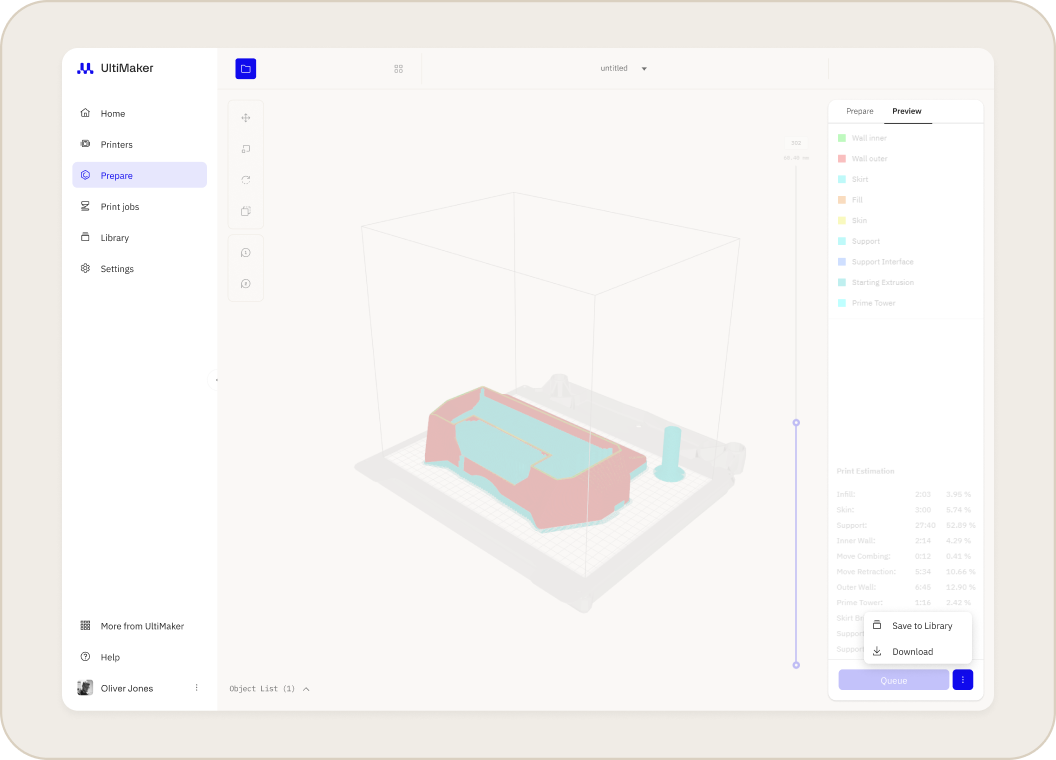
- After slicing is complete, you will be taken to the Preview tab with estimated print time, material usage, and a layer-by-layer visualization of the printed model. This is a helpful step to verify that supports and small features will print as expected.
- Send the Job to a Printer or Save the File
- Once you are satisfied with the sliced preview, you can:
- Click Queue to send the job directly to a connected printer's queue.
- Click Save to Library to store the sliced file in your Digital Factory Library for later use.
- Click Download to save the sliced G-code file to your computer for offline printing.
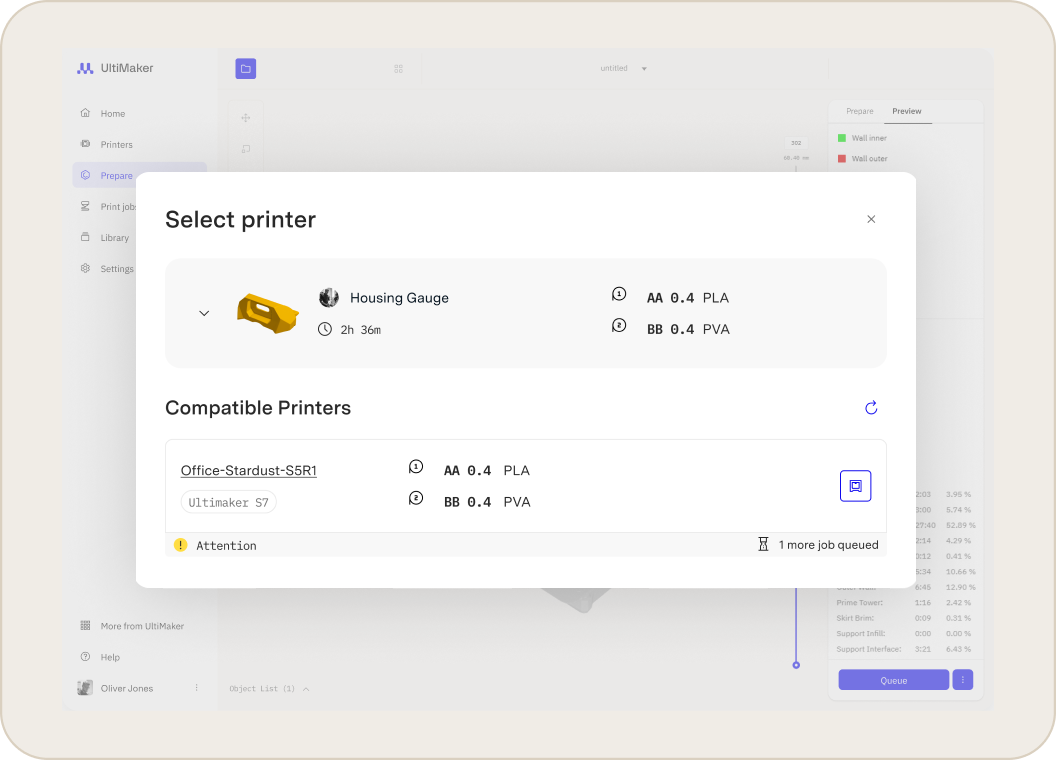
After sending the job to a printer, you can navigate to the Printers or Jobs page to monitor its progress in real-time.
Related Articles


