The UltiMaker S series Air Manager gives you more confidence and setup flexibility for your UltiMaker S5 or S6. Designed to increase user safety, it removes up to 95% of ultrafine particles and shields users from hot and moving components. The UltiMaker S7 and S8 have an integrated Air Manager, and for the S5 and S6, this can be installed as an optional add-on.
The Air Manager is delivered in separate components, which can be installed in a few easy steps. This page contains step-by-step information on how to install the Air Manager and connect it to your printer.
Tip: Instructions for installation of the Air Manager are in the quick start guide that was delivered with the product. If you no longer have this booklet, you can download it as a PDF: UltiMaker S series Air Manager – QSG
Note: These instructions are optimized for installing only the Air Manager. If you have a complete Pro Bundle, including the Material Station, it is recommended to follow the installation order as shown on the Pro Bundle assembly page.
Preparation
The Air Manager comes in reusable, durable packaging, specially designed to protect the device. Unbox the Air Manager by removing the plastic locking clips at the bottom of the box. Holding the handles, lift the upper section of the box. Place the foam pieces, documents, and accessories aside. The rest of the boxes will be removed during the installation of the Air Manager.
Tip: Please retain all packaging for warranty purposes.
Note: When installing the Air Manager on an older UltiMaker S5, first ensure that the firmware is up to date. Air Managers with a serial number starting with BPP-040101 require at least version 6.5.3 (Stable) or 7.0.2 (Latest).
Next, turn off the printer and make sure the printer is placed in a suitable location. You will need access to the back of the printer during the installation. If you have materials loaded, these can remain in place and do not have to be unloaded. Make sure that two print cores are placed in the print head before installing the Air Manager. If you have a Material Station connected to your UltiMaker S5 or S6, make sure to unplug the power going into the Material Station.
Note: The UltiMaker S series printer with Air Manager must be positioned out of direct sunlight when in use. Ensure there is at least 10 cm of free space at the back of the Air Manager for unrestricted airflow.
Installation
 |  |  |
|
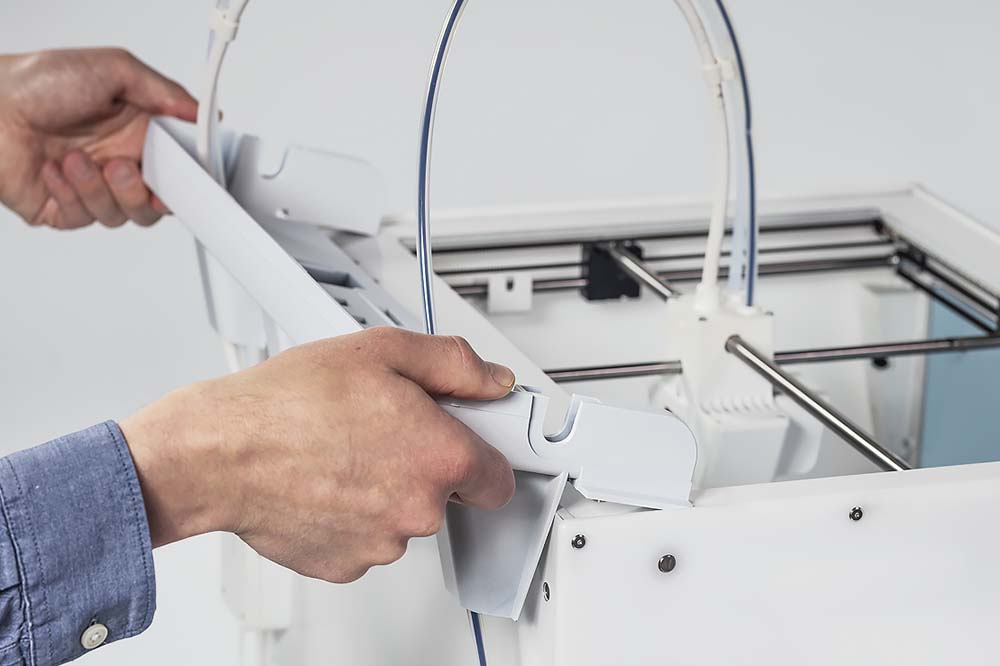
1. Mounting bracket
Align the mounting bracket with the back of the printer.
|
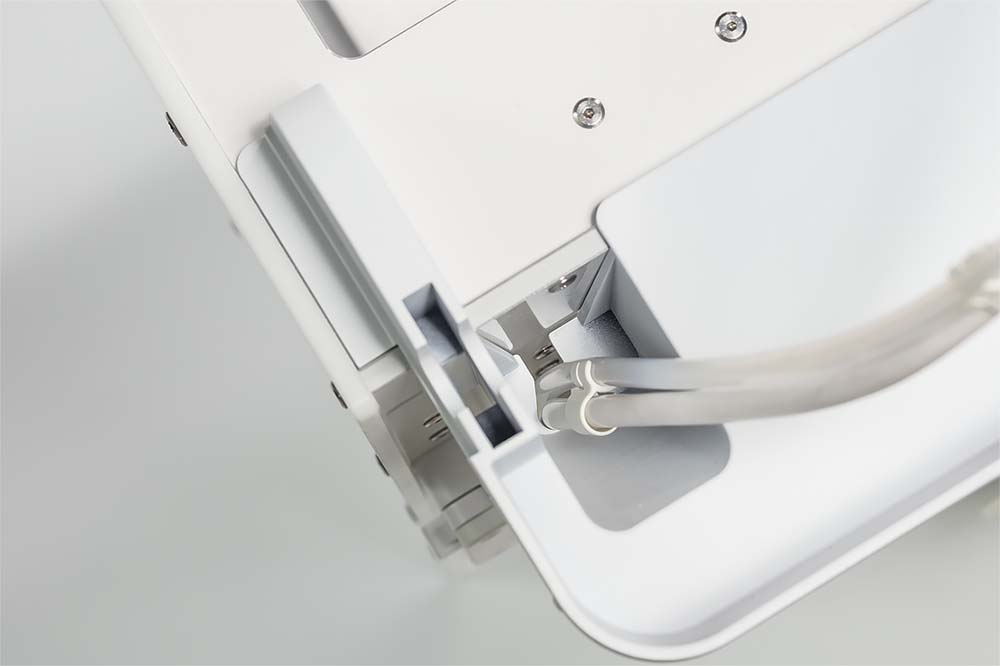
2. Bowden tubes
Guide the Bowden tubes into the mounting bracket slots. Ensure that Bowden tube 2 is placed in front of the print head cable.
|
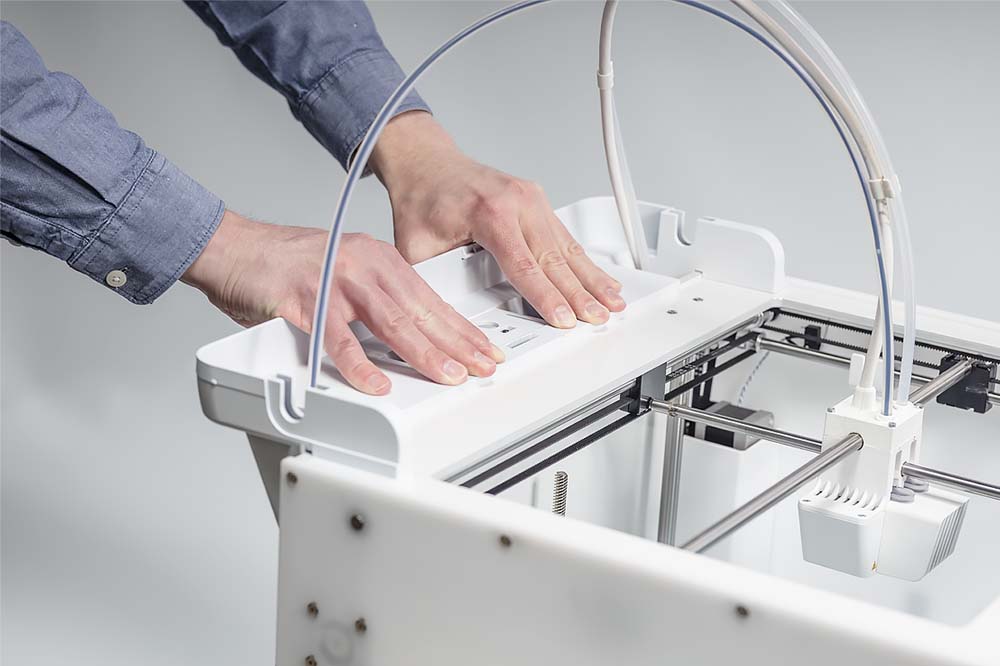
3. Fix the mounting bracket
Gently push down on the mounting bracket until it clicks firmly into place.
|
 |  |  |
|
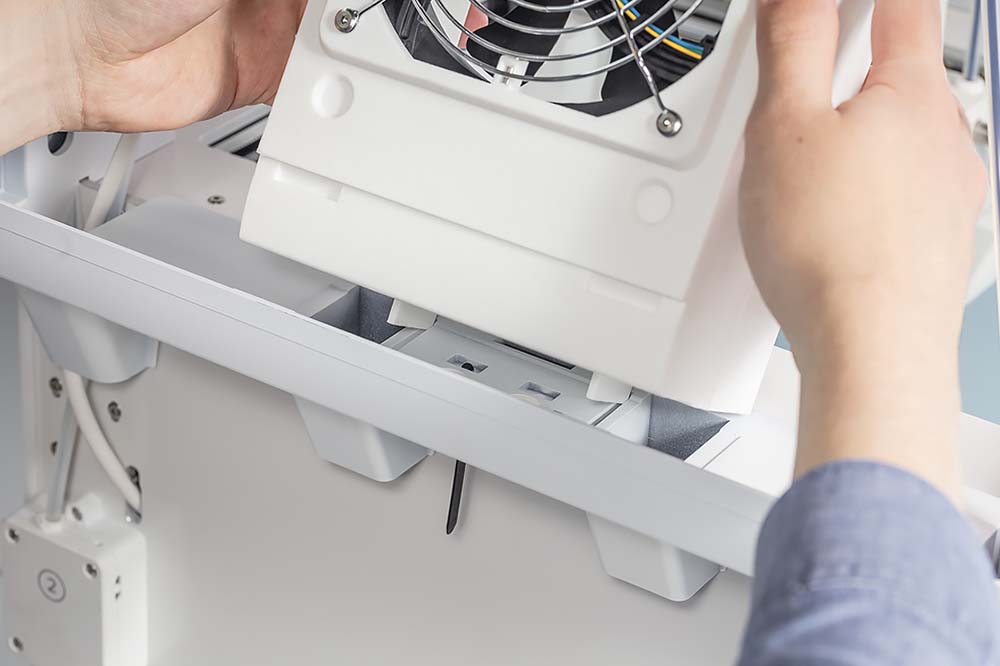
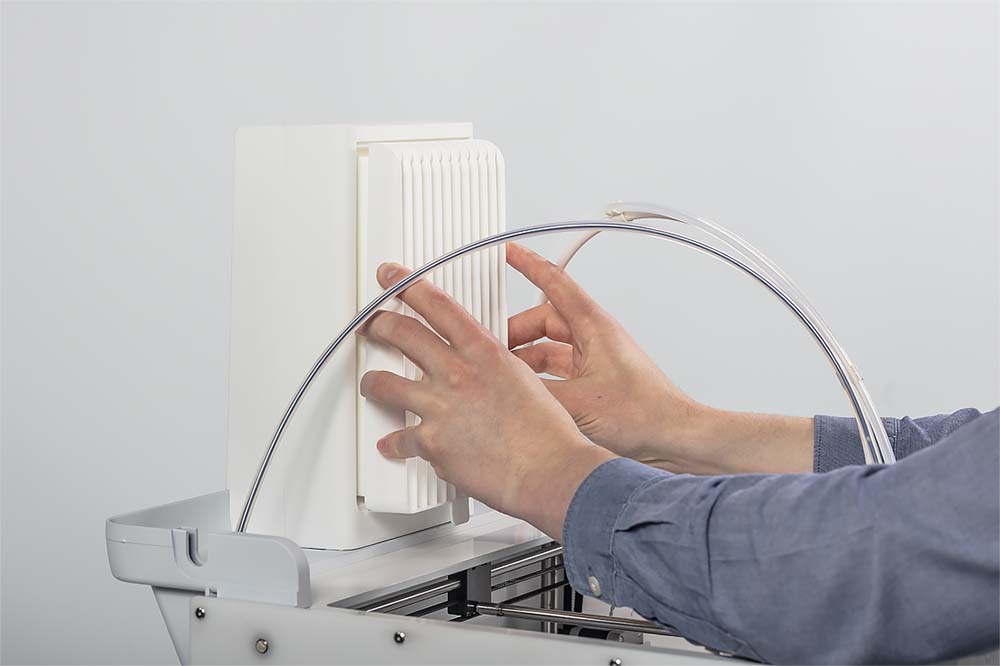
4. Filter housing
Align the bottom of the filter housing with the slots in the mounting bracket and push into place.
|
5. Filter
Align the filter with the housing, with the tab toward the bottom. Push it fully in place.
|
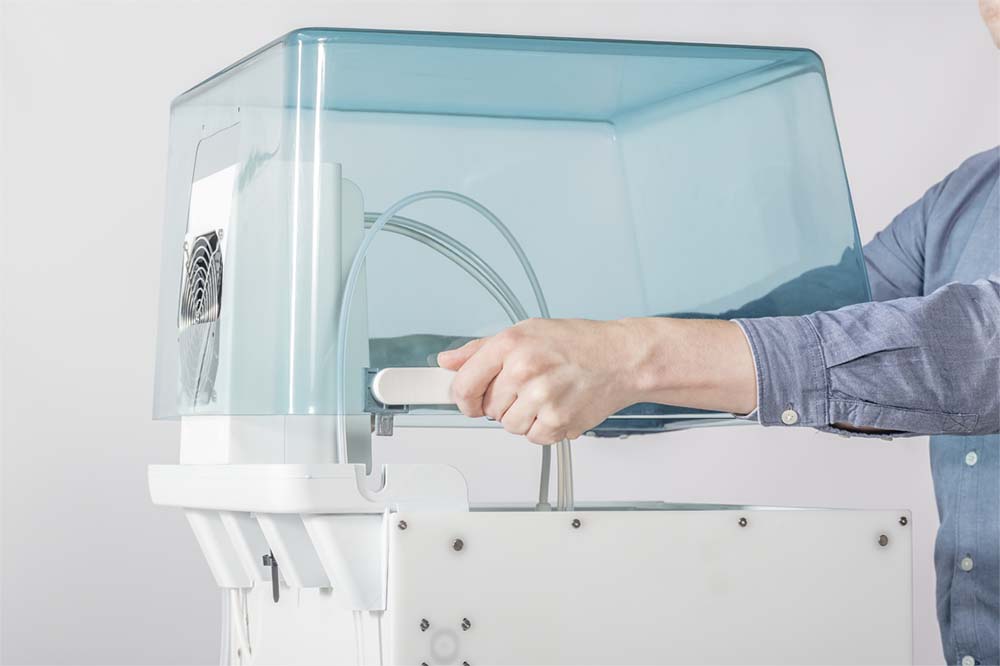
6. Cover
Lift the cover using the handles on each side, and place it over the filter housing.
|
 |  |  |
|
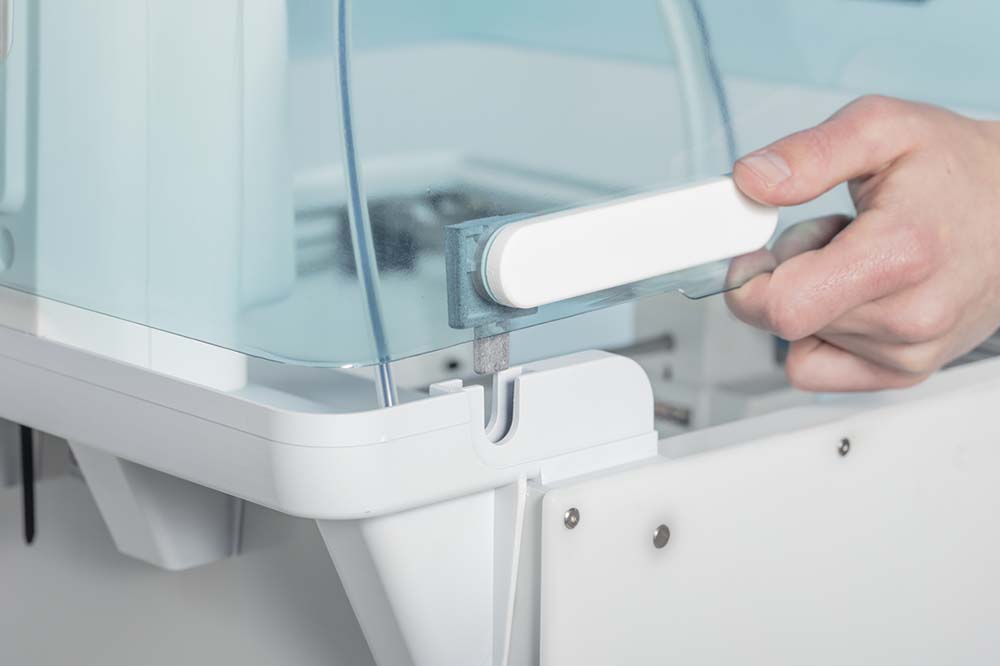
7. Hinges
Align the hinges on the cover with the slots in the mounting bracket and drop the cover into place.
|
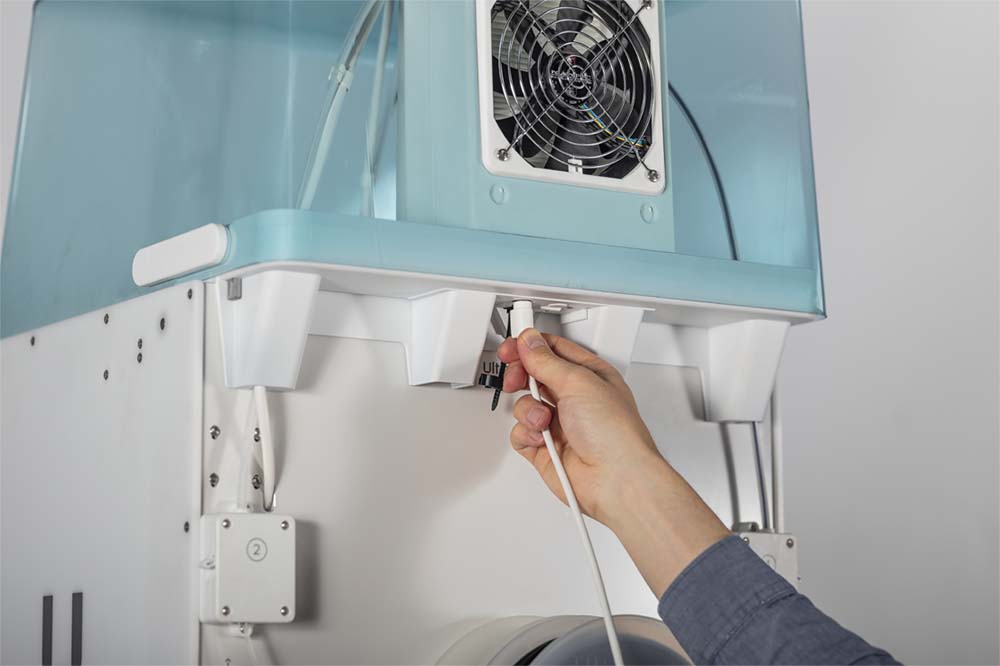
8. Air Manager cable
Connect the Air Manager cable to the port at the back of the Air Manager.
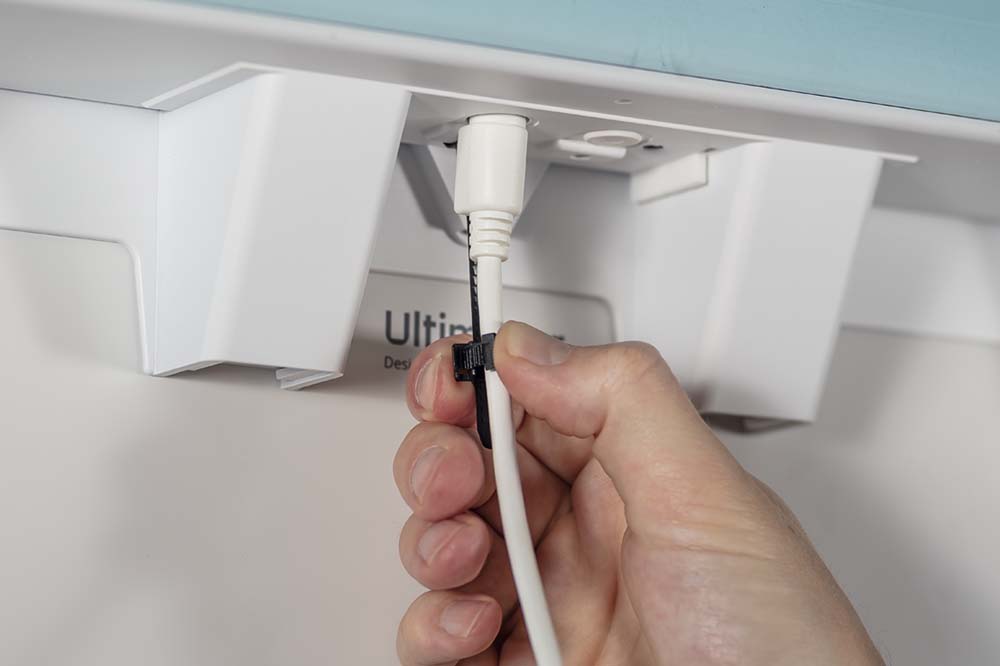
| 9. Stress relief clip
Place the stress relief clip attached to the mounting bracket around the Air Manager cable and close it. |
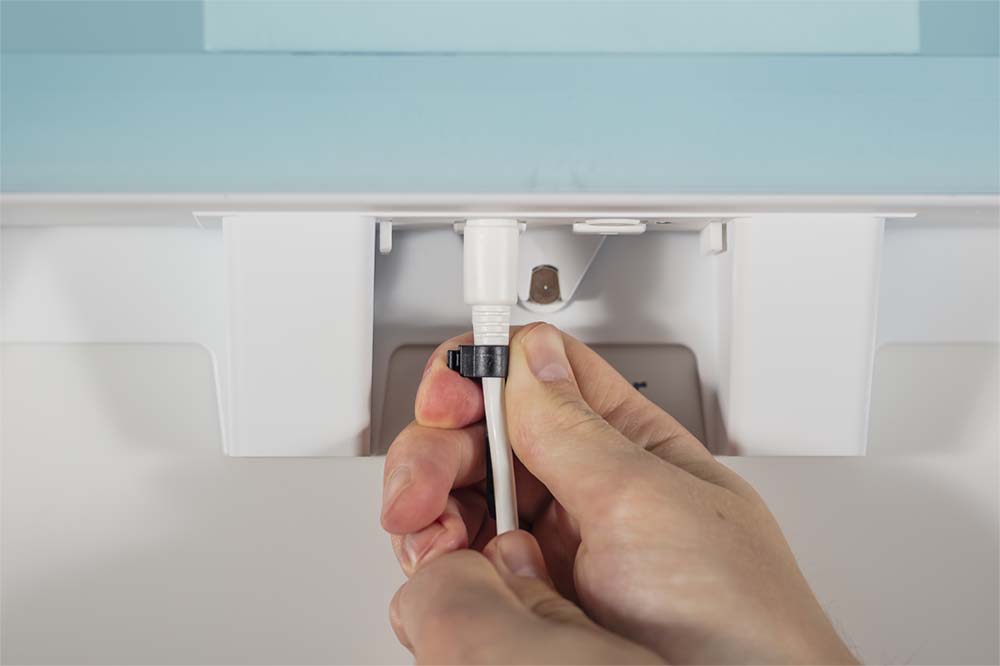 |  |  |
10. Secure stress clip
Slide the stress relief clip upwards until it cannot go further to secure the cable in place.
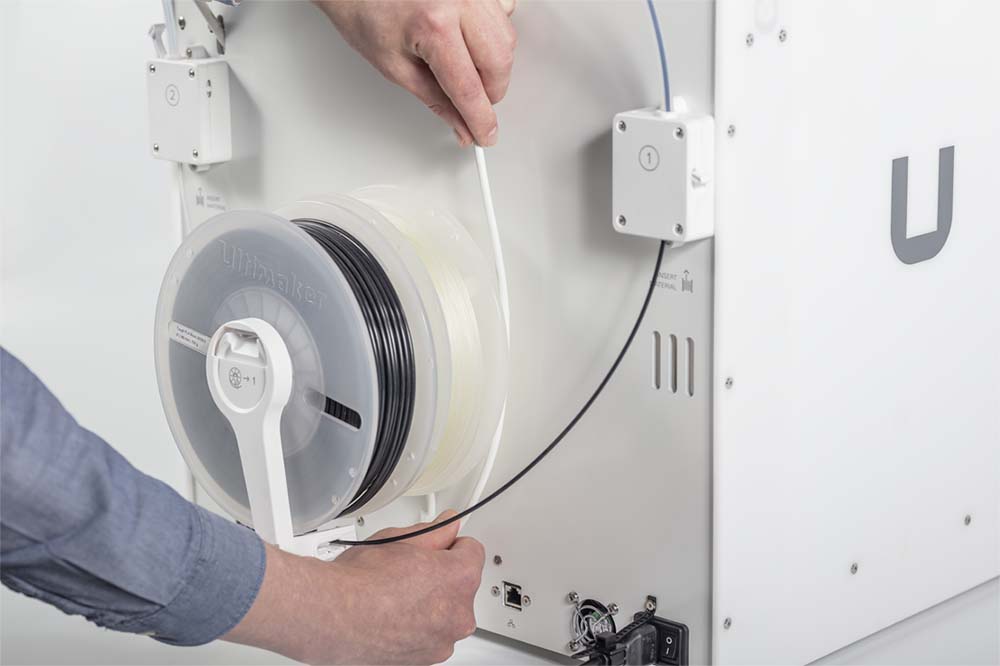
| 11. Air Manager cable
Guide the Air Manager cable on the right side around the spool holder and plug it into the UMB OUT port at the back of the printer. | 12. Spool holder cable
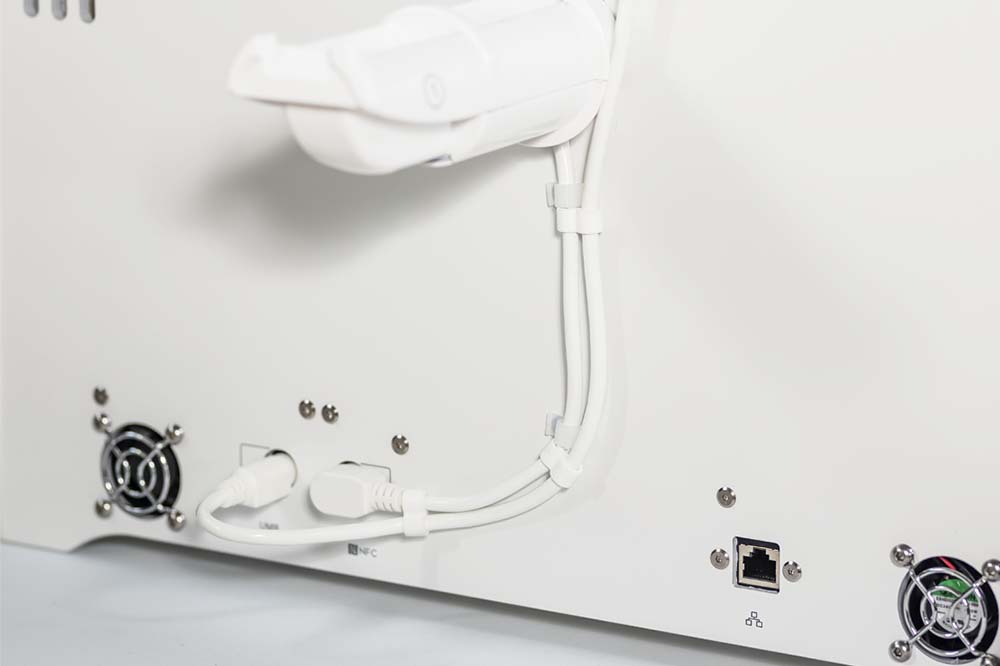
Use the cable clips (from the Air Manager accessories) to connect the Air Manager cable to the spool holder cable. |
Notes for steps 11 and 12: These do not apply if you also have a Material Station. In that case, the Air Manager cable will be connected to the UMB OUT port of the Material Station instead. The Air Manager cable can be placed in the cable clips in the back panel of the printer (the spool holder is not used), and the separate clips included with the Air Manager are not used. Learn more here.
Confirming the installation
Now that the installation of the Air Manager is finished, turn on the UltiMaker S5 or S6 using the power switch at the back. When the printer boots up, it will show a prompt confirming the installation. You can now continue printing with the added benefits of the UltiMaker S series Air Manager!
FAQ
Below, you can find some common questions after installing the UltiMaker S series Air Manager.
Tip: If the accordions do not expand when you click on them, please refresh the page.
I don't see the confirmation prompt
If you do not see the confirmation of the Air Manager on the display, first make sure you are running the latest firmware. Firmware versions 5.4 and later support the Air Manager.
Note: Air Managers with a serial number starting with BPP-040101 and higher will require firmware versions 6.5.3 (Stable) / 7.0.2 (Latest) or later to be installed on your UltiMaker S5 prior to connecting the Air Manager.
If your firmware is up to date, the Air Manager might not be connected correctly. In the menu, navigate to Settings, and scroll down to Peripherals → Air Manager. If this option does not show Installed, the Air Manager is not recognized by your printer. In this case, turn off the printer, check the Air Manager cable on both sides, and reconnect if necessary.
Ensure the cable is connected to the correct ports:
- UltiMaker S5 or S6 with Air Manager: UMB OUT port on the printer (do not use the NFC port)
- UltiMaker S5 or S6 Pro Bundle: UMB OUT port on the Material Station
If the issue persists, check further tips on this page or contact support.
Caution: Do not start a print with the Air Manager installed but not connected or not recognized. This can damage your printer. Either temporarily uninstall the Air Manager or open the cover.
Stuck on Preparing to install
After booting up the printer with the new Air Manager connected, the printer will first cool down the bed and print cores. The display will show 'Preparing to install. Please wait for the printer to cool down.' until all components have reached safe temperatures before confirming the installation.
Note that the printer requires two print cores to be inserted into the print head. If one or both print cores are missing, the printer will not be able to register the temperatures. This will cause the display to freeze on the Preparing to install screen. After 10 minutes, the error 'Print core is taking too long to warm up' will appear.
Ensure you have correctly placed a print core in each slot of the print head before installing the Air Manager.
If both print cores are installed but the issue persists, please contact support for further assistance.
I did not use all items in the box
Not all accessories included with the Air Manager are required for the installation. The following parts are not used:
How to add the Air Manager in UltiMaker Cura?
It is not necessary (or possible) to note that the UltiMaker S5 or S6 has an Air Manager in UltiMaker Cura. The Air Manager is controlled by the printer's firmware. The default machine and profile settings in Cura already contain the necessary information for the Air Manager.
Note: If the material profile is not optimized for the Air Manager, you can still print with it. The Air Manager's fan speed will then default to 100%. Learn more here: Printing with the Air Manager


