UltiMaker places a high value on privacy. The risks our customers are facing are the starting point for UltiMaker's approach to privacy and security. When designing, developing, and maintaining our products and services, UltiMaker takes all justifiable measures to prevent:
- Loss of confidential information, like print files or personal data stored in UltiMaker systems.
- Business process interruption, using UltiMaker devices or applications as a stepping stone into customer systems and infrastructure.
- Reduction of print quality, affecting customer processes that rely on parts printed via UltiMaker systems.
- Unauthorized usage of customer data, products, and services.
Learn more about UltiMaker security
In the Digital Factory, admins can set extra security measures for connected and shared printers, such as enabling a firewall and setting an access PIN code.
Enable printer firewall
The firewall will block all unsolicited local network traffic on your printer. This means that users on the local network will not be able to discover the printer using UltiMaker Cura. The printer will also not be able to receive any print jobs via the local network. The printer is effectively secured from any local network activity.
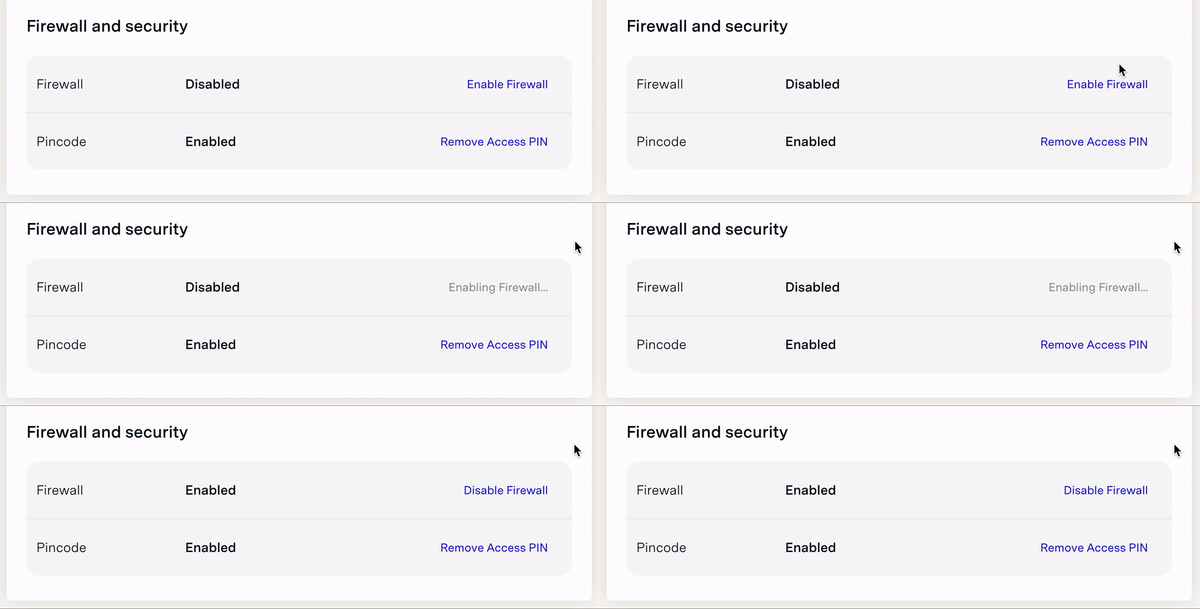
You can enable the firewall via the printer's display or via the Digital Factory. Only admins have the right to change security-related features such as the firewall. In the Printers panel, select the printer for which you want to set the firewall. Then, go to Settings, scroll down to Firewall and security, and select Enable Firewall.
Tip: For more information about the firewall, visit this page.
Set printer access code
Admins of workspaces can secure the Settings menu of S series printers with a PIN code lock. This PIN code lock will prevent unwanted changes to the device by unauthorized users.
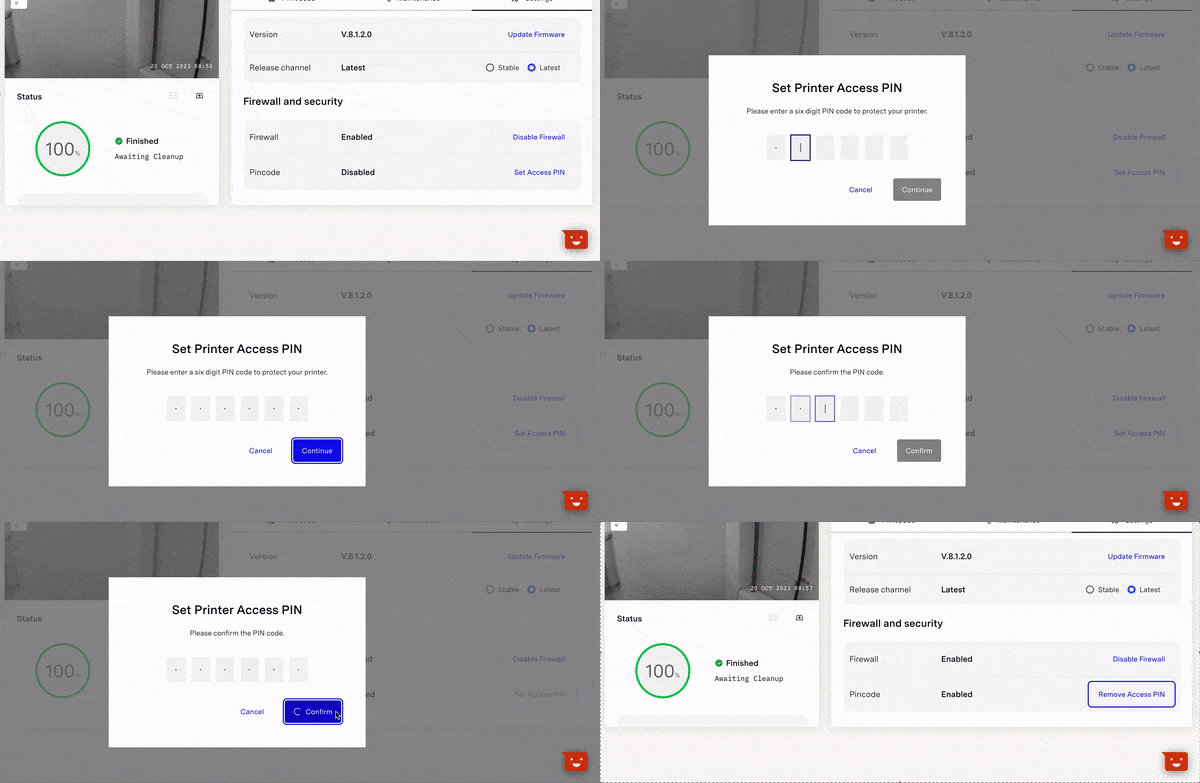
In the Printers panel, select the printer for which you want to set the firewall. Then, go to Settings, scroll down to Firewall and security, and select Enable Access PIN. Select a six-digit code and enter it again to confirm. All users of the printer must now enter this code when accessing the Settings menu on the printer.
Note: This feature was implemented in firmware version 6.2. It is recommended to keep the printer's firmware up to date.
Tip: For more information about the PIN code lock, visit this page.


