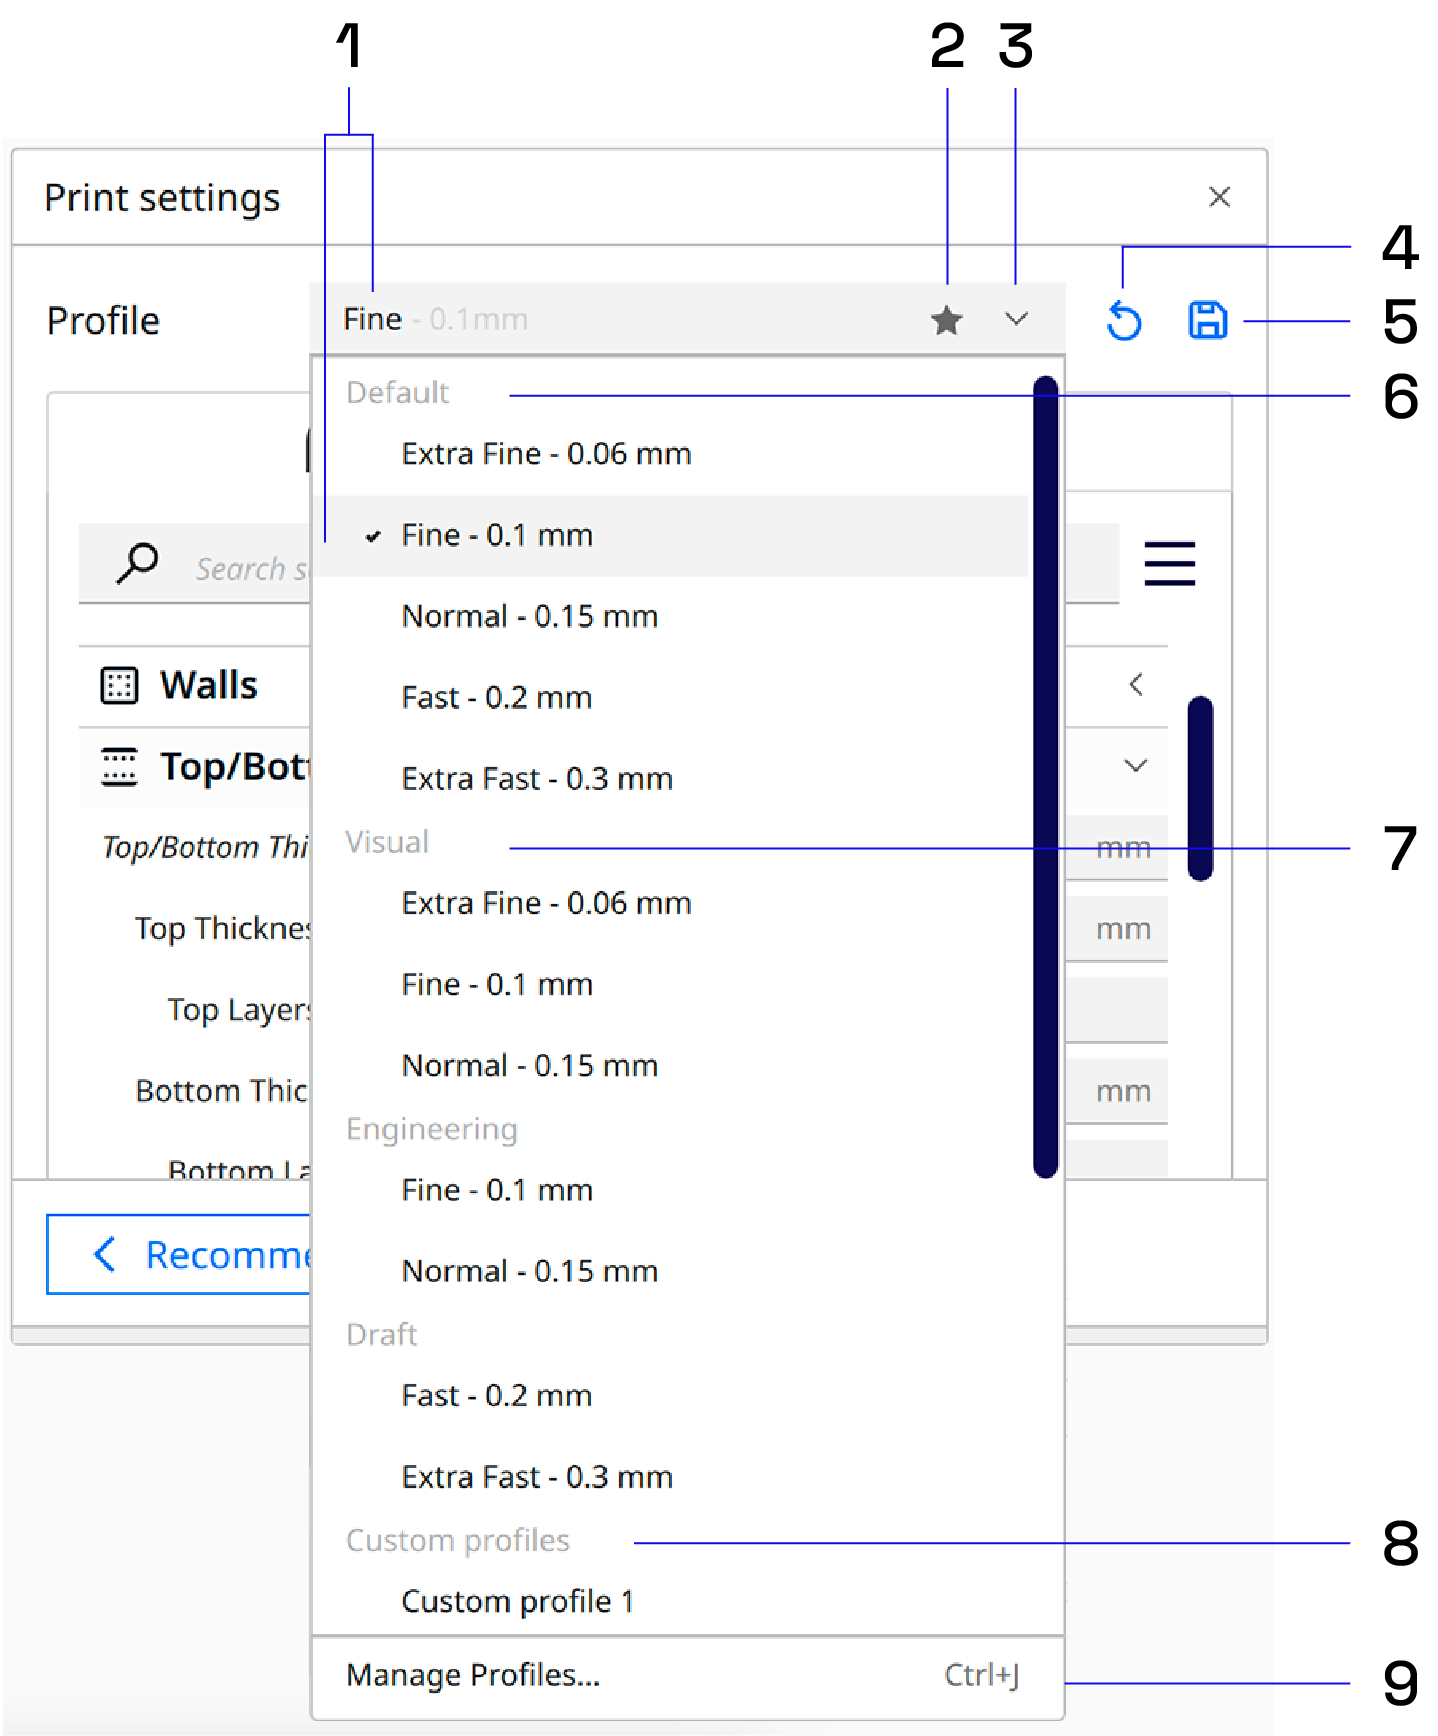
UltiMaker Cura provides the ability to quickly save, share, and manage your print profiles to keep an efficient workflow. This page explains how to work with profiles to get the most out of your 3D printing experience using the print profile quick menu.
The print profile quick menu is located in the Print settings panel when the Custom mode is active.
Note: The options for available profiles will depend on the selected printer type (UltiMaker or third-party) and configuration (material and print core or nozzle size).
- Selected profile. The currently selected profile is shown at the top and indicated with a checkmark in the profile list.
- Star icon. Indicates that the selected profile contains unsaved profile changes.
- Quick menu. Click here to open or close the quick menu.
- Reset. If the profile contains unsaved changes, click this icon to discard the current changes and restore all settings to the default active profile values.
- Compare and save. If the profile contains unsaved changes, click this icon to see an overview of all overrides and save these settings as a new custom profile.
- Default profiles. These standard profiles are developed by UltiMaker for all UltiMaker printers. The visibility and compatibility of profiles depend on the selected configuration.
- Intent profiles. These intent profiles are specialized to print with specific printing strategies. Intent profiles have limited availability, depending on the active configuration (currently S series only).
- Custom profiles. These profiles are your user-saved custom profiles.
- Manage profiles. Opens the Profile manager tab in the Preferences overview, from where you can activate or duplicate existing profiles, or create a new profile.