UltiMaker Cura contains many preset profiles, but you can also create your own. You can learn more about printing profiles in this article: What is a printing profile in UltiMaker Cura?
Managing your profiles can be done in the Profiles tab of the Preferences menu. You can access this overview in three different ways:
- Use the keyboard shortcut CTRL+J on Windows or ⌘+J on Mac
- In the top bar, click Preferences → Configure Cura... and then select the Profiles tab
- Open the print profile quick menu and select Manage Profiles...
Tip: A lot of print profile manager functionality can also be found in the print profile quick menu.
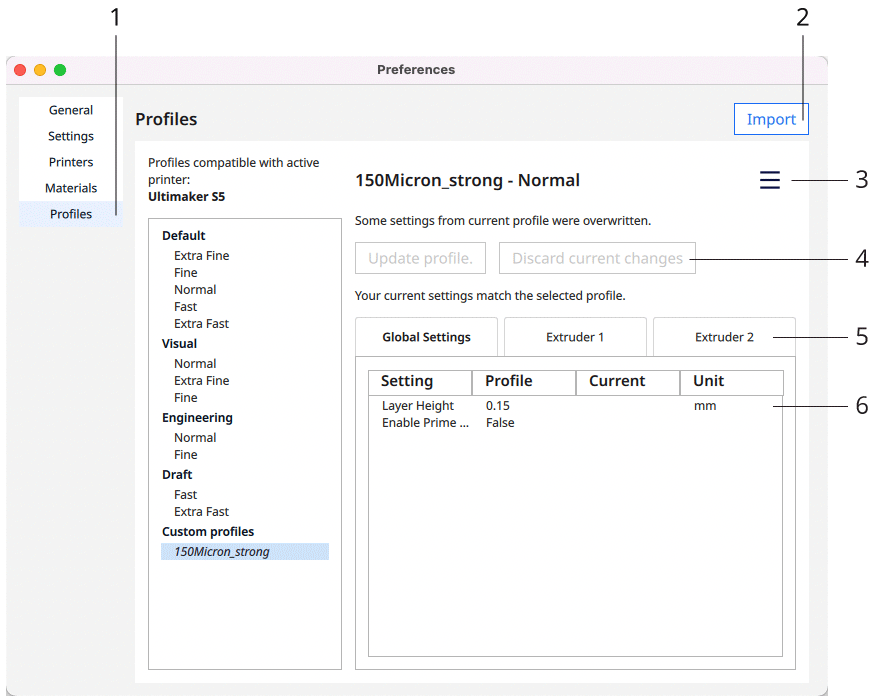
The print profile manager contains all default and user-saved profiles and allows you to manage these in a convenient way.
- Profiles. The profile tab in the UltiMaker Cura Preferences panel.
- Import. Allows importing previously exported print profiles into UltiMaker Cura.
- Menu. Activate, duplicate, remove, or rename the selected profile. Some options could be grayed out. You cannot remove or rename preset profiles or currently active custom profiles.
- Update profile. Update the profile or discard any unsaved changes made to the custom profile. If you update a preset profile with changed settings, this will create a new custom profile.
- Extruder tabs. Print profile information is stored in the global settings tab that counts for both extruders. The separate extruder tabs contain extruder unique parameters.
- Profile values. All changes made to the printing profile compared to the default profile. Changes are displayed per extruder.