Materials can be changed easily on the UltiMaker S3, S5, S7 by using the procedure from the menu. Besides changing a material, you also have the option to only load or unload a material.
Note: Changing materials on the UltiMaker S5 or UltiMaker S7 in combination with a Material Station is very different. If you have a Material Station, follow the instructions on this page instead.
Tip: If you are switching to a material with a very different printing temperature or a contrasting color, it is recommended to first unload the old material and clean the print core before loading the new material.
Change material and print core
It is not possible to change the material and the print core at the same time. If you want to change both, especially in an unsupported combination, take the following steps:
- First, unload the material via the Configuration menu.
- Next, change the print core following the instructions on this page.
- Then, load the new material.
Tip: On the UltiMaker S5 or UItiMaker S7 in combination with a Material Station, print core and material compatibility is only important when starting a print, not when only loading or changing print cores.
Change material instructions
In the Configuration menu, select the material you want to change and select Change. Wait for the print core to heat up and unload the material. Then follow the instructions on the display:
| Unload material |
Take the filament out of the feeder and remove it from the spool holder. Select Confirm to continue.
Tip: If you are changing material 1, also temporarily take the filament guide with material 2 from the spool holder.
|
| Store material | Put the end of the filament through one of the holes in the spool to prevent it from uncoiling. Properly store the material when not in use according to the recommended storage conditions. |
| Prepare the new spool | Take the spool of material you want to load. Cut off the end of the filament into a nice, sharp tip. Straighten the end of the filament to ensure easy loading. |
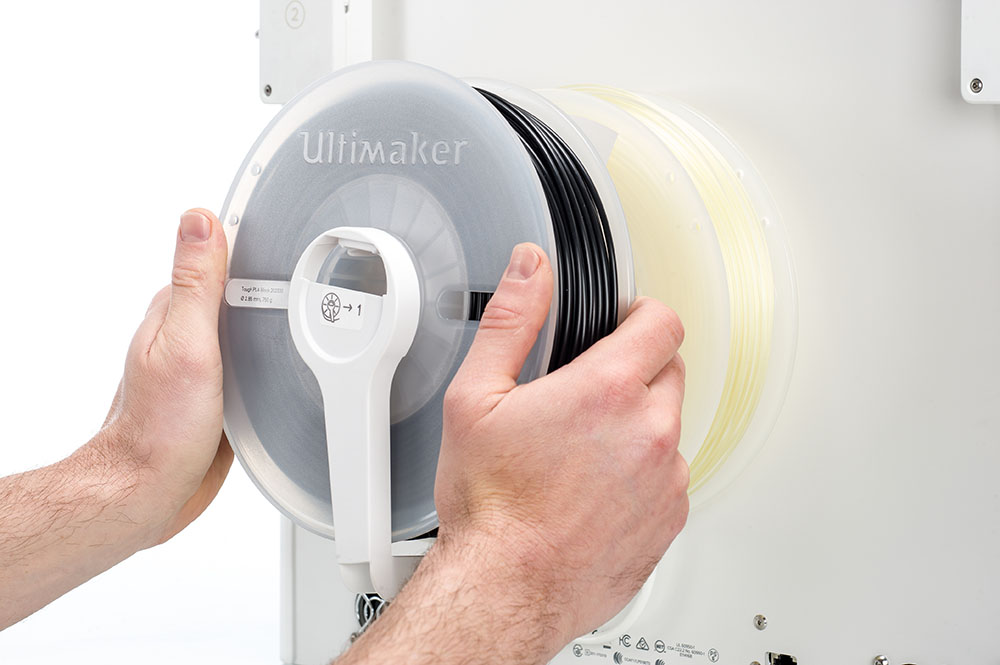
| Install the new spool |
Place the new material on the spool holder and select Confirm.
Tip: When changing material 1, place the new material on the material guide. When changing material 2, don't forget to place the filament guide with material 1 back onto the spool holder.
|
| Select material type |
When using UltiMaker materials, wait for the printer to detect the material type and select Confirm.
Tip: When using a third-party material, you can select the material type manually. Ensure you have installed the correct material profile first.
|
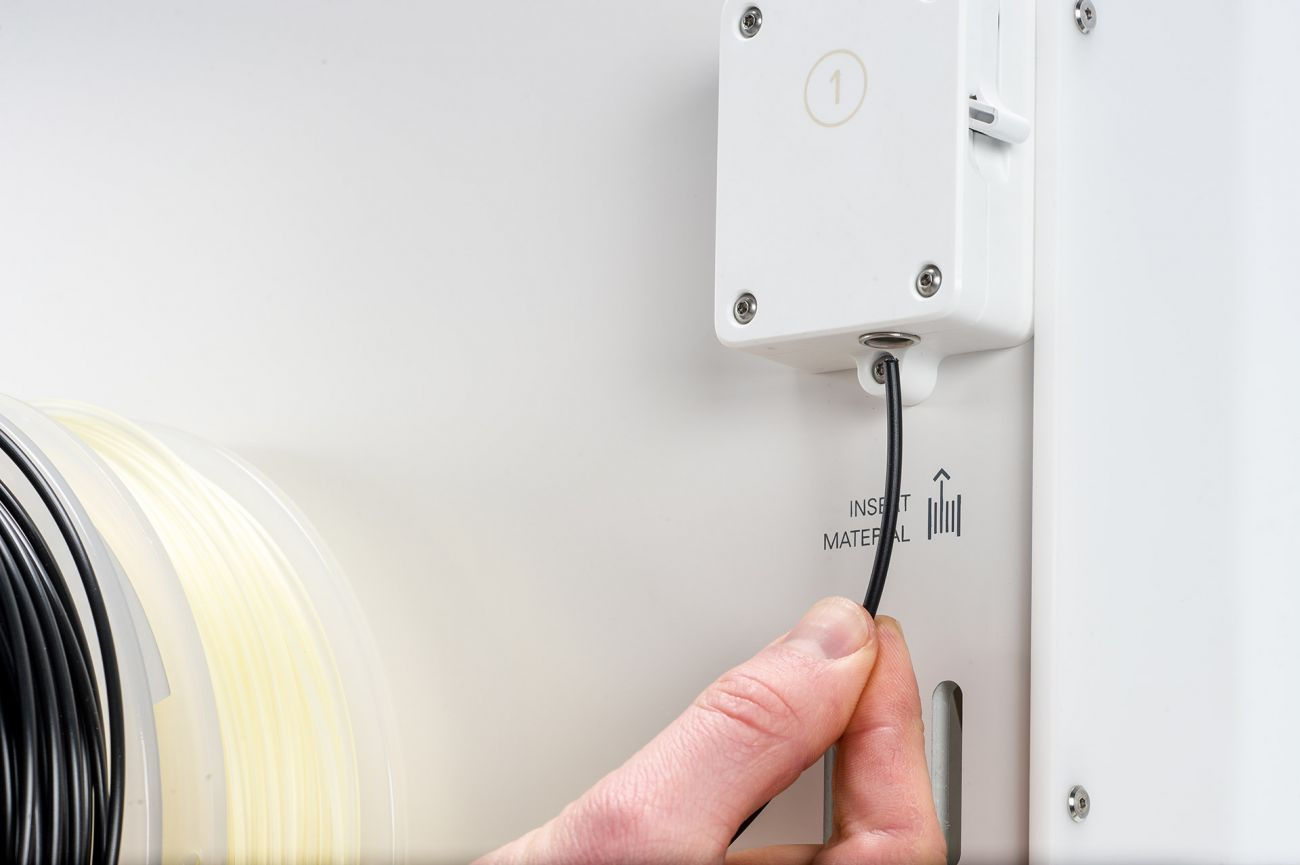
| Load material |
Insert the end of the filament into the feeder until the feeder grips the material. As soon as the filament is visible in the Bowden tube above the feeder, select Confirm.
Note: Don't wait too long with confirming to prevent the material from getting stuck during the loading process.
|
| Extrude material |
Wait for the print core to heat up. The filament will now fast-forward to the print head. Wait until it extrudes from the nozzle and any residue from the previous material has been flushed out. Confirm when the new material is flowing consistently and remove the strand of filament from the printer.
|
 |
|


