Once the 3D print has finished, it must be removed from the build plate. This article describes how to remove prints from the glass build plate. The following UltiMaker printers use glass build plates:
UltiMaker 2 series, UltiMaker 3 series, UltiMaker S3, UltiMaker S5, and the UltiMaker S6 (Glass plate variant)
Tip: For information about UltiMaker printers with a flexible build plate (UltiMaker S6 Flex, S7, S8, and Factor 4), please visit this page: Removing the print from the flexible build plate
Caution: When using a brim, be aware of the danger of cutting yourself when removing the print from the build plate. Use a deburring tool to remove the brim once the print is taken from the build plate.
There are several methods to remove printed parts, depending on how the print has adhered to the build plate. Some parts can easily be removed from the glass build plate after the printer has cooled down. However, for most materials, it is recommended to apply a thin layer of glue to the glass build plate. This can mean that the object is still firmly attached, even after the plate has cooled down. In that case, remove the build plate from the printer to detach the printed part. Follow these steps:
Wait for cool down
First, allow the build plate and the print to cool down after printing. Leave the door(s) closed at least until the display indicates when it is safe to remove the plate. The display will show an orange warning bar if the build plate is 60 °C or higher. Note that 60 °C is still quite warm for most materials, and letting the build plate cool down further is recommended.
Note: It is not recommended to try to remove objects from the build plate while it is still warm. This could cause the bottom of the object to deform.
The material will contract as it cools. Depending on the material used, the footprint of the object, and chosen adhesion methods, the print may easily come loose from the glass plate after cooling. If it detaches easily, you do not need to remove the build plate from the printer. This often works well for objects with a small footprint.
Note: Do not exert too much force on the object while the glass plate is still inside the printer. This can damage the build plate clamps. If the print does not detach easily, remove the build plate from the printer and follow the additional tips on this page.
Remove the build plate
To remove the build plate, open the two build plate clamps at the front. Slide the glass plate forward until it is out of the build plate clamps at the back. Then lift up the plate and take it out of the printer.
Caution: Do not lift up or tilt the glass plate until it is out of the build plate clamps at the back to prevent damaging the clamps. Also, always first allow the glass plate to cool down after printing before removing it to prevent burning your fingers. The status bar on the display will indicate when the build plate is safe to touch.
Use a spatula
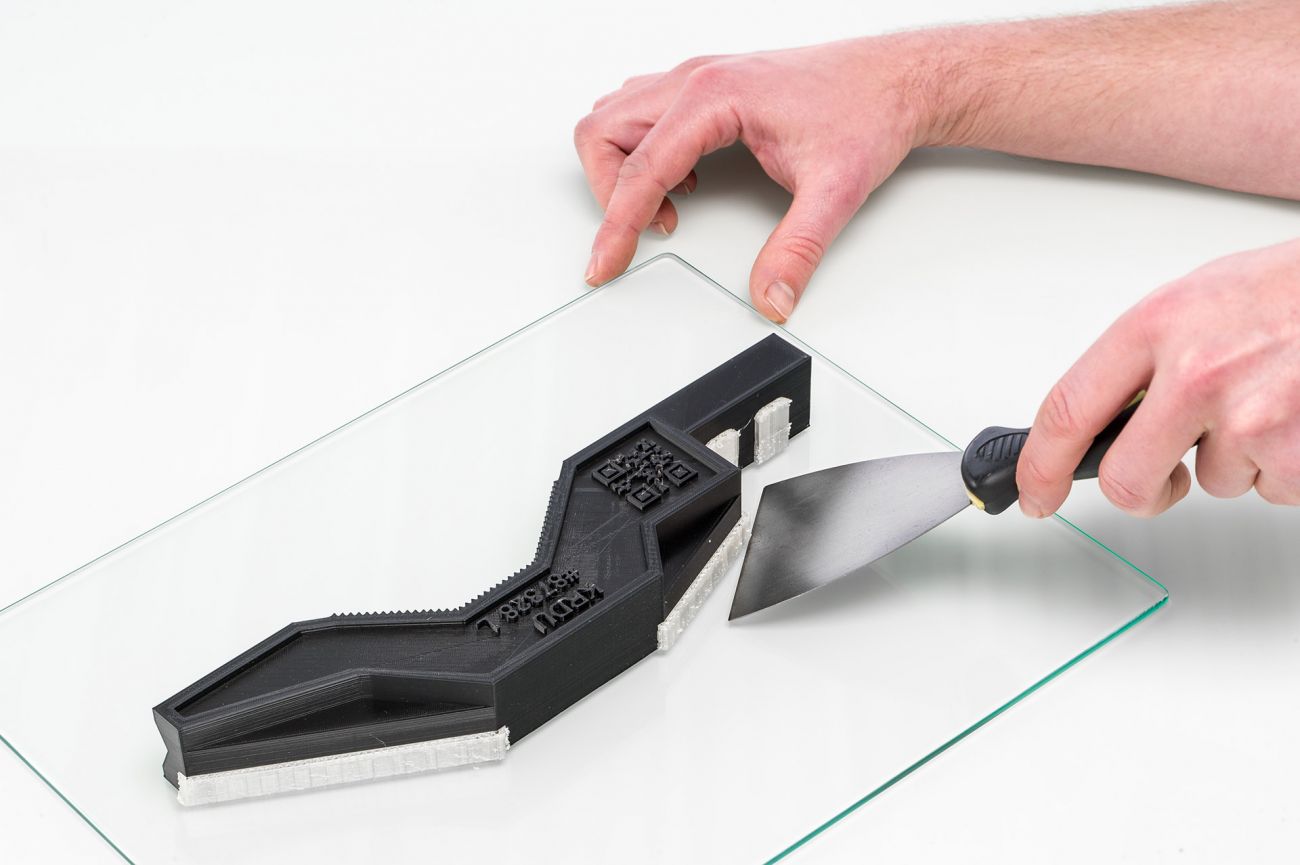
If your print is still adhered to the build plate after cooling, you can use a spatula to remove the print.
Caution: Never do this inside the printer. Always take the build plate out of the printer to avoid damaging the build plate clamps.
Place the glass build plate on a flat surface. Place the spatula under the print, keep it parallel to the build plate, and apply a small amount of force to remove the print. A spatula can also be used to carefully remove the remaining parts of the print from the build plate, such as the brim or support structures.
Caution: The edges of the model or brim can be sharp. Wear protective gloves to prevent injury. Be aware of the risk of glass chipping, especially for high-temperature materials or if the correct adhesion method was not used. Safety glasses are advised.
Use water
If the print is very securely adhered to the build plate, you can also remove the print using water. Remove the glass build plate with the print from the printer.
Caution: Always first allow the glass plate to cool down after printing before removing it to prevent burning your fingers. The status bar on the display will indicate when the build plate is safe to touch.
Run cool tap water on the backside of the plate to cool it quickly. The print material will contract faster than with normal cool down, which should make it pop off the glass plate.
Alternatively, if glue was used on the glass plate, run lukewarm water over the print side of the plate to dissolve the glue. Once the glue is dissolved, it is easier to remove the print. If PVA was used, place the build plate with the print in water to dissolve the PVA. This makes print removal easier.
Prepare for the next print job
After removing the print from the glass build plate, place it back inside the printer. If necessary, first clean the glass build plate and reapply the adhesive. Always thoroughly dry the glass before reinstalling it.
Slide the glass plate onto the build plate until it fits in the build plate clamps at the back. Then, close the build plate clamps at the front to secure it.
Confirm the removal of the print on the display. Your printer is now ready to start the next print job.
Caution: Never confirm removal before the print is removed and the glass plate is placed securely back into the printer. This can cause damage to the print and/or printer if the next print job is started. Especially pay attention to this if the printer is connected via local network or UltiMaker Digital Factory, as new print jobs can start unexpectedly.
Tip: The print removal can also be confirmed remotely via the Digital Factory. This can be used when the build plate is cleared, but this was not yet confirmed on the printer's display. Learn more about this functionality on this page.


