The information in this article applies to UltiMaker S series printers (S3, S5, S6, S7, and S8). The leveling process is the same regardless of whether peripherals (Air Manager and/or Material Station) are installed.
During printing, it is important that the first layer sticks well to the build plate. Leveling the build plate ensures that you have the correct distance between the build plate and the nozzle during printing, for optimal adhesion. If there is too much distance between the nozzles and build plate, the print will not adhere properly. If the distance is too small, material cannot extrude properly during the first layers.
UltiMaker S series printers use a process called active leveling for optimal adhesion and reliability. On S series printers with a glass build plate (S3, S5, S6 Glass), the build plate can be manually leveled when necessary. Read more about these leveling processes below.
Tip: UltiMaker S series printers with the flexible build plate (S6 Flex, S7, and S8) do not have a manual leveling procedure; the build plate is in a fixed position.
Note: Ensure two print cores are inserted into the print head. Make sure there is no excess material stuck to the nozzles and the build plate is clean before the start of a print or when you want to manually level the build plate, or you might get inaccurate results.
Active leveling
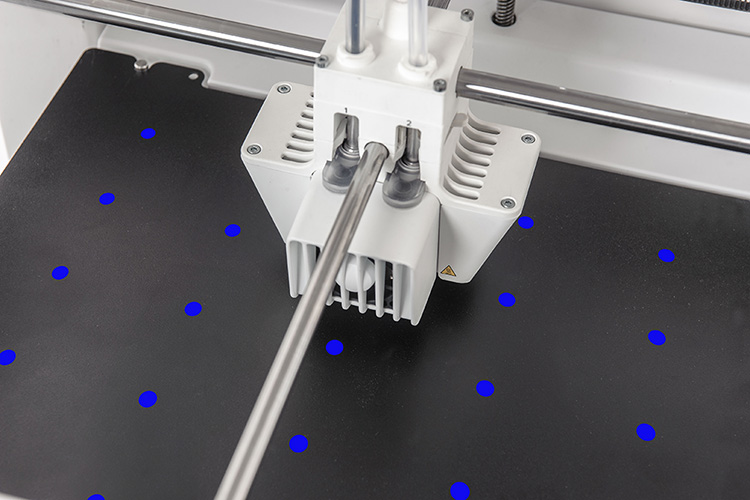
Active leveling is automatically performed at the start of each print to create a reliable first layer. During active leveling, the printer will create a detailed height map of the build plate surface. This information is used to compensate for any inaccuracies of the build surface during the first layers of the print. It will do this by adjusting the build plate height while printing.
The UltiMaker S3 and UltiMaker S5 have a capacitive sensor, while the UltiMaker S6, S7, and S8 use an inductive sensor for the active leveling process. Although the hardware is different, the process behaves the same on all printers.
Note: Do not touch the UltiMaker S series printer during the active leveling procedure, as this could affect the calibration process.
Tip: Are you having problems with the active leveling procedure or seeing a leveling-related error on the display? Follow the steps in this article to resolve the issue: Active leveling errors
Manual leveling
The build plate is leveled at the factory, and manual leveling does not normally need to be performed. However, on UltiMaker S series with a glass build plate (S3, S5, and S6 Glass), manual leveling is recommended in case of active leveling errors, or after certain maintenance or repair actions. This includes repairs to the heated bed or build plate clamps, or after a firmware recovery.
Tip: UltiMaker S series printers with the flexible build plate (S6 Flex, S7, and S8) do not have a manual leveling procedure; the build plate is in a fixed position.
Manual leveling consists of 3 steps: rough leveling, fine-tuning, and Z-offset calibration. You will need the calibration card from the accessory box. In the Options menu (gear icon), go to Maintenance → Build plate → Manual leveling. Select Start to begin and wait while the printer prepares the manual leveling procedure.
Rough leveling
In this part of the leveling process, set an approximate distance of 1 mm between the first nozzle and the build plate. Follow the instructions on the display.
Caution: After selecting Confirm for each step, the print head will move to the next position. Keep hands clear of the build volume until the print head and build plate have stopped moving.
- The print head will first move to the back of the build plate. Use the touchscreen controls to move the build plate until there is approximately 1 mm distance between the first nozzle and the build plate. Make sure that the nozzle is close to the build plate without touching it. Confirm to continue.
- The print head will move to the next position. Adjust the front-right thumb wheel to roughly level the build plate at the front. There should be a distance of approximately 1 mm between the nozzle and build plate. Confirm to continue.
- The print head will move to the next position. Repeat step 2 for the front-left thumb wheel and Confirm to continue.
Fine-tuning
In the next step, fine-tune the position of the build plate using the calibration card. Follow the instructions on the display.
Note: Do not apply pressure to the build plate while fine-tuning with the calibration card. This will lead to inaccuracies.
- The print head will start again at position 1, in the back of the build plate. Place the calibration card between the nozzle and build plate. Use the touchscreen controls to adjust the position of the build plate until you feel some resistance when moving the card. Select Confirm to continue.
- The print head will move to the next position. Place the calibration card between the nozzle and build plate in the front-right corner. Adjust the thumb wheel until you feel some resistance when moving the card (the same amount as for position 1). Confirm to continue.
- The print head will move to the next position. Repeat step 2 for the front-left corner and Confirm to continue.
Z offset
In the final step, set the vertical offset between the first and the second nozzle. This ensures that the two print cores are aligned well in dual extrusion prints. During this step, do not alter the position of the build plate with the thumb wheels. Only use the controls and the calibration card.
Note: Do not apply pressure to the build plate while setting the Z offset with the calibration card. This will lead to inaccuracies.
- Place the calibration card between the second nozzle and build plate.
- Use the controls to adjust the position of the build plate until you feel some resistance when moving the card. Select Confirm to continue.
- Wait for the printer to finish the manual leveling procedure.
Factory position
After performing the manual leveling process multiple times, the springs under the build plate may have become too loose. This means that the build plate is too high, which could cause problems during active leveling.
Reset the position of the build plate to the factory position. This is different for the UltiMaker S3 and UltiMaker S5/S6.
Note: This does not apply to UltiMaker S series printers with the flexible build plate. On these printers, the build plate is in a fixed position, and they do not offer a manual leveling procedure.
| UltiMaker S3 |
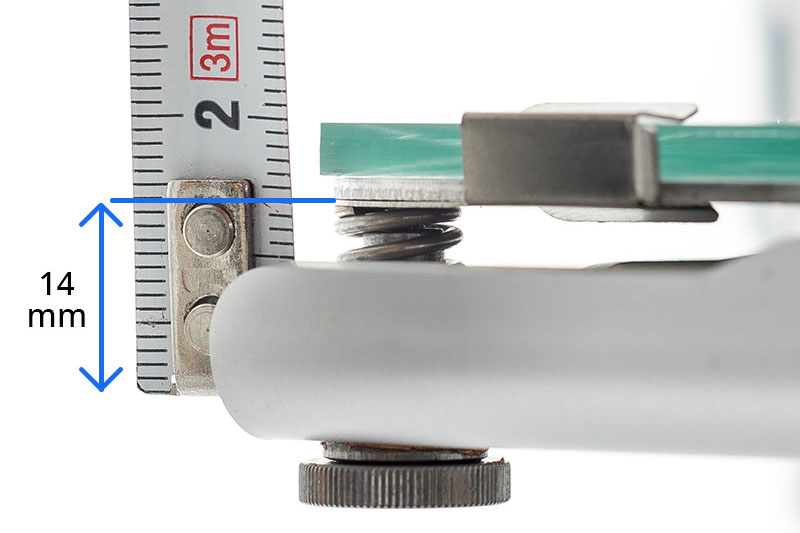
Use a spacer tool or a ruler. Adjust the three thumb wheels under the build plate until there is a distance of 14 mm between the bottom of the heated bed and the top of the base plate.
|
| UltiMaker S5 and S6 | Fully tighten all three of the thumb wheels until they cannot go any further. Push down on the build plate to make this easier, or use the rotation tool. After this, loosen all three thumb wheels two full turns (720°). |
After you have reset the position of the build plate, run through the manual leveling process once more.


