This article describes the various build plate adhesion settings in UltiMaker Cura. These settings are available when opening the Custom mode.
Although the section is always visible, the dual extrusion settings will only appear for dual extrusion printers. Also note that both extruders must be enabled in the Configuration panel to tune these settings.
Enable prime tower
A prime tower is an additional print that is created on the build plate to help prepare the nozzle before printing the next layer. It reduces oozing and under-extrusion and enhances overall printing quality. The prime tower has a few settings that can be adjusted.
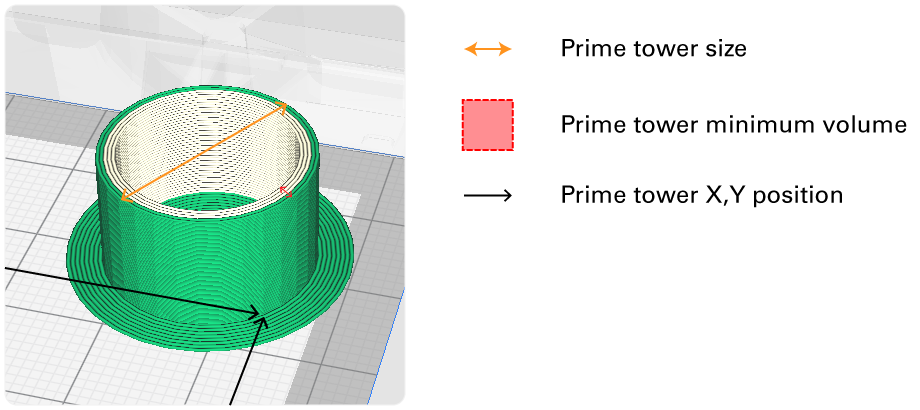
- Prime tower size. The size in the X/Y direction of the prime tower. A larger footprint creates a more stable prime tower.
- Prime tower minimum volume. This indicated the minimum volume of material in the prime tower. The volume must be enough for the nozzle to prime properly.
- Prime tower X/Y position. The position of the prime tower as seen from the origin point in UltiMaker Cura. On UltiMaker 3D printers, it is located near the switching bay by default to reduce printing time.
- Wipe inactive nozzle on prime tower. After printing the prime tower with the active nozzle, the inactive nozzle wipes itself off on the tower. This cleans the nozzle to reduce the chance of oozing on the printed model.
- Prime tower brim. With this setting enabled, a brim will be printed around the prime tower. This improves the adhesion to the build plate.
Tip: You can also adjust the Prime tower flow if the prime tower is enabled. This setting is found under the Material section. This is set to 100% by default.
The image below shows the behavior of some of the prime tower settings:
Enable ooze shield
The ooze shield is a separately printed, one-layer wide wall around the object, which catches ooze from incoming nozzles before each layer is printed. The ooze shield will print with each extruder, alternating every layer. The maximum height of the ooze shield is the last layer which includes an extruder switch.
It has two separate settings that can be controlled:
- Ooze shield angle. The maximum angle of the ooze shield. This is to prevent the shield from collapsing.
- Ooze shield distance. The distance between the ooze shield and the model. This is used to prevent the shield from merging with the model or making it too difficult to remove after printing.
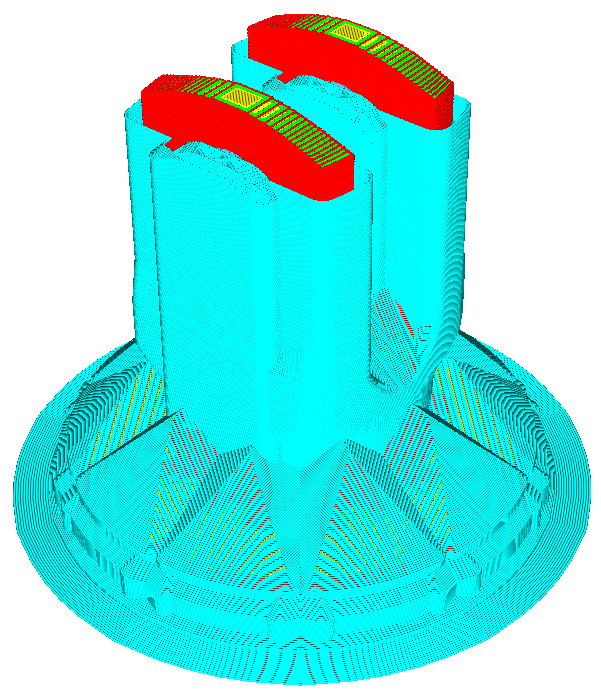
This model is printed with the ooze shield enabled. The ooze shield needs to be removed after the print finishes, revealing the underlying model.
Tip: The ooze shield is not normally recommended for the UltiMaker 3 or S series, due to the optimized dual extrusion settings. However, the use of an ooze shield may improve the printing results when printing with the experimental UltiMaker Original dual extrusion kit.
Nozzle switch retraction distance
This is the length of the retraction of the filament when the nozzle goes into standby mode. This value is higher than the normal retraction distance since the nozzle will be in standby mode for a longer period of time.
Nozzle switch retraction speed
This refers to the speed of the retraction when the nozzle switches to standby mode. A higher retraction speed results in a better print, but has a higher chance of causing filament grinding.
The settings for Retract and Prime speed can be set separately.
Nozzle switch extra prime amount
This setting will purge a little bit of extra material after an extruder switch. During standby, the nozzle may have oozed some material. Increasing this value will help restore the pressure inside the nozzle and prevent under-extrusion. However, a too-high value may cause blobs on the printed part.
This setting can be configured separately for each extruder, depending on the material and nozzle properties.
Tip: Continue learning about all UltiMaker Cura custom settings. The next section is Mesh fixes.


