This article describes the various build plate adhesion settings in UltiMaker Cura. These settings are available when opening the Custom mode.
The build plate adhesion settings ensure that the nozzle is primed properly before each print and can add helpers. This ensures that the print sticks well to the build plate and increases the success rate. These settings will affect the build volume and the maximum size of the printed object.
Caution: Disabling all adhesion settings can lead to print failure and potential damage to the printer.
Enable prime blob
With this setting enabled, the printer creates a small blob of material on the build plate before the print starts. This is done to prime the nozzle. starts with a blob of material, to prime the nozzle. Disable this setting to use the skirt or brim to prime the nozzle instead.
Note: This setting uses the M280 command, which is not implemented on all printers. The prime blob setting is not visible for all printers.
Build plate adhesion type
There are three types of build plate adhesion: Skirt, Brim, and Raft. You can also easily disable the adhesion types by selecting None.
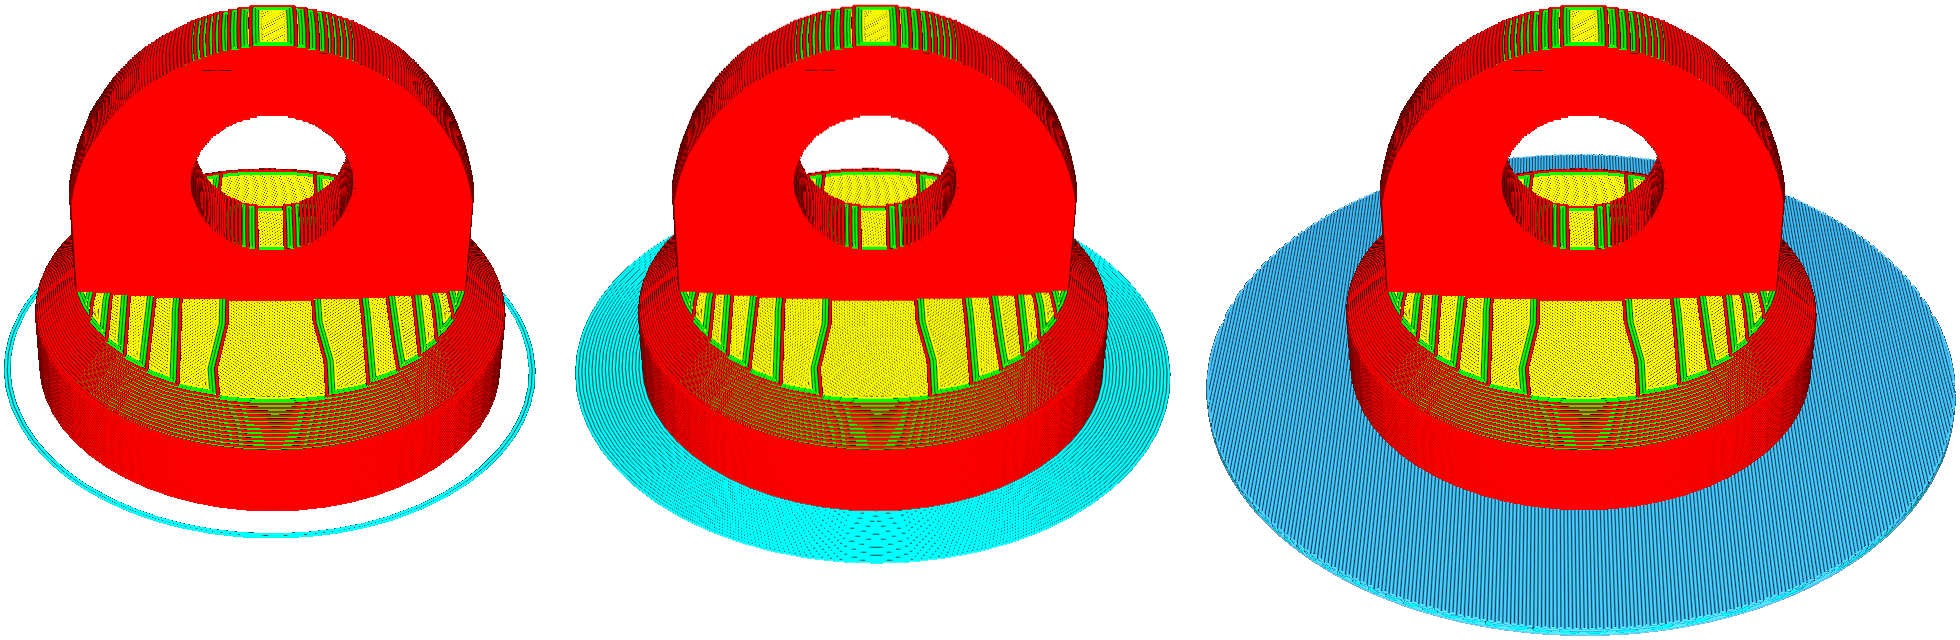 This model has the build plate adhesion types from left to right: skirt, brim, and raft. Learn more about the different types and related settings in the dropdowns below:
Tip: If the accordions do not expand when you click on them, please refresh the page.
Brim
The option Brim adds a single layer flat area around the base of the model to prevent warping. The brim is connected to the model and makes the bottom surface area bigger. This increases the adhesion to the build plate and, in case of warping, the corners of the model are less likely to curl up because of the brim attached to it.
Materials that have a high potential for shrinkage (e.g. ABS) can benefit from using a brim. Models that have a very big base or very thin parts at the bottom will also stick better to the build plate with a brim.
Tip: For dual-extrusion prints, the brim will be printed with the same material as the object it touches by default. Brims with different colors or materials will not overlap but join together. This setting can be overridden; see the section Build plate adhesion extruder below.
There are multiple options available for the brim setting:
- Brim minimum length. The length in millimeters here is the amount of filament that is extruded, regardless of the other brim settings.
- Brim width. This setting adjusts the width of the brim in millimeters.
- Brim line count. This setting overrides the brim width, setting the width by the number of printed lines.
- Brim distance. This setting can cause a gap between the model and the brim. This makes it easier to remove the brim from the model after printing, but also reduces the effectiveness of the brim for build plate adhesion.
- Brim only on outside. This setting ensures that models with holes on the initial layer, like a donut shape, only have a brim on the outside of the model.
- Brim inside avoid margin. A part fully enclosed in another part can generate an outer brim that touches the inside of the other part. This setting removes all brim within this distance from internal holes.
Skirt
A skirt is a line printed around the object on the first layer, but not connected to the object. This helps prime the extrusion nozzle and can be an additional check for bed leveling before the print begins.
Tip: For dual-extrusion prints, the skirt will be printed with both extruders. If only one extruder is used in the print job, only that extruder will print the skirt.
If you select a skirt, you can adjust the following parameters:
- Skirt line count. The number of skirt lines printed around the model.
- Skirt distance. The distance between the model and the skirt.
- Skirt minimum length. The total length of the skirt. This will override the skirt line count when the minimum length is not reached yet.
Raft
A raft adds a thick grid with a roof between the model and the build plate. This can be useful when the bottom surface of a model is not completely flat or has little adhesion to the build plate. A raft ensures that the model will stick better to the build plate.
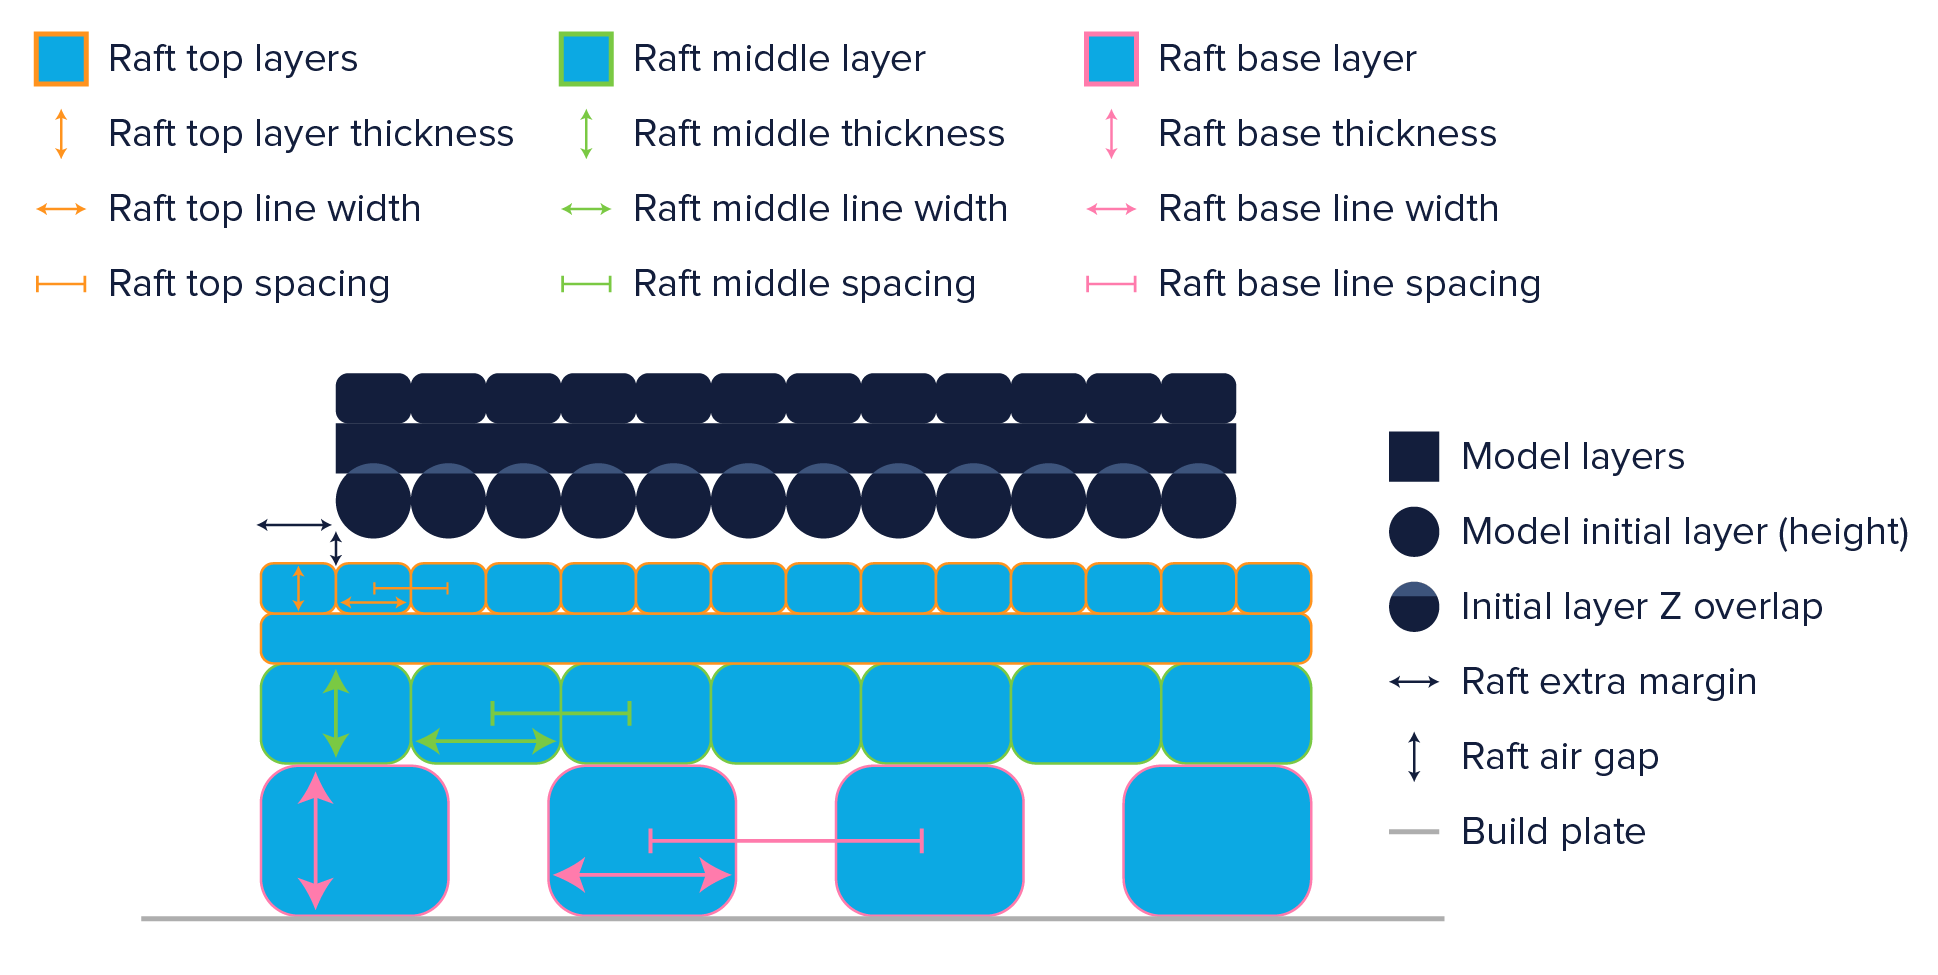
The raft options in UltiMaker Cura are extensive. The raft is divided into three parts: top layers, middle layers, and base layers. The image below explains the raft settings that are available. It is important to know:
- Initial Z overlap. This setting lowers all layers of the model, except the initial layer, to compress the initial layer against the raft.
- Raft base layer. This layer needs to be pressed right up against the build plate and therefore looks oversized.
A visualization of the raft settings in UltiMaker Cura:
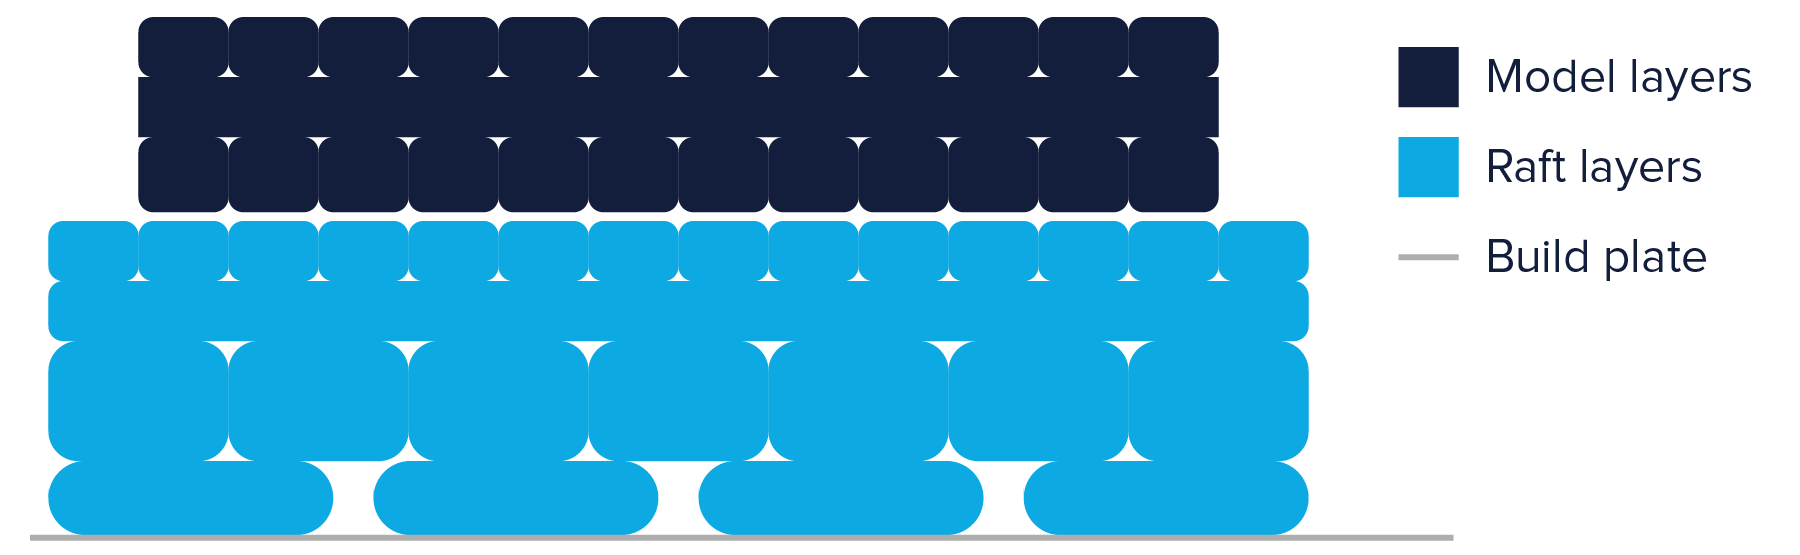
The final result when printing with the raft as visualized above will end up like in the image below.
Build plate adhesion extruder
This setting determines which extruder prints the selected build plate adhesion method. This setting is only available in dual extrusion machines. By default, the setting is Not overridden, meaning that Cura will automatically select the extruder based on the model(s) on the build plate and the adhesion type selected.
In the Custom mode, you can select a specific extruder for the adhesion type. Some additional options will appear:
- Skirt. It is important to know that for adhesion type Skirt, the extruder cannot be overridden. If both extruders are active in the print job, both extruders will always print a skirt.
- Brim. For dual extrusion prints, the brim will be printed with the same material as the object (or support structure) it touches by default. Override this setting to choose a specific extruder to print all the brims. For example, when using PVA as a support material, choosing this material for the brims will make them much easier to remove after printing.
- Raft. For rafts, you can select the extruder type for all parts of the raft, or select a specific extruder to print the base, middle, or top.
Tip: Continue learning about all UltiMaker Cura custom settings. The next section is Dual extrusion.


