Product notification
This product has been discontinued, and its end-of-service date has passed. While it is no longer supported, the information on this page remains available for your reference.
|
The hot end isolator connects the separate parts of the hot end. It is important that the hot end isolator is properly screwed onto the heater block to prevent any material from gathering between these parts. If material does gather between these parts, it can lead to print quality issues or blockages.
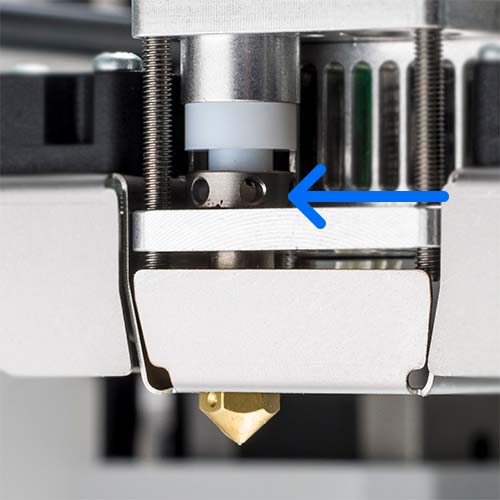 |
Where is the hot end isolator?
The hot end isolator in the print head is the metal part with holes. This part is between the aluminum plate and the TFM isolator coupler.
Maintenance
It is recommended to retighten the hot end isolator every three months to ensure the parts are connected securely.
|
Caution: This procedure requires heating up the nozzle. Be careful and do not touch the hot nozzle with your bare hands. Protective (thermal) gloves are advised.
Instructions
|
1. Retract material
|
Start by retracting the material. For this, the nozzle must be heated up. You can use the Change material process, or navigate to Maintenance → Advanced → Move material and use the button to move the material backward until the tip is visible in the Bowden tube above the print head.
|
|
2. Heat up the nozzle
|
Next, navigate to Maintenance → Advanced → Heat up nozzle and turn the controller button to set the target temperature to 150 °C.
|
|
3. Tighten the isolator
|
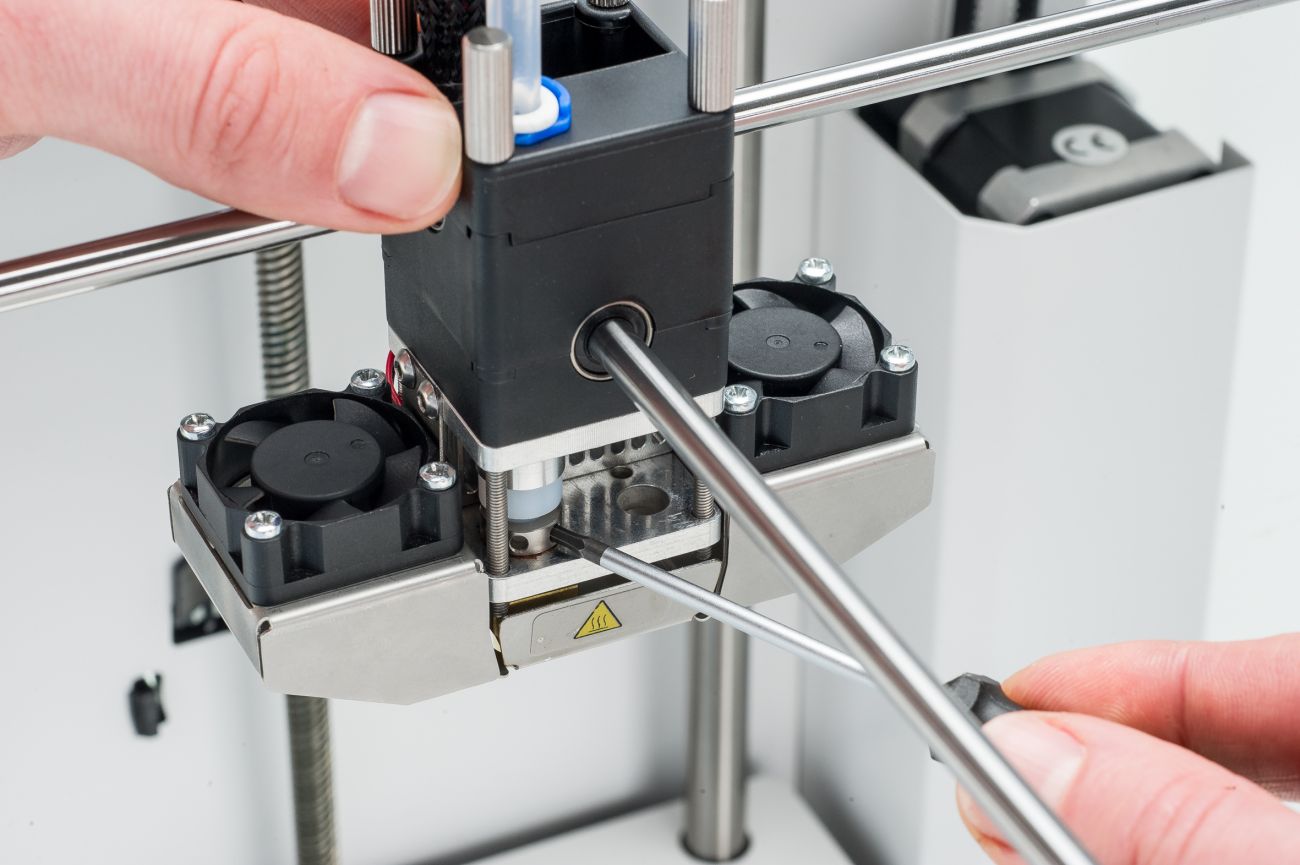
Insert the 2 mm hex screwdriver into one of the holes of the hot end isolator. Turn the screwdriver clockwise to fully tighten the hot end isolator.
|
|
4. Reload material
|
Reload the material via Maintenance → Advanced → Insert material if the spool was completely unloaded. If you only retracted the filament, forward it into the print head again using the Move material option.
|
Replacing components
If the hot end of your printer shows signs of leakage, or the hot end isolator is damaged in another way, this part (or the complete hot end) may need to be replaced. Please consult the repair manuals on this page.
Note: Although the UltiMaker 2+ is discontinued and the availability of spare parts is not guaranteed, a similar hot end is used on the UltiMaker 2+ Connect (part number 80-130498). This is also compatible with the UltiMaker 2+.


