Product notification
This product has been discontinued and the end-of-service date has passed. The information on this page remains available, but is no longer supported.
|
Before you can start printing on the Ultimaker 2 or Ultimaker 2 Extended, you need to load material into the printer. For the first use, it is recommended to use the spool of PLA that comes with the printer.
The Ultimaker 2 will guide you through the process of loading material.
Tip: Loading material is part of the welcome setup, but you can also find this option in the menu by navigating to Materials → Change or Maintenance → Advanced → Insert material.
Place the spool
Remove the packaging from the spool of material. Cut off the end of the filament that is hooked onto the spool. Ensure a nice sharp tip for easy loading.
Place the spool on the spool holder at the back of the printer. Ensure that the filament is coiled towards the bottom of the feeder. On the Ultimaker 2 and Ultimaker 2 Extended, this means the filament must be in a counterclockwise direction.
It is recommended to straighten the end of the filament, so it can easily enter the feeder.
Wait a moment for the nozzle to heat up.
Caution: Make sure not to touch the nozzle during this procedure as it will become hot.
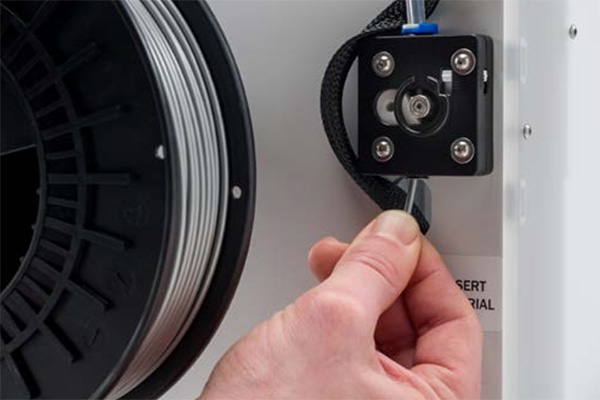
Insert filament
The feeder will start turning slowly. Insert the end of the filament into the bottom of the feeder. Apply pressure until you feel that the feeder grips the material. The filament will now automatically slowly move upwards.
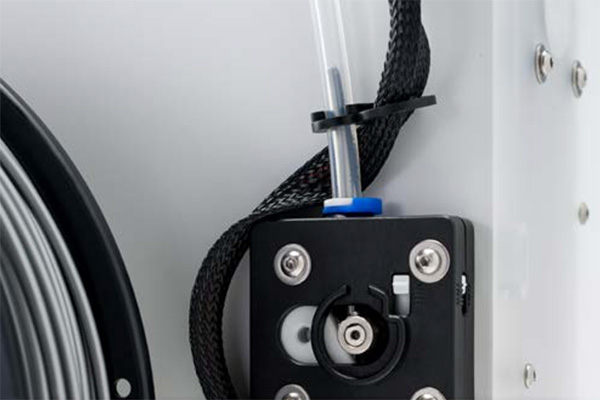
As soon as the filament is visible in the Bowden tube above the feeder, confirm this using the button.
Note: Do not wait too long with pressing the controller button. After this, the printer will automatically forward the filament to the print head. If the material is too far into the Bowden tube, the material will jam in the hot end and the feeder will grind into the filament.
Extrude material
The filament will now fast forward through the Bowden tube to the print head. When it almost reaches the nozzle, the feeder will turn slowly again.
Wait for material to extrude from the nozzle.
Note: The color of the material that starts extruding could be different from the color of the material that you just loaded. There can be some residue from the factory test print left in the nozzle. Wait until you see the color of the filament that you loaded coming out of the nozzle.
Confirm when the material is flowing consistently from the nozzle. Remove the strand of filament from the printer.
The material is now loaded and you can start printing with the Ultimaker 2 (Extended).
The Ultimaker Extrusion Upgrade Kit for the Ultimaker 2 and Ultimaker 2 Extended contains an improved geared feeder for more reliable material feeding and swappable nozzles for greater flexibility. Consider upgrading your Ultimaker 2 to an Ultimaker 2+. Contact your local reseller, or see this page for more information: The Extrusion Upgrade Kit for the Ultimaker 2


