Product notification
This product has been discontinued, and its end-of-service date has passed. While it is no longer supported, the information on this page remains available for your reference.
|
This error can appear on the UltiMaker 3 or 3 Extended and refers to a problem with the print core temperature. This error indicates that the printer has registered a too high temperature in one of the print cores. This can mean that there is a problem in the print core, but this error is usually caused by an interrupted connection. The error on the display will indicate with which print core a problem was detected.
Removing print cores
When the print core is in an 'active' state (hot, heating up, or cooling down), it should never be removed from the print head. In an active state, the printer is actively monitoring the print core's temperature. The max temp error will appear if the connection is interrupted.
It is recommended to always follow the print core replacement procedure via the UltiMaker 3 menu. The print cores can also be removed and replaced manually, but only when the print core is in an 'idle' state or when the printer is powered off.
Tip: For more information about the print cores' statuses, please visit this page: What do the different light colors mean on print cores?
Inserting print cores
Note that the UltiMaker 3 always requires two print cores to be installed in the print head, even for single-extrusion prints. This is important during active leveling and to close the control loop.
When inserting a print core, ensure it is installed correctly. Squeeze the black lever upward so you can easily slide it into the print head. When it is inserted into the print head, you should hear an audible 'click'. If you do not hear this, gently push the print core until it securely clicks into place.
Clean the connections
If the error continues to appear even when the print core is installed securely in the print head, the contact points may need to be cleaned. Dust or grease on the print core or PCB may be interrupting the connection.
Note: Never touch the contact points at the back of the print core with your bare hands, as oils and grease can affect the connection.
Remove the print core from the print head. Carefully clean the contact points at the back of the print core with a cotton swab and some (isopropyl) alcohol.
Also check the pins of the PCB inside the print head. You can also clean these with a cotton swab and some (isopropyl) alcohol. Ensure to only gently brush upwards, to prevent the risk of bending the pins. Turn off the printer before cleaning the print head PCB pins.
Caution: Isopropyl alcohol (CAS nr. 67-63-0) is a hazardous, highly flammable substance. Keep away from heat, sparks, static discharge, and other potential ignition sources. Ensure good ventilation and avoid inhaling the vapor. Read the SDS from your IPA supplier to learn more about the risks and safety precautions or find more information here: Isopropyl alcohol (IPA) safety.
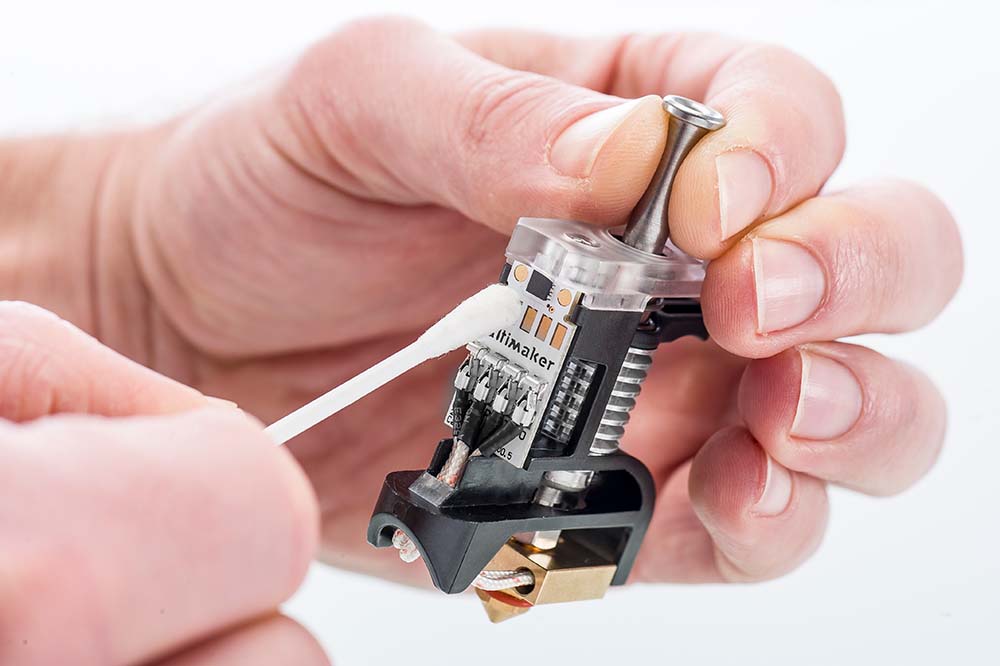 | 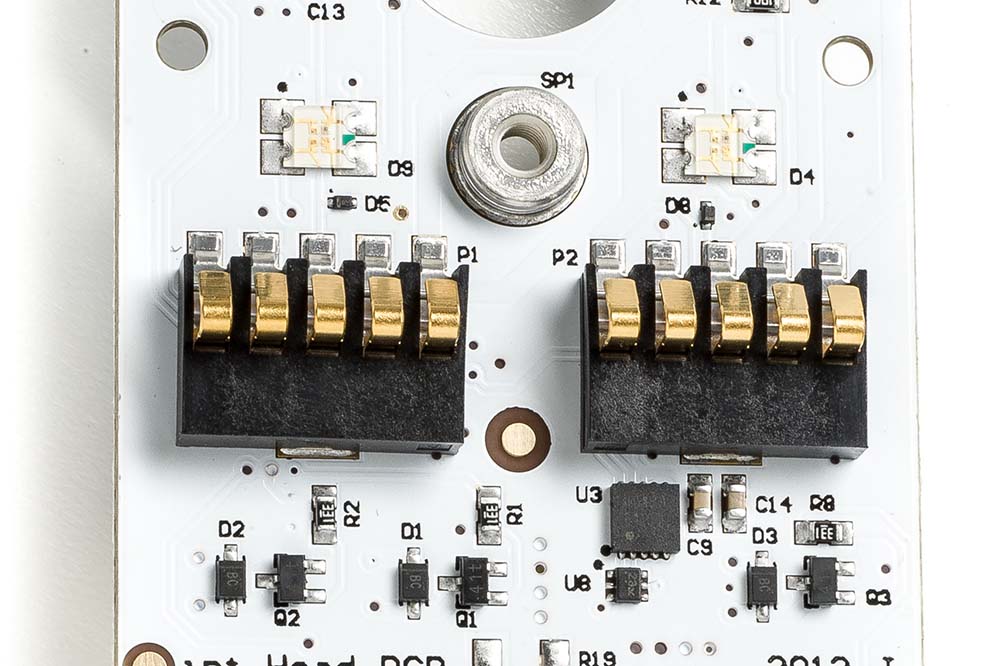 |
|
Clean the print core contacts
|
The UltiMaker 3 print head PCB pins
|
Check the print cores
If the tips above have not helped to resolve the error, there could be a problem with the heater and/or sensor of the print core. If these are damaged or disconnected, the printer will show the max temp error as a safety measure and prevent the print core from heating up.
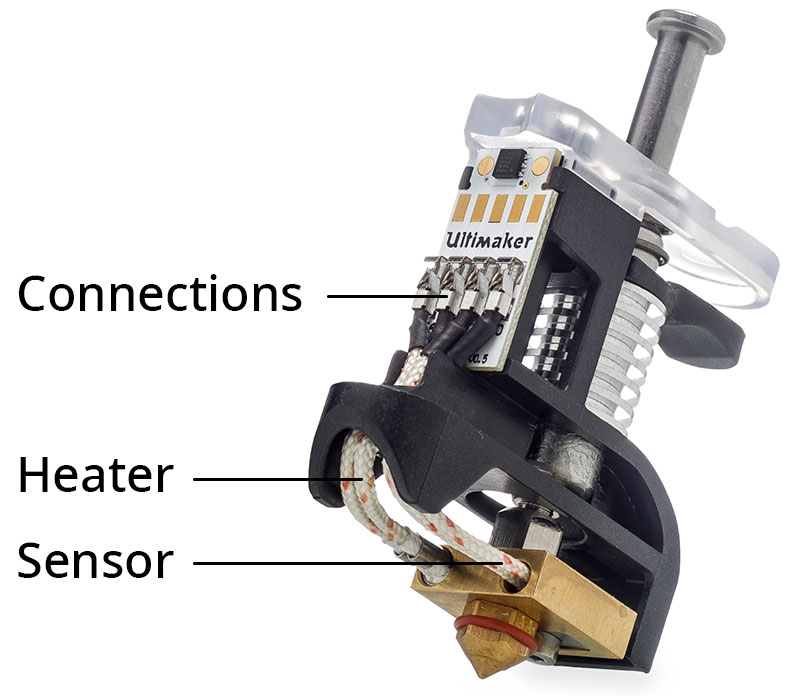 |
At the back of the print core, closely inspect the heater and sensor wires. The temperature sensor is inserted into the smaller hole on the right (as seen from the back), and the heater is the one on the left (as seen from the back) with the metal sleeve.
- Ensure that both the heater and sensor are still fully inserted into the print core heater block.
- Check that none of the wires look frayed or display any signs of damage.
- Also, check that all four of the wires are still correctly connected to the print core PCB at the back.
|
If you see any signs of damage to the print core, its wires, or the connections, replace the print core.


