UltiMaker printers network configuration, USB network setup & static IP
Like typical devices capable of connecting to a network, UltiMaker printers support the most common network configurations. By default, the printers will be assigned a DHCP address. To connect a printer to the network, you can either use the on-screen network connection flow or use a USB network flow*. The USB network setup also supports advanced networking configurations, such as assigning static IP or connecting to enterprise networks.
* Note: This guide only applies to UltiMaker S series printers and Factor 4.
This method is not supported on the UltiMaker 3, UltiMaker 2+ Connect, Method series, or Sketch series.
In this article
- DHCP network
- Enterprise capabilities and network certificates (i.e for use with Eduroam)
- How to: Network setup via USB, including static IP
Tip: For more information about networking, check this related article: UltiMaker Platform network requirements.
DHCP network
The most common type of network configuration is to be assigned a dynamic IP via your network router. The assignment is done automatically upon connecting to your network via SSID and password. Most simple networks, and home networks, will follow this route. The IP address assigned to the printer is random, and can change between reboots.
When you connect to a network via the printer's display, the printer will assume the default DHCP configuration. It is not possible to configure advanced settings via the menu on the display.
You can also use the USB network setup to configure the SSID and the password of a wireless network that a printer should connect to.
Tip: When configuring multiple printers to connect to the same network, it is recommended to use the USB network setup.
Enterprise capabilities and network certificates
UltiMaker S series printers and Factor 4 support 802.1x certificates and WPA2 Enterprise. These models* have the capability to change the network configuration file using a USB stick. We use ultimaker_network.config file for this.
* Note: This was implemented for S series printers since firmware version 6.1.
The ultimaker_network.config configuration file is a standard ConnMan service provisioning file. This allows you to configure secured wireless points that need authentication.
Depending on the services you need, you can modify the configuration as long as it's supported in ConnMann.
This introduces a new way to connect to a Wi-Fi, or local network, including the option to assign static IP addresses. The following section explains how to create a configuration file and import it to the printer from a USB drive.
Tip: You can download this template file and modify it with your settings.
The configuration file is a plain text file that must be named ultimaker_network.config. The file can be used for multiple services at once, both Wi-Fi and Ethernet. You can use any plain text editing program to configure the file.
Network setup via USB, including static IP
Tip: Get a head start with your network config file by downloading this template file. Simply uncomment the relevant lines (remove the '#' symbol), and add your own network details to the file.
Caution: Sometimes, your system may add a .txt extension to the file when downloading or modifying the file. Make sure that the file does not have this extension and ends with the extension '.config'.
To import the network settings via USB:
- Download the configuration file and fill in your network details.
- Save the file as ultimaker_network.config file to the root folder of your USB drive.
- Insert the USB drive into your UltiMaker 3D printer.
- In the network menu, select Setup network via USB. Click the import button. The network overview should display your configuration within 30 seconds. In case you are setting a static IP and it is not assigned yet, try to re-enable the connection manually.
Important: Make sure you are disconnected from Wi-Fi or Ethernet when importing the settings.
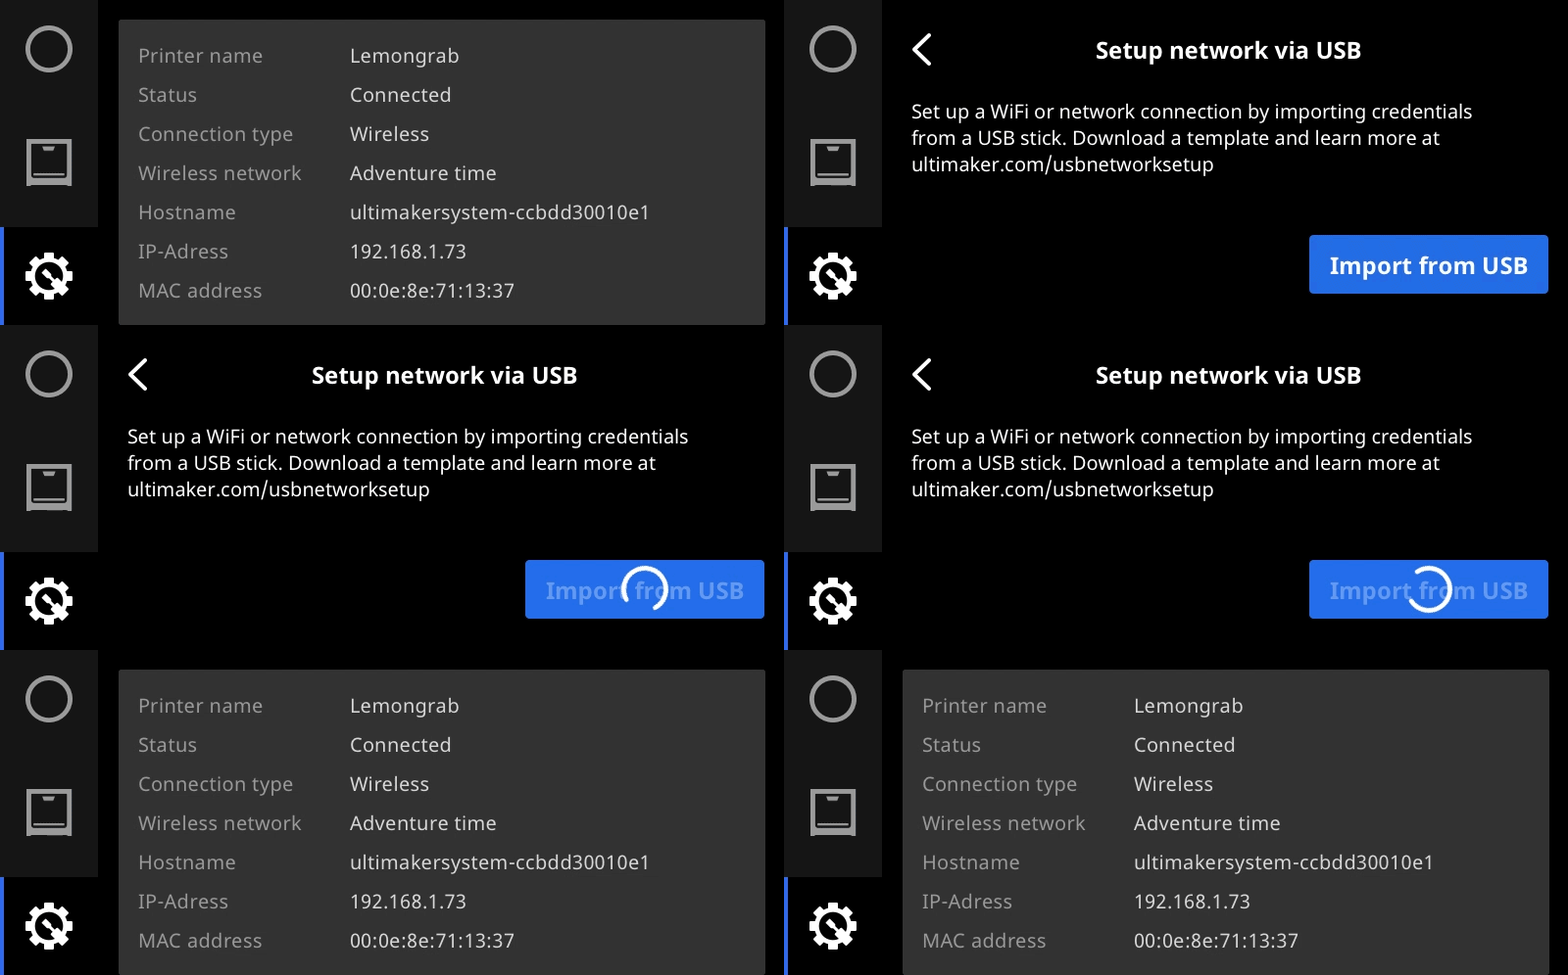
Insert a USB drive containing the ultimaker_network.config file and "Setup network from USB".
Example
The examples below show the configuration to connect to the Wi-Fi network "myWifiNetwork". The password is entered as "Passphrase". We will look at both the minimal requirements for Wi-Fi setup, and setting up static IP for Wi-Fi and Ethernet.
#Setting up Wi-Fi, minimal requirements with DHCP
[service_wifi]
Type = wifi
Name = myWifiNetwork
Passphrase = p&ssw3rd

#Connect to a WPA2 Enterprise Wi-Fi
[service_wifi]
Type = wifi
Name = *SSID name*
Identity = *username*
Passphrase = *password*
EAP = peap
Phase2 = MSCHAPV2

#Setting up Static IP for Wi-Fi
[service_wifi]
Type = wifi
Name = myWifiNetwork
Passphrase = p&ssw3rd
IPv4 = 192.168.1.42/255.255.255.0/192.168.1.255
IPv6 = off
Nameservers = 8.8.8.8, 8.8.4.4

#Setting up static IP on Ethernet / LAN cable
[service_ethernet]
Type = ethernet
IPv4 = 192.168.1.42/255.255.255.0/192.168.1.255
IPv6 = off
Nameservers = 8.8.8.8, 8.8.4.4

#Setting up your printer name
[ultimaker]
MachineName = NameYourMachine
CountryCode = 00
Tip: The 'CountryCode' (listed as '00' above) is a unique, two-letter combination for every country. If you don't know your ISO country code, please refer to the following Wikipedia page: ISO 3166-1 alpha-2
Note: It is important that the CountryCode is set correctly, otherwise the Wi-Fi may not work to its full potential. If the wrong country code is set, the printer could be non-compliant.
For more details on the configuration file, please refer to the following article: https://manpages.debian.org/testing/connman/connman-service.config.5.en.html
Setting up static IP via the MAC address
It is possible to set up a static IP address routing with a network configuration change assigning a fixed IP address to the MAC address of the printer. This is a standard network functionality of a router. For more information please refer to your router's manual.
Read this guide to learn more about the MAC address of your printer.


