Before you can start printing on the Ultimaker Original or Original+, you need to load material into the printer. For the first use, it is recommended to use the spool of PLA that came with the kit.
Instructions
To correctly load a material spool for the Ultimaker Original or Original+, take the following steps:
|
Place the spool on the spool holder
|
Cut off the end of the filament of the new spool and ensure a nice, sharp tip. Place the spool on the spool holder at the back of the printer with the material in a clockwise direction.
|
|---|
|
Preheat the nozzle
|
On the UltiController, navigate to Prepare → Preheat → PLA. This heats up the nozzle to the correct temperature. Wait a moment for the nozzle to warm up.
|
|---|
|
Open the feeder
|
Turn the small feeder lever up into a vertical position and slide it upwards. This relieves the pressure from the feeder. You can now open the black part of the feeder.
|
|---|
|
Insert the filament
|
Guide the filament into the feeder, past the knurled wheel, and into the Bowden tube. Push the material all the way through until it reaches the print head.
|
|---|
|
Close the feeder
|
Rotate the black part of the feeder upwards again. Push it against the wood and push the feeder lever down. Turn this horizontal again to secure the feeder and put tension on it.
|
|---|
|
Extrude material
|
Manually turn the extruder gear at the side of the feeder to move the material. Turn it until material extrudes from the nozzle.
|
|---|
The filament is now currently loaded on the Ultimaker Original(+), and you can start printing.
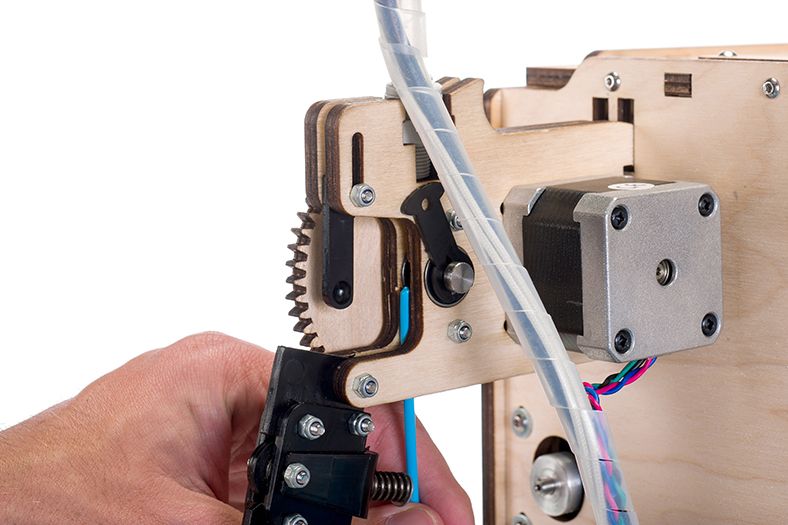 | 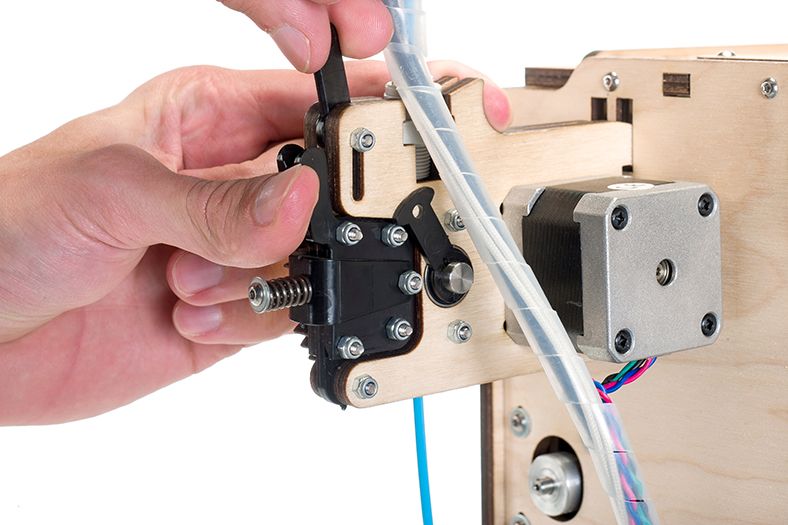 | 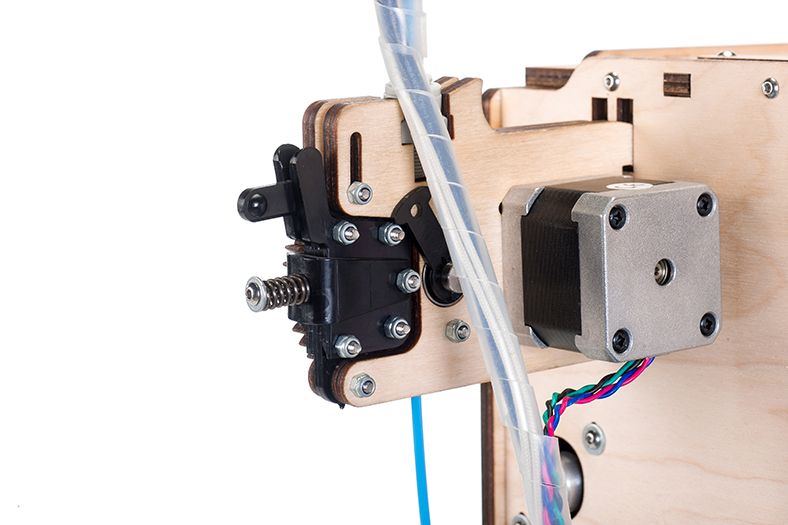 |
| Guide filament into the feeder | Adjusting the feeder lever | Filament loaded |


