This article describes the various build quality settings in UltiMaker Cura. These settings are available when opening the Custom mode.
The settings in the Quality category control the layer heights and line widths. In other words, the level of detail for the print. These settings are strongly linked to the nozzle size and influence many other settings.
Layer Height
The layer height is one of the most frequently changed settings. It is the thickness of one printed layer in millimeters. Usually, thinner layers increase visual quality, give a smoother surface, and allow more detail. On the other hand, thicker layers decrease the print time substantially. Thicker layers may also give better-quality overhangs.
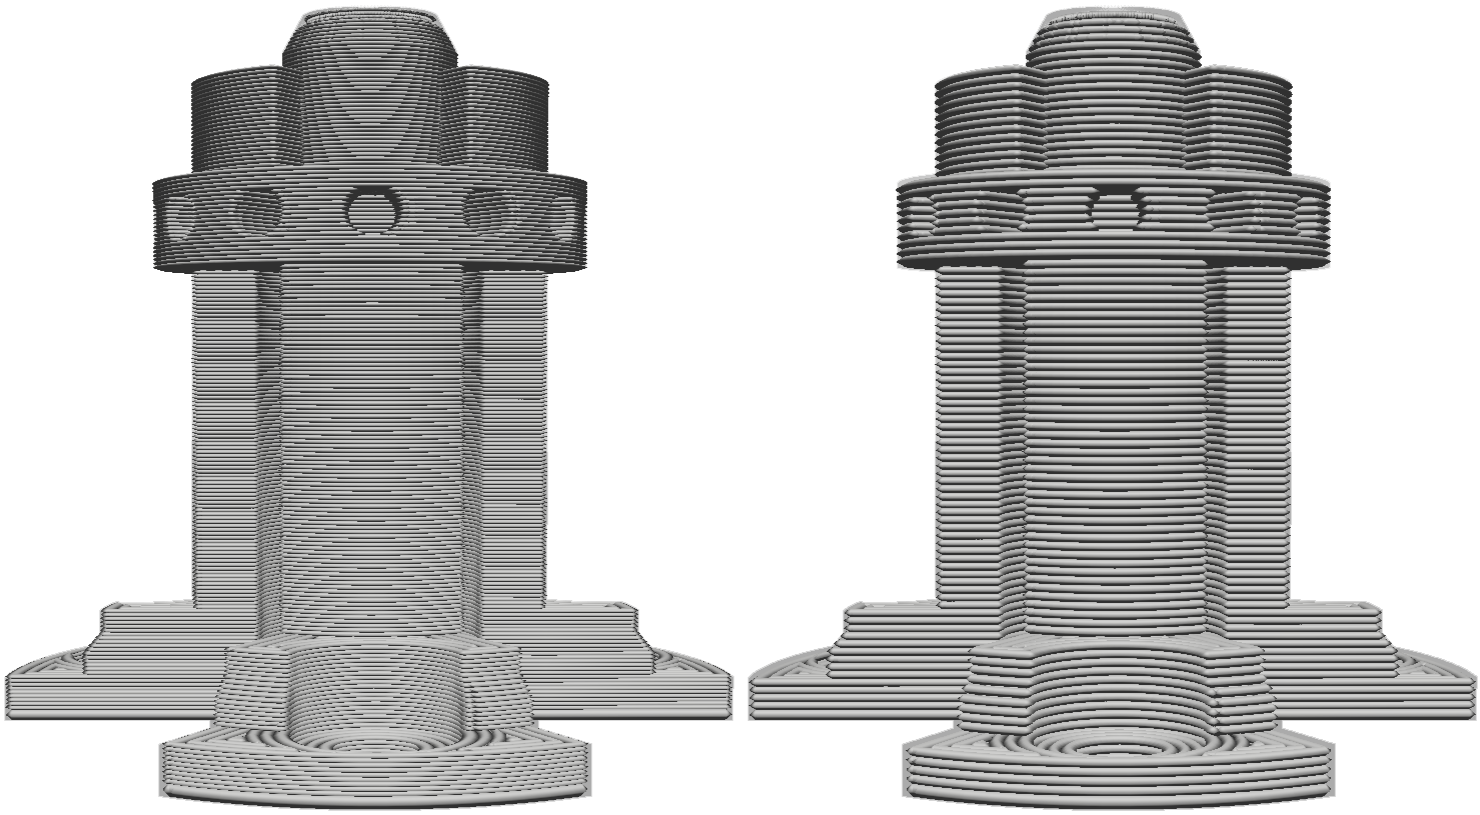
The model on the left has a smaller layer height than the model on the right.
The profiles in the Recommended mode are based on a resolution, or layer height. The number of available profiles depends on the configuration, meaning the printer, nozzle size, and material(s).
Note: On dual extrusion printers, the layer height setting is always linked between extruders. It is not possible to choose a different layer height per extruder. This may reduce the number of available profiles when using different nozzle sizes.
In the Custom mode, you can manually set the layer height to any value. As a general rule of thumb, it is recommended to keep the layer height between 25% and 75% of the nozzle size.
Tip: When you want to change the layer height from the default value, it is recommended to choose a base profile close to your desired layer height. Many settings in the preset profiles are optimized for particular layer heights. This includes print speed and nozzle temperatures. When drastically changing the layer height without updating other flow-related settings, you might experience extrusion problems.
Initial Layer Height
This setting defines the height of the first layer of your print. The initial layer height is usually thicker than the layer height to create a stronger adhesion with the build plate. When the model has a lot of detail on the first layer, it might have a decreased quality because of the thicker layer. This limitation can be compensated for with the Initial Layer Horizontal Expansion setting, which is found in the Walls category.
Line Width
The line width defines the width of a single printed line, which should be close to the nozzle size. Based on the line width, the extrusion rate is adjusted, which means that it will automatically calculate how much material must be extruded.
- Example 1: Decrease the line width slightly of the outer wall to allow sharper detail on the model.
- Example 2: An increased line width of the infill allows the infill to print slightly faster.
Tip: The line width is generally equal to the nozzle size. When customizing this value, it is advised to keep the line width between 75% and 125% of the nozzle size. Below 60% or above 150% is not advised as this may cause extrusion problems.

Above, you see the exact same model with line widths of 0.25, 0.4, and 0.8 nozzles.
The line width can be set individually for all line types available:
- Wall Line Width: The width of a single wall line. The line width of the inner and outer walls can be adjusted separately.
- Top/Bottom Line Width: The line width with which the top and bottom layers are printed.
- Infill Line Width: The line width of all infill material.
- Skirt/Brim Line Width: The width of the skirt or brim lines.
- Support Line Width: The line width of support structures.
- Support Interface Line Width: The width of a single support interface line. The line widths for the support interface roof and floor can be adjusted separately.
- Prime Tower Line Width: The width of a single prime tower line.
- Initial Layer Line Width: The width of lines on the initial layer.
There are additional line width settings in other Cura sections. These may only be visible depending on other settings being enabled:
- Walls – Minimum Wall Line Width: For thin pieces, Cura will adjust the wall line widths to be able to print the contours of the model. The walls will not be thinner than this value.
- Top/Bottom – Top Surface Skin Line width: This setting is only available when the number of Top Surface Skin Layers is set to 1 or more. Choosing a smaller line width for the top surface skin layer can create a smoother surface without sacrificing print time too much.
- Build Plate Adhesion – Raft Line Width: These settings are only available when the Build Plate Adhesion Type is set to Raft. The line widths for the raft top, middle, and base can be adjusted separately. The lines at the base of the raft are generally wider to improve adhesion.
Tip: Continue learning about all UltiMaker Cura custom settings. The next section is Walls.