Tip: This exporting method is introduced in UltiMaker Cura 5.7.
If you are missing this option please upgrade to a more recent version of UltiMaker Cura.
Why A Universal Cura Project?
We recommend using Universal Cura Projects when you plan to distribute your model with others who might have a different 3D printer than you have.
- An STL file contains only the model itself and no additional information to help you how to best print the model.
- A project file contains all the printer, model, and material-specific settings but can only be loaded on the exact printer it was created on.
- A Universal Cura Project lives somewhere in between.
A Universal Cura Project (UCP) can be loaded on all 3D printers available inside of UltiMaker Cura and it will only contain model-specific settings and modifier meshes that the creator of the file selected to ensure a successful print job for people with less experience.
How to save a Universal Cura Project
When you find the right orientation, and print settings for your model and you are ready to distribute your model, go to
File,
Save Universal Cura Project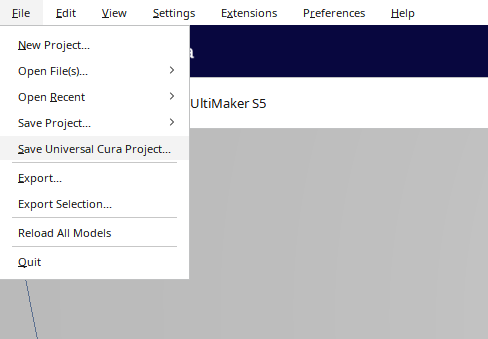
In the next screen the changed settings are displayed.
Settings with a checkbox will be included in the Universal Cura Project and loaded when someone else opens the file on their 3D printer.
Settings that are not considered model specific will automatically be unchecked.
They can still be included by checking the box, but might not contribute to a successful print job so we advise against including them in the Universal Cura Project.
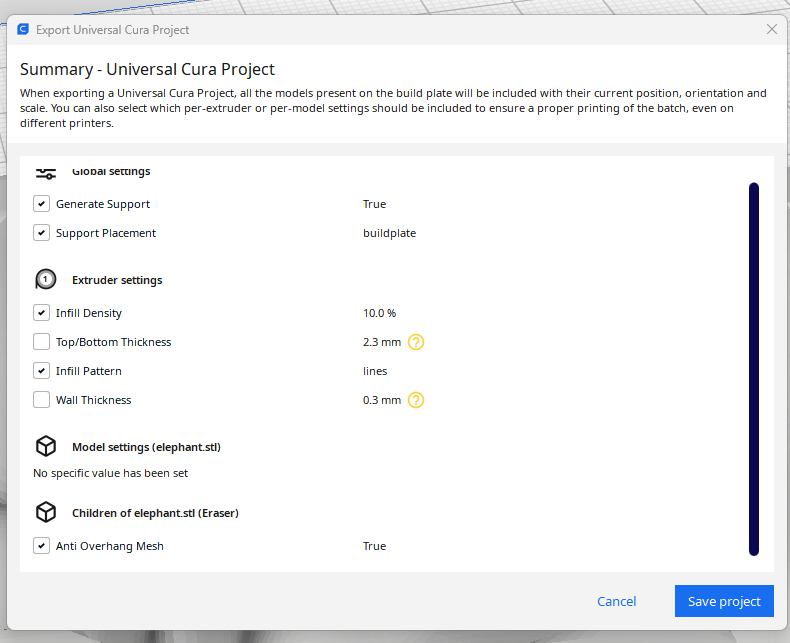
When selecting Save Project Cura will create a .3mf file on your computer in the folder that you specify.
How to open a Universal Cura Project
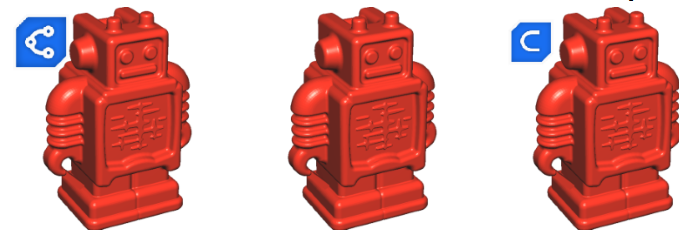
A Universal Cura Project has the file extension .3mf. On Windows, they can be distinguished from regular .3mf files by their preview.
- A UCP, only model settings, will have a UCP logo in the top left corner
- A 3D object, no settings will have a plain preview
- A Cura Project File, printer, and material settings, will have a Cura logo in the top left corner
When selecting a Universal Cura Project, you can choose to import models or to open it as a Universal Cura Project.
By selecting Open as UCP you can see the settings that the creator included to help with slicing.
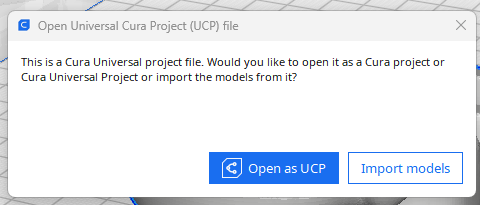
In the Open Universal Cura Project screen, the included settings and original configuration are displayed.
In the top right corner you can select the printer on which you want to open the model.
This will overwrite the settings on the printer and remove any models already loaded on the buildplate.
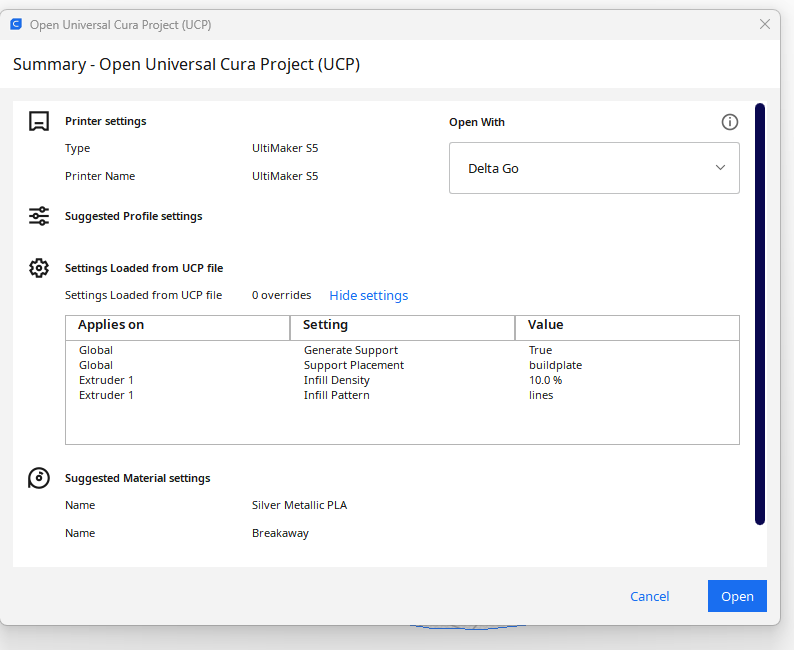
Which settings are included?
A Universal Cura Project will only include meshes and settings that are relevant to the type of model that is being printed.
There are about 40 settings that are considered model-specific, they are listed below.
Walls
This category contains settings that define the walls of the model.
Incorrect wall settings can result in fragile print jobs or a bad fit.Included settings in this category are:
Print Thin Walls, Z Seam Position, Horizontal Expansion, and Outer Before Inner Wall
Top/Bottom
This category contains settings that define the top and the bottom of the model.
Incorrect top/bottom settings can result in low-quality top or bottom surfaces.Included settings in this category are:
Enable Ironing, Monotonic Top/Bottom Order, Iron Only Highest Layer, Bottom Skin Removal Width, Top Skin Removal Width.
Infill
This category contains settings that define how the space inside the model is filled.
Incorrect infill settings can result in print jobs with holes in top surfaces or fragile print jobs.Included settings in this category are:
Infill Density, Infill Pattern, Infill Before Walls, Minimum Infill Area, Skin Edge Support Thickness
Support
This category contains settings that define how overhangs, marked in red, are supported.
Incorrectly supported models often result in failed prints.Included settings in this category are:
Generate Support, Support Placement, Support Structure, Support Overhang Angle, Support Density, Support Horizontal Expansion, Rest Preference
Build Plate Adhesion
This category contains settings that define how your model sticks to the buildplate.
Incorrect build plate adhesion settings will result in print jobs warping or releasing from the build plate.Included settings in this category are:
Build Plate Adhesion Type, Brim Distance, Brim Only on Outside, Smart Brim
Dual Extrusion
This category contains settings that help with printers that print with multiple nozzles.
Incorrect settings can result in bleeding and blending colors.Included settings in this category are:
Enable Ooze Shield
Mesh Fixes
This category contains settings that make limited alterations to the loaded meshes.
Incorrect mesh fix settings will result in models that do not look as intended.Included settings in this category are:
Remove Mesh Intersection, Remove All Holes, Alternate Mesh Removal
Special modes
This category contains settings that will print the meshes in a different way and ignore most other defined settings.
Incorrect special modes will result in models that do not look as intended.Included settings in this category are:
Spiralize Outer Contour (Vasemode), Surface Mode
Experimental
This category contains a collection of settings that each bring different values but are still considered experimental, so they need to be used with caution.
Incorrect experimental mode settings can result in failed print jobs.Included settings in this category are:
Enable Coasting, Use Adaptive Layers, Slicing Tolerance, Fuzzy Skin Outside Only, Make Overhang Printable, Small Hole Max Size, Small Feature Max Length, Enable Draft Shield, Generate Interlocking Structure


